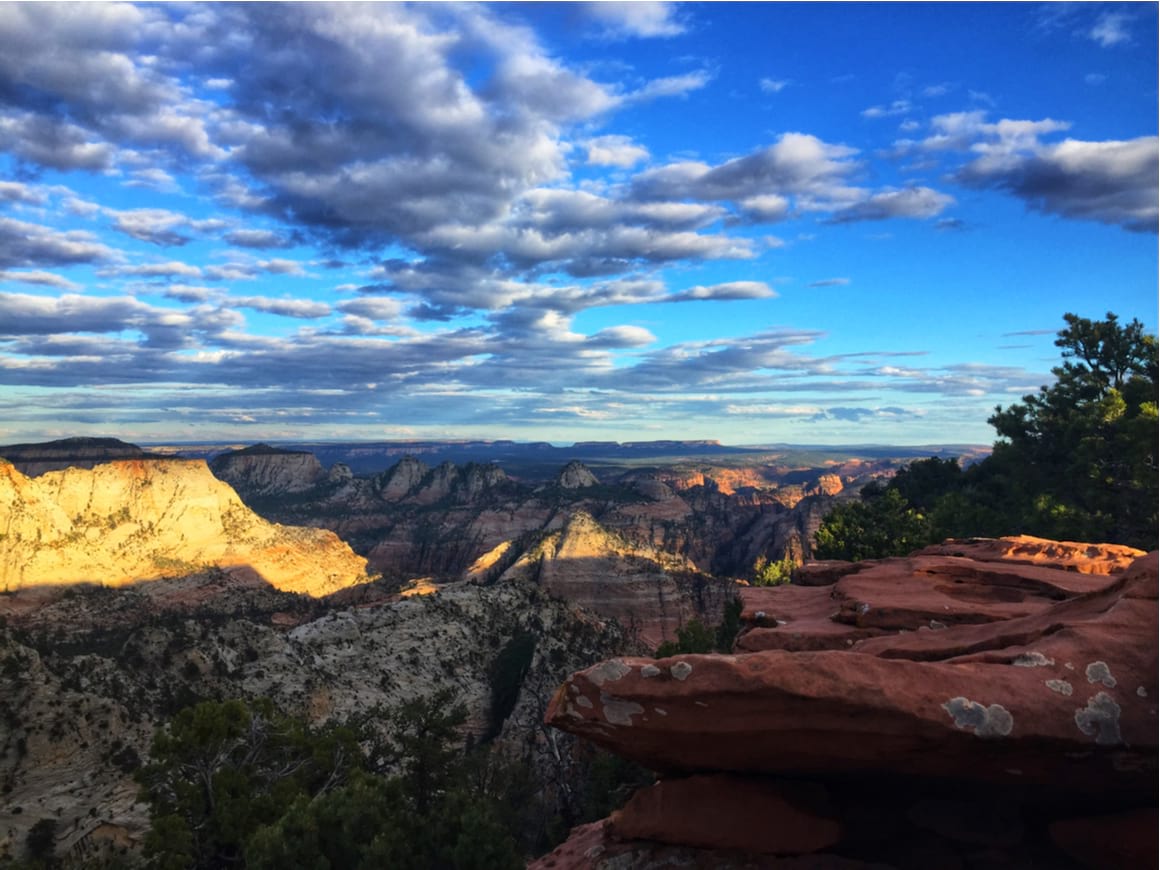
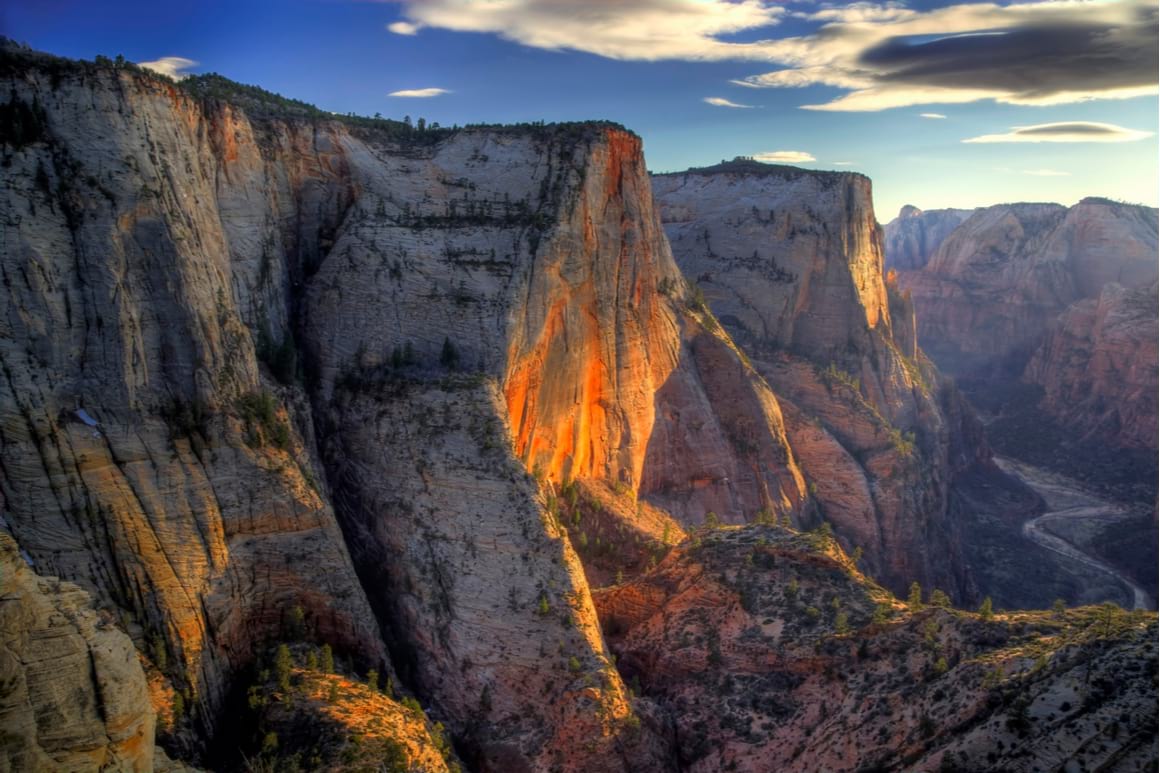
Zion National Park is an absolute marvel of a place. The sheer scale of its canyons, the adventurous intricacies of the rock formations, and its lush rocky landscape make for one hell of a combo.
Believe us, this park is primed for hiking. Not only are its trails a diverse mix of difficulty levels (sometimes downright dangerous), but the views you’ll get are a big bonus too.
And while looking up at all the crazy jutting canyons and rock formations is awesome, getting a view from above is on a whole ‘nother level.
If all this sounds as incredible to you as it does to us, you probably have a few questions already: Where do I start? Which hikes are good? Is it safe to hike here?
Worry not, my friend. That’s precisely why we’ve created this epic guide to hiking in Zion, packed full of all the information you’ll need to navigate this gnarly park. Ready when you’re ready!
The Broke Backpacker is supported by you. Clicking through our links may earn us a small affiliate commission, and that's what allows us to keep producing free content 🙂 Learn more.
Situated in southwest Utah, Zion National Park is 229 square miles of gargantuan desert beauty — a must on any backpacking trip in the USA.
And there is simply no better way than hiking to really get to grips with this natural oasis. The trails here tend to be well-signposted, and when they’re not, our lovely hiker friends have done their good deed and helped mark the more off-the-beaten routes with rock piles. Cheers for that!
Roads may cut through the national park, but hiking is the only way you’re going to get to see what everyone comes here for — the mad views. And there are some crazy viewpoints in Zion for the adventurous hikers.
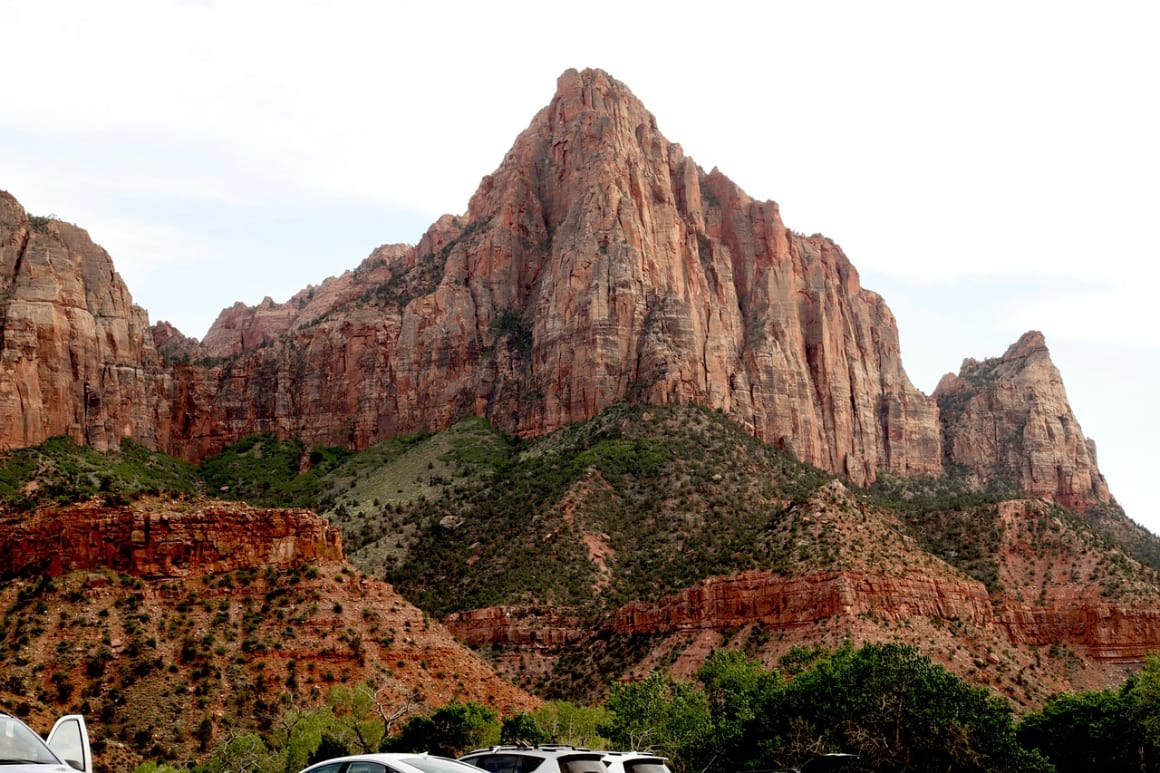
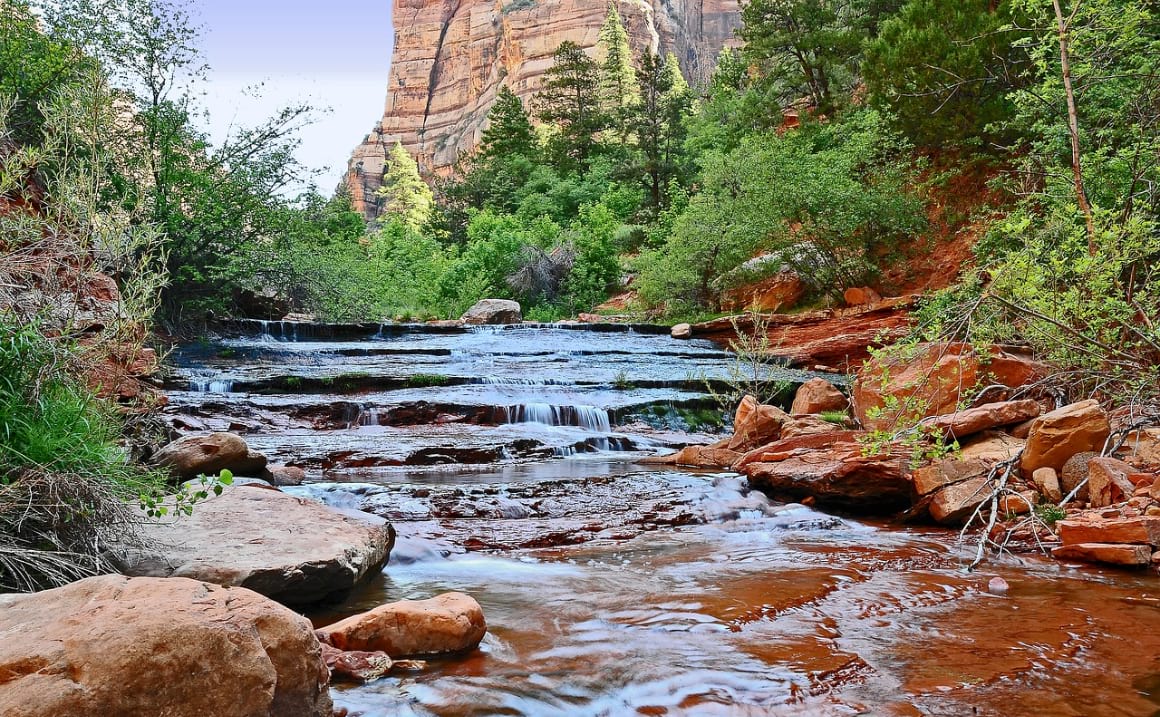
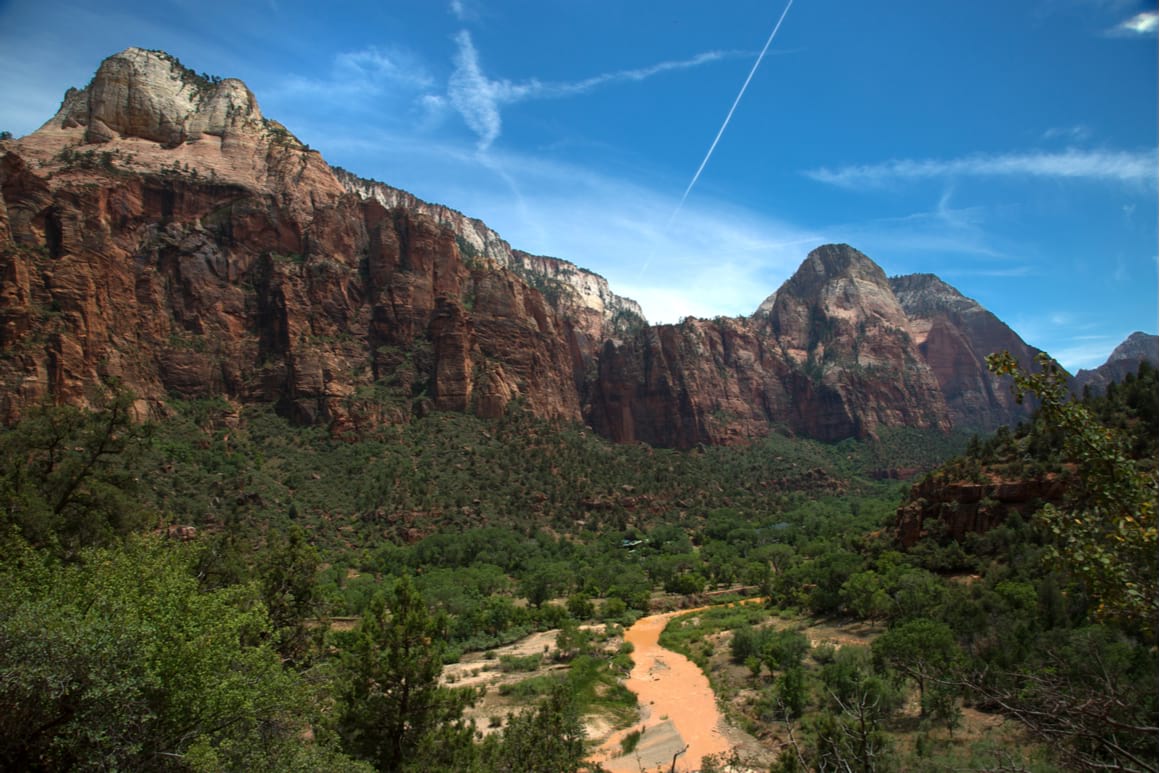
The main event is, without a doubt, the Zion Canyon itself. With red rock walls soaring over a thousand feet of lush greenery and a serpentine river, the colour of this place alone is something to shout about.
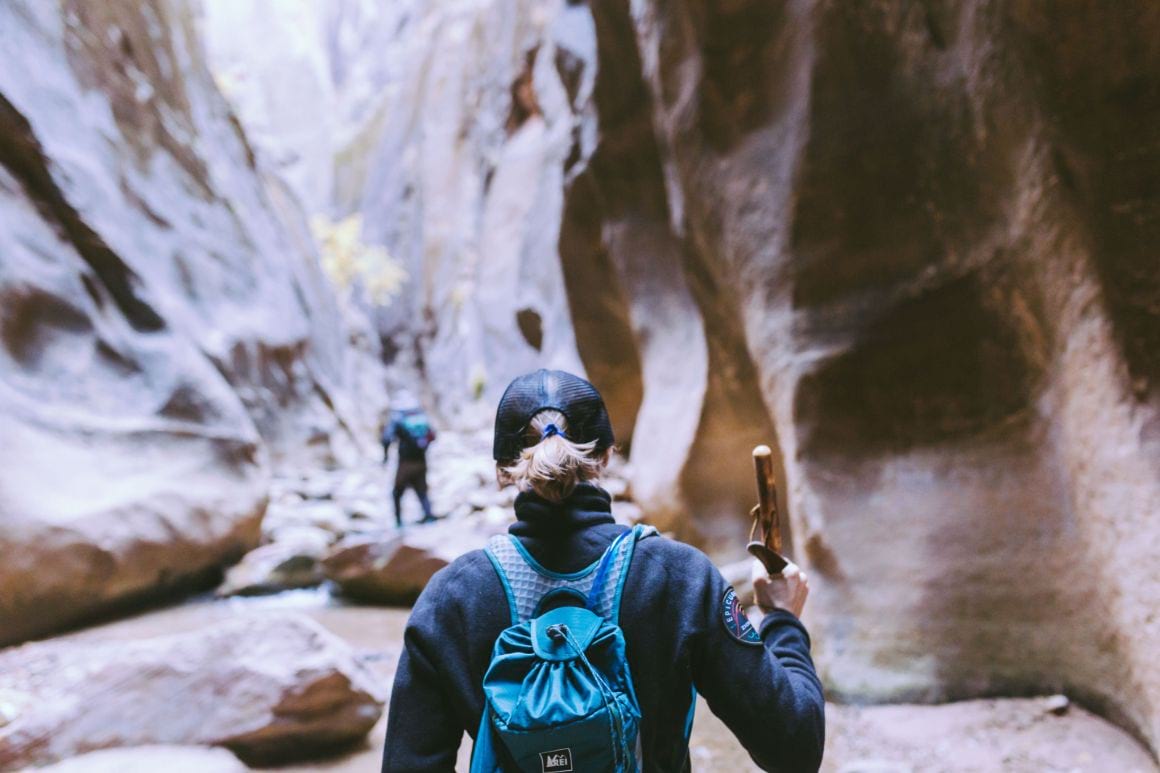
The park also has a few more narrow and cavernous sections, hiding plenty of adventure too. The Narrows, for example, and The Subway, are definitely places to check out in Zion — mesmerizing slot canyons and a good challenge too.
As you may have figured already, the landscape here is a major sell. A mix of scrublands, verdant plant life, and impressive pink rock formations that give it a kind of Garden of Eden feel.
When hiking in Zion, it’s important to be self-aware and to know your boundaries. Safety should be your #1 concern.
Need to know where to stay in Zion National Park, check out our guide.
Zion Trail Safety
Zion’s famous caverns, peaks, and cliffs tempt hordes of visitors every year. Adventure-seekers and nature-lovers make their way to the national park to experience the ancient rock formations and challenge themselves in the depths of its canyons.
As you can imagine, there are a whole bunch of options for hiking in Zion. There really is a trail for everyone’s taste and fitness level.
But staying safe on the trail is super important: your trip should be more about creating epic memories than getting in trouble. Be very careful when hiking alone. Always hike with a buddy if you can, and let somebody know of your plans when going alone.
Before you lace up your walking shoes and slather on sunscreen, here are some important safety guidelines that you should consider:
- Respect the sun – Zion’s desert-like landscape will often leave you exposed to the hot, hot sun. Pack sunscreen, sunhats, and sunglasses with you so you don’t get burnt. And take breaks in the shade.
- Know your limits – Pushing yourself can be rewarding, but sometimes the conditions are just too extreme. If at any point you don’t feel safe, comfortable, or confident, there’s always the option to turn back.
- Bring the right equipment – Not all hikes are made equal. Some routes require you to wade or swim, while others will need a harness or a rope. Be sure to read up on what the trail requires before you head out.
- Bring a map or GPS system – Make sure to bring along a GPS if you’re really going out into the wild, camping overnight, or hiking one of the more remote trails. Cell phone service might fail, and your battery could die out. The official park information is a good tool to carry as well.

- Be aware of wildlife – Numerous animal species live inside the boundaries of the park. Needless to say, you should never disturb Zion’s wildlife. Cougars may be seen roaming in the more remote areas.
- Check the weather – Hiking in adverse weather conditions is dangerous. Huge downpours can cause rivers to surge and make trails virtually impassable. Always check the conditions of the trail before you come. Contact the visitor center if needed.
- Give yourself plenty of time – Always start early in the day. It’s dangerous to rush hiking as you’re more likely to injure yourself, and it’s not safe to hike in the dark. Be the early bird and it will pay off!
- Travel Insurance – You never know when something’s going to go the wrong way. Get yourself some good travel insurance so you can spend time enjoying Zion instead of worrying about it.
Have You Tried AllTrails?
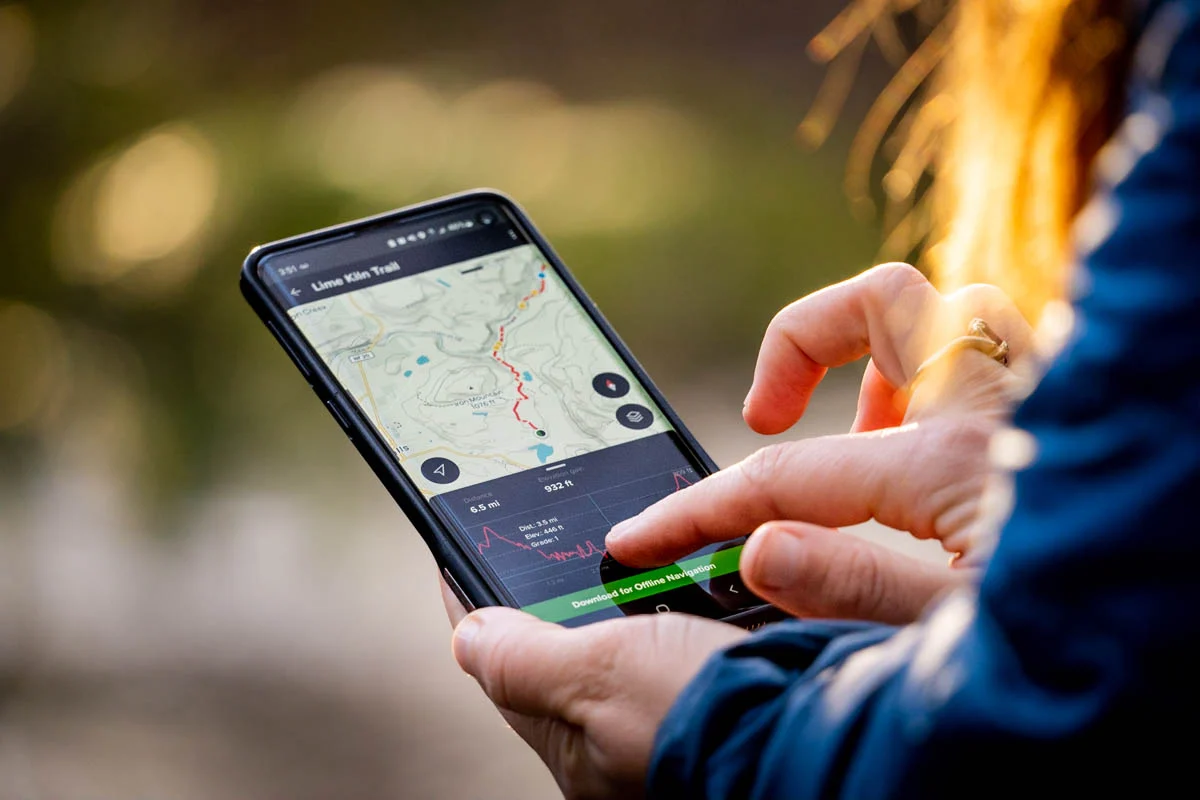
While we are have suggested some awesome hikes in this post, there are thousands more to choose from. At the moment, my absolute fave way to find hikes in a new country or destination, is to use the AllTrails app.
Yep, AllTrails offers access to loads of trails in and around Zion, complete with trail maps, reviews, user photos, and difficulty ratings Whether you’re venturing onto a family-friendly lakeside path or tackling a challenging alpine route, AllTrails helps ensure you’re well-informed.
Key Features:
- Trail Maps & Navigation: Each route includes detailed maps and elevation profiles. The platform lets you download maps for offline use—a lifesaver in remote valleys where signal can falter.
- Trail Insights & Photos: Get a feel for the trail ahead with user reviews and photos. Evergreen wisdom from other trekkers helps you fine-tune expectations.
- Safety Tools: Features like real-time activity sharing (AllTrails Plus) and “Lifeline” let you share your location with trusted contacts—a smart safeguard when hiking solo or on less-populated trails.
- Free vs. Premium (AllTrails Plus) Options: The free version offers great essentials like route browsing and basic tracking. AllTrails Plus adds perks such as offline maps, route overlays, and quick emergency alerts—for around $30/year.
Getting Started:
- Search “Zion” in the app or site.
- Filter results by difficulty, trail length, elevation gain, or user ratings.
- Read recent reviews and study trail photos to pick a fit for your fitness and vibe.
- Download your chosen trail map—or upgrade if you want full offline access.
- Share your hiking plan with a friend or family member—safety first!
Now that we’ve clued you up on the important stuff, it’s time to get into the best hikes in Zion. So, here they are!
- The Watchman Trail – Best Day Hike in Zion
- East Rim Trail from Big Bend Hike – Most Beautiful Hike in Zion
- The Narrows Overnighter – The Best Multi-Day Hike in Zion
- Angels Landing Trail – A Must-Visit Hike in Zion
- Lower Emerald Pool Trail – A Fun, Easy Hike in Zion
- The Subway, Top-Down Route – The Toughest Hike in Zion
- Cable Mountain Trail – Best Hike for Views in Zion
- Deertrap Mountain Trail – Off the Beaten Path Trek in Zion
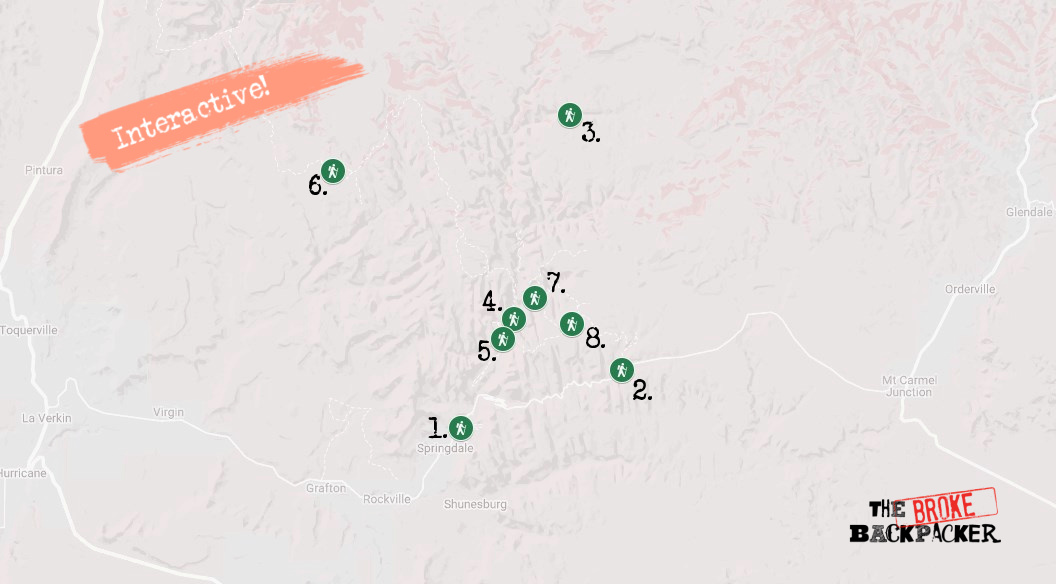
1. The Watchman Trail – The Best Day Hike in Zion
This loop trail in Zion is fairly straightforward, not overcrowded, and still packed with epic views — three things any hiker will appreciate.
It’s definitely one of the simpler hikes in Zion and is a nice way to ease yourself into all that’s great about this masterpiece of a park.
The hike is easily accessible from Springdale. The trailhead itself is near the Zion Visitor Center, which is situated close to the shuttle stop.
From here, signs for the Watchman Trail mark the way. The trail edges around the Watchman Campsite, and soon, you’ll be up in the foothills of Bridge Mountain. Eventually, you’ll come to Watchman Overlook, which offers a stunning panorama of the Springdale area. Look up, and you’ll see the 2,200-foot Watchman Spire towering above you.
This gentle hike is great for beginners. For some reason we’re not sure of, the Watchman Trail is often overlooked by visitors to Zion National Park, who opt for more popular routes.
Avoid the crowds and save yourself the extra effort by opting for this easy day hike in Zion.
- Length: 5 km
- Duration: 3 hours
- Difficulty: Easy/Average
- Trailhead: Zion National Park Visitor Center (37°12’05.1″N 112°58’45.9″W)
2. East Rim Trail from Big Bend Hike – Most Beautiful Hike in Zion
This trail is one of our favourite hikes in Zion. Starting at the East Gate of Zion National Park, the East Rim Trail from Big Bend Hike heads into the valley, winding around washboard mesas and ascending to the Eastern Rim.
It’s a beauty, ‘ight? Along this trail, you’ll find a whole variety of vegetation, incredible vistas, and stacks of rocks. Generally, it’s a pretty sandy trail, and it climbs gradually, giving you time to properly absorb those amazing views while you’re hiking.
The East Rim Trail from Big Bend Hike is well-maintained, but because it’s soft sand underfoot the whole time, it can be a bit heavy going. After you soak up those valley views, you switch back into the mouth of a canyon. A few more miles will take you to the valley floor.
Note that it can get pretty hot on this trail, and it’s quite exposed, so you’ll need sun protection and plenty of water. That goes especially if you choose to do this hike back in reverse.
Hiking in Zion doesn’t get much more starkly beautiful than this. As a bonus, it’s not likely that you run into many people on your hike. It’s just you and the cliffs.
- Length: 16 km
- Duration: 7 hours
- Difficulty: Moderate
- Trailhead: Est Gate (37°13’53.7″N 112°52’35.9″W)
3. The Narrows Overnighter – The Best Multi-Day Hike in Zion
If you’ve got plenty of time to explore Zion National Park and you’re big into hiking, you may want to opt for more than just a day hike. And that’s where this awesome multi-day hike comes into play.
You’ll get to explore what’s known as “The Narrows” — one of the most famous areas of the park. Many people will do it in a day, but it’s well worth it to have the extra time and go even deeper.
The day hike will have you hiking from the Temple of Sinawava, but the overnight hike takes you from Chamberlain’s Ranch, exiting at Sinawava instead. This is a much more adventurous option, but note that it does require a permit.
Starting outside the park itself, at the ranch, the trail takes you along the incredible gorge in the upper section of the Zion Canyon. The canyon is 16 miles long and, at times, up to 2,000 foot deep. At its narrowest point, it is only 30 feet wide — hence the name, duh.
The canyon is carved out by the Virgin River, which is a big feature of the hike. Sometimes you’ll be wading, or even swimming, in the river itself.
Good planning is essential for this hike. There are 12 campsites in The Narrows that you can reserve in advance online; choose whichever one you think will be the best stopping point for you.
- Length: 25 km
- Duration: 2 Days
- Difficulty: Difficult
- Trailhead: Simon Gulch (37°3709928”N -112°9124594W)
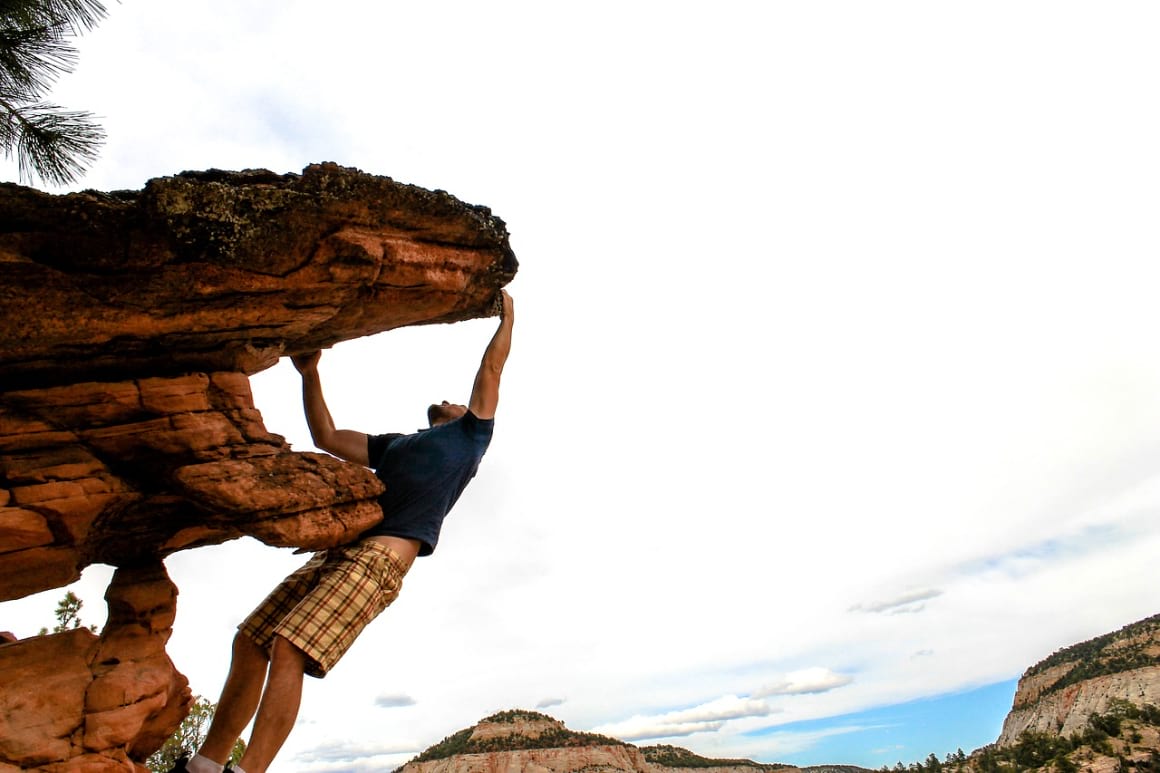
4. Angels Landing Trail – Must-Visit Hike in Zion

Possibly the most famous hike in Zion National Park, Angels Landing Trail is definitely up there as one of the best. And even though it’s very popular, it is also very strenuous — picture steep switchbacks and hair-raising drop-offs. Yikes!
You’ll be rewarded with amazing views over the 270 million-year-old canyon. But if your legs are already feeling wobbly at the thought of this and you’re not so good with heights, this hike may not be the one for you.
Start at The Grotto shuttle stop. You’ll walk the first two miles of the West Rim Trail until you hit Walter’s Wiggles — fun name, but perhaps not so fun in practice. This actually consists of 21 steep ascending switchbacks.
After all this, the last half-mile from Scout Lookout takes you along a narrow ridge to Angels Landing. It’s so narrow that there are even support chains in some sections. This is where you’ll get those iconic postcard views of Zion Canyon from 1,500 feet above.
We’ve said it once, we’ll say it again: this hike is not for you if you’re afraid of heights. Do not attempt this in adverse weather, high winds, or even if it’s just wet.
However, if you’re feeling confident, fit, and love a good ol’ canyon view, definitely go for it. It’ll be easy to understand why it’s such a bucket-list hike.
- Length: 8 km
- Duration: 5 hours
- Difficulty: Average
- Trailhead: Angels Landing Trailhead (37°25976”N, -112°95142”W)
5. Lower Emerald Pool Trail – A Fun, Easy Hike in Zion
If that last hike sounded like way too much risk, then you’ll probably like this one. Less dangling off narrow trails, more landscape enjoyment!
Lower Emerald Pool Trail is a well-maintained and very accessible way to soak up the scenery of Zion National Park. It’s mostly flat, too, making it doable for all fitness levels — it’s also a sweet option for families with younger children.
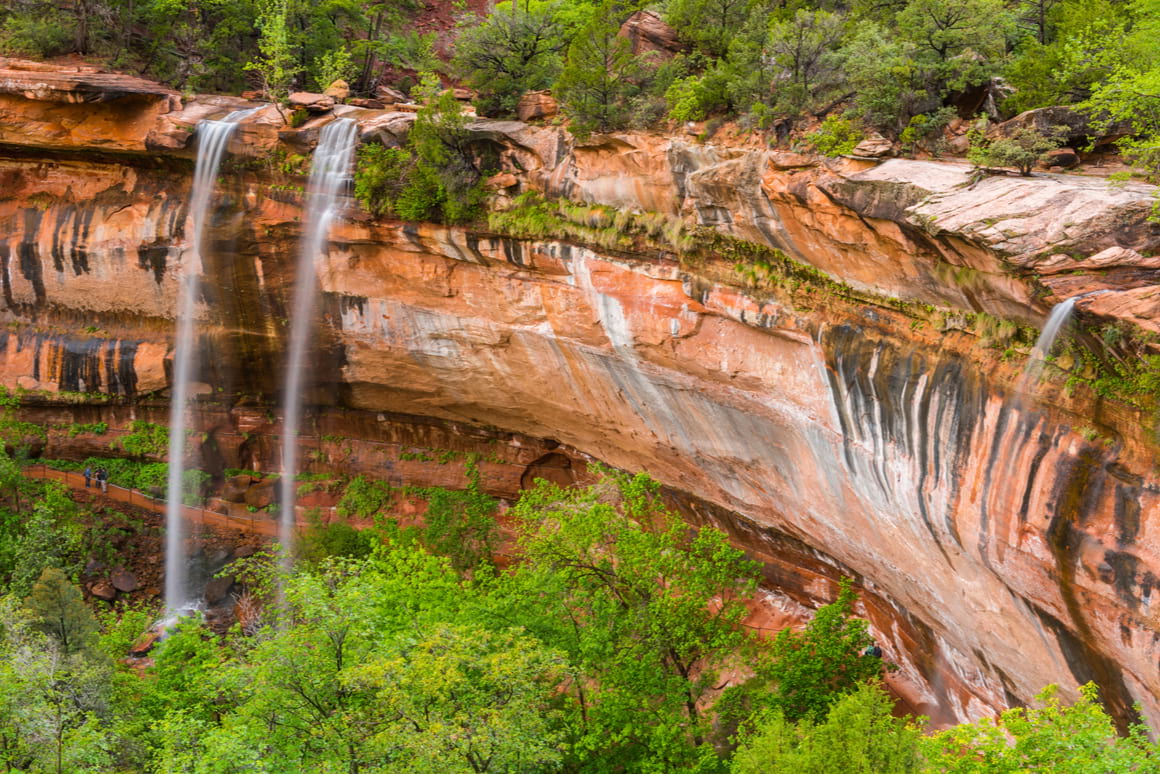
You’ll start at the trailhead just across from Zion Lodge. There are two trails at the beginning here: the Lower Trail is the one you want. It tracks the waterways at the bottom of the canyon all the way to Lower Emerald Pool, situated at the bottom of a cliff.
The streams running through here trickle over the cliff-face to create the pools, making for a really picturesque spot — especially when the light hits it just right.
If you want something a little more strenuous, that’s possible too. From the lower pool, you can clamber up a steep path that links up with the Middle Trail (which also boasts the Middle Pool).
This, in turn, leads you up to the Upper Pool – a larger pool complete with a waterfall that gushes into it. The water is particularly dramatic after heavy rain, so if you time it right, you could be in for a treat.
All these trails are clearly marked and easy to follow, even if some are a little more challenging. But do note that it can get busy in the summer along this oasis-like stretch.
- Length: 3.2km
- Duration: 1.5 hours
- Difficulty: Easy
- Trailhead: Arenal Volcano National Park Visitor Center (10°27’58.0″N 84°44’12.9″W)
6. The Subway Top-Down Route – The Toughest Trek in Zion
The Subway Top-Down Route is easily the toughest hike in Zion National Park. There’s wading involved, steep scrambling, and parts of the route can be difficult to discern. So if you really want to challenge yourself, well, you’ve found the one.
You’ll be walking through some incredible scenery, particularly when it comes to The Subway itself. The aptly named section of the hike leads you through a beautiful tunnel-like section of the slot canyon.
We recommend starting early to make sure you have plenty of time and manage to avoid bottlenecks with other hikers. You’ll begin your journey at the Wildcat Canyon Trailhead.
For a couple of miles, you’ll be on the Wildcat Canyon Trail, until you reach the North Gate Peaks Trail. Follow this for another few miles, and you’ll reach The Subway Route. This is where things start to get really interesting.
The path heads down into Russell Gulch, where The Subway itself begins. You’ll be inching through slick rock formations for about two miles (claustrophobia alert), all the way into the Left Fork of North Creek. Follow the cairn markers (stacked rocks by the side of the trail) as you make your way through the whole thing.
Expect to get wet: boulder-hopping and river-crossings abound in the last few miles. Be prepared, because the water gets cold.
- Length: 12.5 km
- Duration: 8 Hours
- Difficulty: Difficult
- Trailhead: Wildcat Trailhead (37°20’24.0″N 113°04’32.0″W)
7. Cable Mountain Trail – Best Hike for Views in Zion
Great views are common when hiking in Zion National Park, but nothing quite matches the ones you get on the Cable Mountain Trail. It really serves a hefty amount of breathtaking vistas.
The hike itself is gorgeous and offers glimpses of your final goal as you go. It’s a good option if you didn’t get a chance to tackle Angels Landing (or if that one is just too hair-raising for you).
Despite not being as tricky as Angels Landing, it is still strenuous. And though well-paved, it’s pretty much a continuous zig-zag climb from Weeping Rock to the top of Echo Canyon.
From there, it’s relatively flat but still rugged. You’ll have to follow cairns, instead of official park signs, along a dry streambed.
There’s history to this Zion hike, too. Settlers in the early 1900s once used this same route to transport timber from the mountain. In fact, you can still see the remains of the cable system at the top of the mountain!
Best to go during a dry spell, as rains can make the route slippy underfoot. And take plenty of water, as it can get hot. Thankfully, there’s the opportunity to take breaks in shaded areas along the way.
- Length: 12 km
- Duration: 5 hours
- Difficulty: Difficult
- Trailhead: Weeping Rock Shuttle Stop (37°16’15.7″N 112°56’12.9″W)
8. Deertrap Mountain Trail – Off the Beaten Path Trek in Zion
Another Zion trail with incredible views, but that’s not surprising at this point! This one comes with the bonus of being fairly remote, which means that quite often (if not, always) you’ll have the trail all to yourself.
This lightly trafficked route is situated near Orderville, and there are many ways to reach it. You can begin at Weeping Rock, East Rim Trailhead, or hike from the Cable Mountain Trailhead.
Each of these choices provides different terrain options and difficulty levels, so you can choose what suits you best. For us, starting at Cable Mountain makes the most sense. The heat can get intense, but the views are insane.
After a while of walking the rugged route that runs from Cable Mountain, the trail splits. Take the route to Deertrap Mountain.
We can’t stress the sun enough. You’ll be exposed to it most of the time, so bringing sun protection and staying hydrated is super important. Make sure to take regular breaks if you need them.
Aside from the heat, exploring the remote landscape at the top of Deertrap Mountain feels worlds away from the more popular trails in Zion National Park. Worth it if you’re looking to hike in solitude.
- Length: 17.7km
- Duration: 8 hours
- Difficulty: Difficult
- Trailhead: Deer Trap Mountain Trailhead (37°15’24.2″N 112°54’40.3″W)
To enjoy the park in all its glory, the best option is to stay in Zion for a few nights. But making a base doesn’t necessarily mean staying inside the park.
In fact, many of the best accommodation options are situated just outside the boundary of the park, in Springdale. This town is right at the park’s doorstep and offers everything, including mid-range chain hotel experiences and a few motels and inns that might suit you.
In case you’re not happy with that, you can look for something in Rockville.

You’ll find a few notable places to stay in Zion National Park itself. For example, there’s relative luxury on offer at Zion National Park Lodge, located near the Zion Lodge Historic District.
For the more intrepid hikers, you may be wondering about camping. Luckily for you, three campsites in Zion offer the chance to really be at one with nature – Watchman Campground, South Campground, and Lava Point Campground. All these sites are drive-up, so they’re very accessible. They have flush toilets and potable water but no showers or electrical hook-ups.
Note that camping in Zion is limited to 6 people and 2 tents per plot. In addition, you can only stay for a maximum of 14 nights from March through mid-November (outside of that, it’s 30 nights).
Best Airbnb in Zion National Park: Lone Ranger Suite
Staying here feels like walking into a western film. At your doorstep, a convenient sidewalk will take you into town and the park. And to add to the charm of it all, you could potentially spot some baby deer walking around at night!
Looking for more unique Airbnbs? We’ve found these 10 epic lodges in Zion all with incredible mountain backdrops and only a stone’s throw away from the national park.
Best Hostel in Zion National Park: Zion Glamping Adventures
Zion Glamping Adventures offers a unique opportunity to sleep under the stars without sacrificing your home comforts. This isn’t any old tent, this is a luxury experience with seriously comfy beds, bathroom and fire place. Embrace the elements and enjoy a fancy night you won’t forget.
Best Hotel in Zion National Park: Driftwood Lodge – Zion National Park – Springdale
Well situated in Springdale, this three-star hotel is close to restaurants and shops, and has easy access to Zion National Park. It also has an outdoor pool, a Jacuzzi, a relaxing terrace and a stylish bar. All of this combined makes this rustic retreat our pick for the best hotel in Zion.
By now, we hope you’re pumped to go out there and hit up Zion’s beautiful set of hikes. But before you go, there are some things that you have in mind when packing for the trip.
Some of the hikes in Zion can be a challenge and require you to bring special equipment. The shoes you wear make a huge difference, not only to your safety but also to how much you are able to enjoy the hike itself. Pick something appropriate for the trail with a good grip!
Pay special attention to the water bottle you bring. Opting for one with a filter will allow you to drink from ANYWHERE and is also great for reducing unwanted plastic waste. And that is a huge problem.
Many of the hikes lead through areas that leave you exposed to strong sun. Be prepared with protection against the harmful sun and pack a good sunscreen and sunhat.
There are a few essential items that a hiker should always have in their daypack to help them on the trail (undoubtedly including a well-stocked first aid kit). Here’s a list of the essential items you should absolutely consider bringing with you.

Black Diamond Alpine Carbon Cork
- Price > $$$
- Weight > 17 oz.
- Grip > Cork

Petzl Actik Core Headlamp
- Price > $$
- Weight > 1.9 oz
- Lumens > 160

Merrell Moab 2 WP Low
- Price > $$
- Weight > 2 lbs 1 oz
- Waterproof > Yes
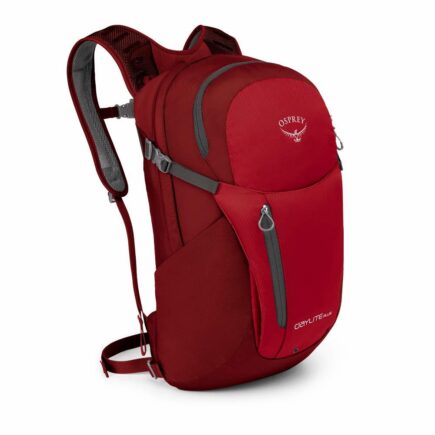
Osprey Daylite Plus
- Price > $$$
- Weight > 20 oz
- Capacity > 20L

GRAYL Geopress
- Price > $$$
- Weight > 16 oz
- Size > 24 oz
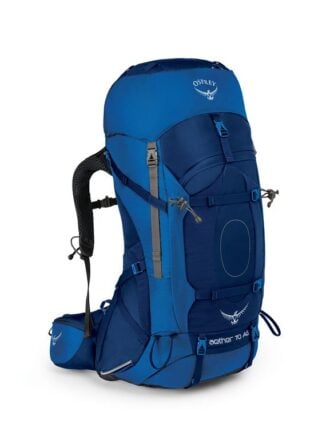
Osprey Aether AG70
- Price > $$$
- Weight > 5 lbs 3 oz
- Capacity > 70L

MSR Hubba Hubba NX 2P
- Price > $$$$
- Weight > 3.7 lbs
- Capacity > 2 person
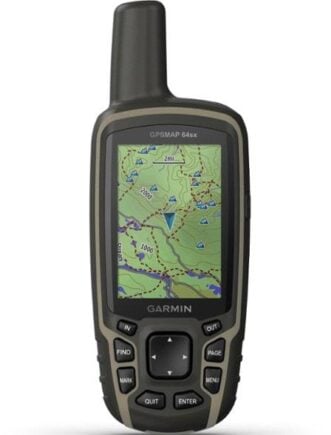
Garmin GPSMAP 64sx Handheld GPS
- Price > $$
- Weight > 8.1 oz
- Battery Life > 16 hours
Don’t Forget Your Zion Travel Insurance
ALWAYS sort out your backpacker insurance before your trip. There’s plenty to choose from in that department, but a good place to start is Safety Wing.
They offer month-to-month payments, no lock-in contracts, and require absolutely no itineraries: that’s the exact kind of insurance long-term travellers and digital nomads need.

SafetyWing is cheap, easy, and admin-free: just sign up lickety-split so you can get back to it!
Click the button below to learn more about SafetyWing’s setup or read our insider review for the full tasty scoop.