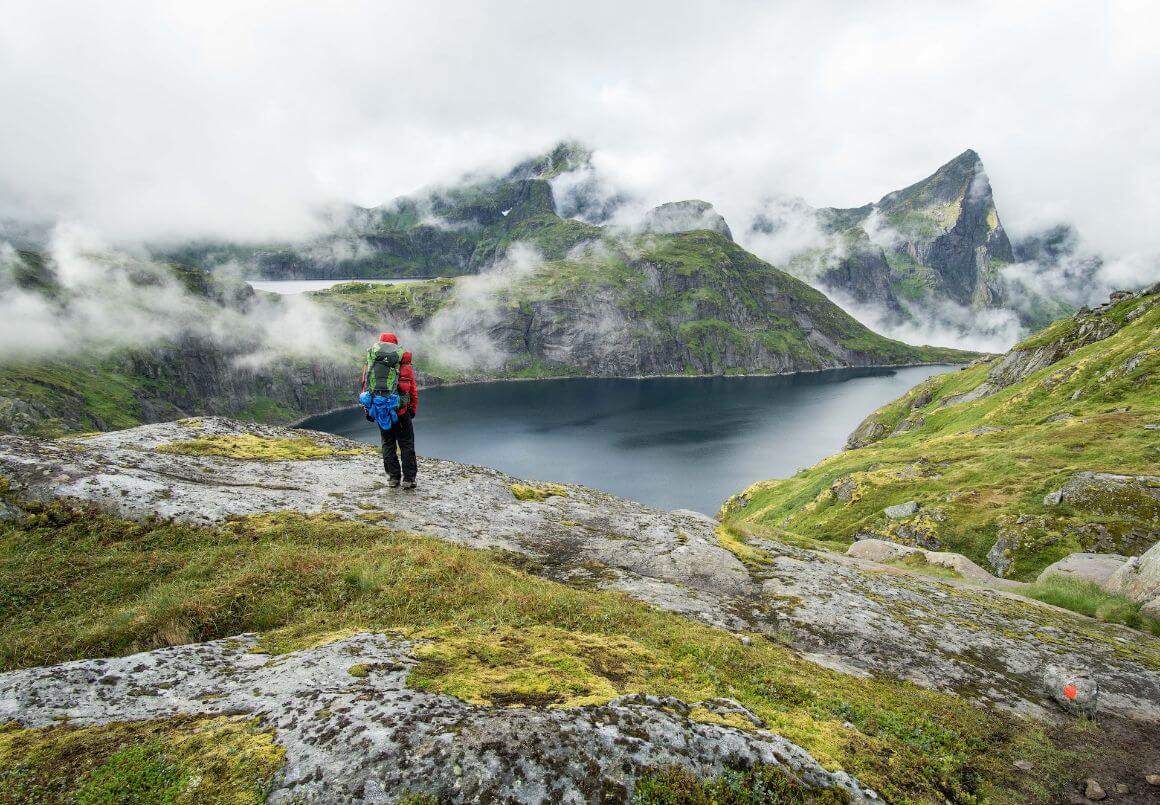
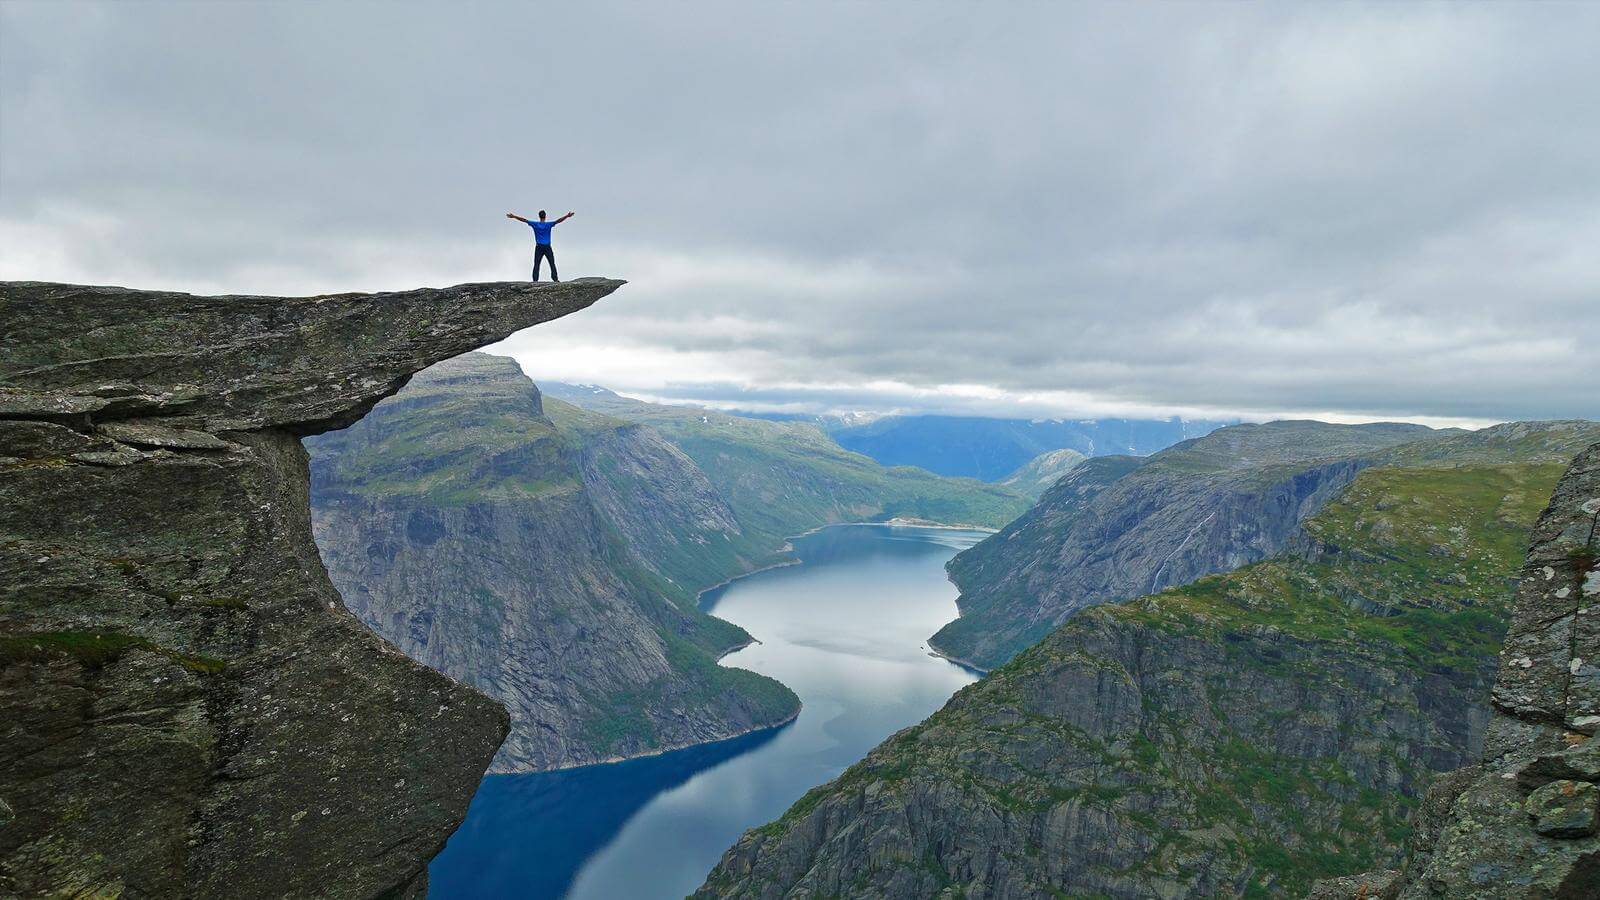
In a land where the concept of Friluftsliv (outdoor pursuits) is revered, it should come as no surprise that Norway totally has the upper hand when it comes to hiking!
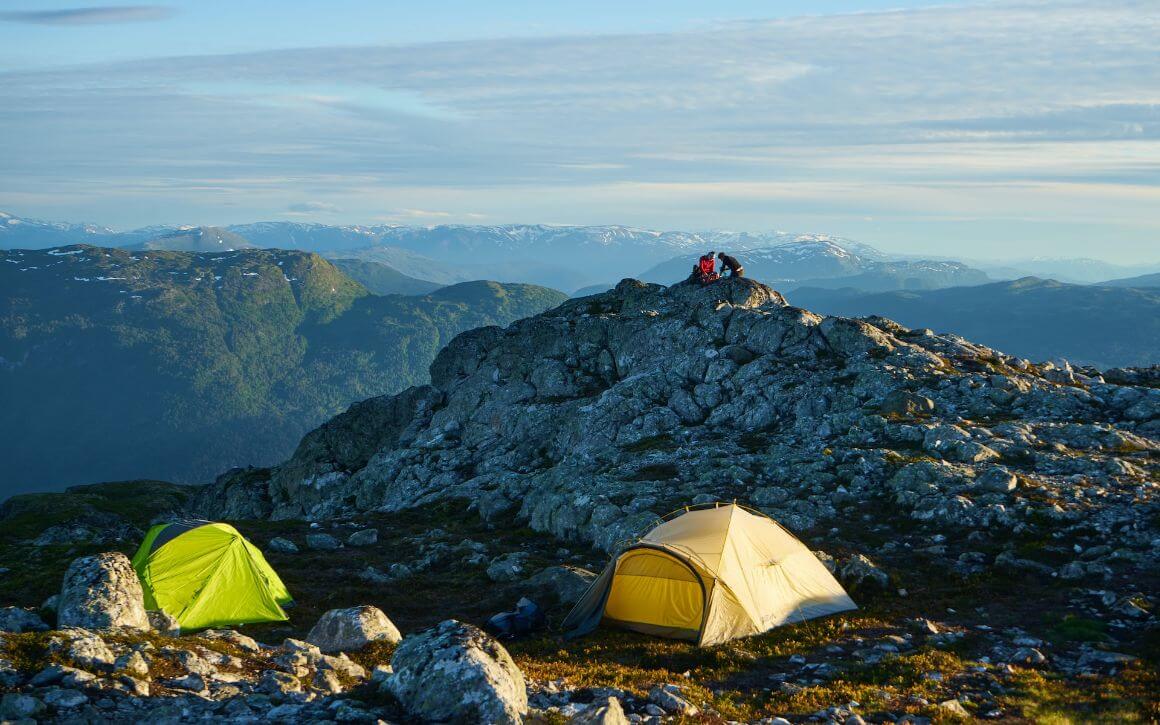
A spectacular country speckled by Alpine peaks, gem-colored fjords, and majestic glaciers, Norway certainly is an outdoor adventurer’s dream come true. Not only does it have 47 national parks under its belt, but local laws even permit wild camping- perfect for travelers looking for multi-day hikes. A scenic coastline beckons as it stretches out for thousands of miles, taking you through gloriously twisty and warped terrains.
Despite the vast hiking opportunities though, it’s extremely important to plan your hike just right. It’s crucial to gear up properly (yes, even on easy trails) to ensure a safe, fun, and stress-free adventure.
With so many things to plan and consider, it’s all too easy to get overwhelmed- which is precisely why I put together this insider guide to the best hikes in Norway. Whether it’s packing the right gear, uncovering those hidden gems, choosing the perfect trail, or even finding the best spots to crash for the night, I’ve got everything covered for you.
So, let’s get started!
What to Know Before Hiking in Norway
The Broke Backpacker is supported by you. Clicking through our links may earn us a small affiliate commission, and that's what allows us to keep producing free content 🙂 Learn more.
Outdoor recreation isn’t simply encouraged in Norway; it’s also a super important part of the national identity!
In fact, according to the local Outdoor Recreation Act, the Right to Roam allows you to hike virtually anywhere you want as long as you respect nature and pick up after yourself. It’s also important to know that from April to September, open fires aren’t allowed in or near forested regions.
You can expect diverse landforms, including coastal fjords, mountains, inland plains, valleys, and coastal hills. Indeed, no two hikes are ever quite the same, especially in the Norway National Parks.
Since most Norwegians live along the coastline, inland Norway offers a dramatically stark landscape with heaps of uninhabited areas. As such, it’s not uncommon to hike for days without even seeing another person.
To help hikers choose a path that meets their ability, Norway has a grading standard for marked trails. You’ll notice that marked hiking paths are all color-coded to let you know what to anticipate:
- Green: These trails are generally considered easy and suitable for beginners. These shorter paths usually don’t exceed 5km and are limited to an elevation gain of 300m. Keep your eyes peeled for wheelchair and pram-friendly signs!
- Blue: Blue-marked trails usually have a medium intensity suitable for beginners or hikers with an average fitness level. Some blue trails do have steep terrains, but for the most part, the ascents are moderate. Blue trails don’t usually involve stream crossings- although there are a few exceptions to this.
- Red: Well, the name says it all, right? Ideal for experienced hikers with excellent stamina, red trails will see you through some of Norway’s most laborious hiking conditions. Think rocky ascents, dizzyingly high slopes, polar landscapes…the works! You absolutely need to gear up before tackling these trails since they often involve climbing and other technical challenges.
In addition to the color codes, hikers should also consider the trail’s altitude, especially if they’re not used to higher terrains. Fret not, though: I’ll take you through all the safety considerations to ensure that you have an epic time in the Land of the Midnight Sun!
If you ask me, the best time to plan your trip to Norway, especially if it’s for hiking, is in summer (May to September) when the temperature is a pleasant 52 to 65°F or 11 to 18°C. Whilst you won’t exactly bake under the Norwegian sun, you definitely want to grab plenty of water, a hat, and some sun cream- but more on that in our What to Bring on Your Hike section!
For now, let’s check out some safety considerations.
Norway Trail Safety
I’m sure I don’t have to tell you that trail safety is the number one thing to consider when planning your Norway hikes.
Whilst there’s zero doubt that Norway is an idyllic destination, hikes there will take you into remote landscapes through crystalline fjords, past glaciers, and towering peaks.
With such diverse landforms come different types of risks, so it’s best to be prepared for all sorts of eventualities.
Don’t forget that some spots are extremely isolated, so you can’t always count on human intervention!
Here are some safety tips to keep in mind before hitting those trails:
- Plan ahead: I’m all for spontaneous trips, but last-minute hiking plans can be dangerous. Take a few days to properly map out your hike.
- Know what to expect: What kind of terrain types does your hike entail? Will you need altitude pills? What does the weather forecast predict? These are all super important questions you need to address before venturing out.
- Share your location: Or better yet, hike with a buddy. If you’d rather embark on a solo hike though, it’s crucial to let somebody know where you’re headed.
- Pack a first-aid kit: Hey, you can never be too prepared on a hike, so grab that first-aid kit before heading out! Scrapes and cuts are more common than you think.
- Gear up adequately: I can’t stress this one enough. Packing the right gear is crucial. Think of a map (your phone battery won’t last forever!), a GPS device, and appropriate clothing. I’ll take you through the rest later. Norway can be VERY expensive, so buy what you need before your trip.
- Bring plenty of water: Norway isn’t known for its hot climate, but you really want to keep your water topped up all the same.
- Get insured: The chances that you’ll end up stranded in the middle of nowhere are super low, I know. But the bill for a rescue mission can be shockingly expensive, so consider getting travel insurance before your trip.
Have You Tried AllTrails?
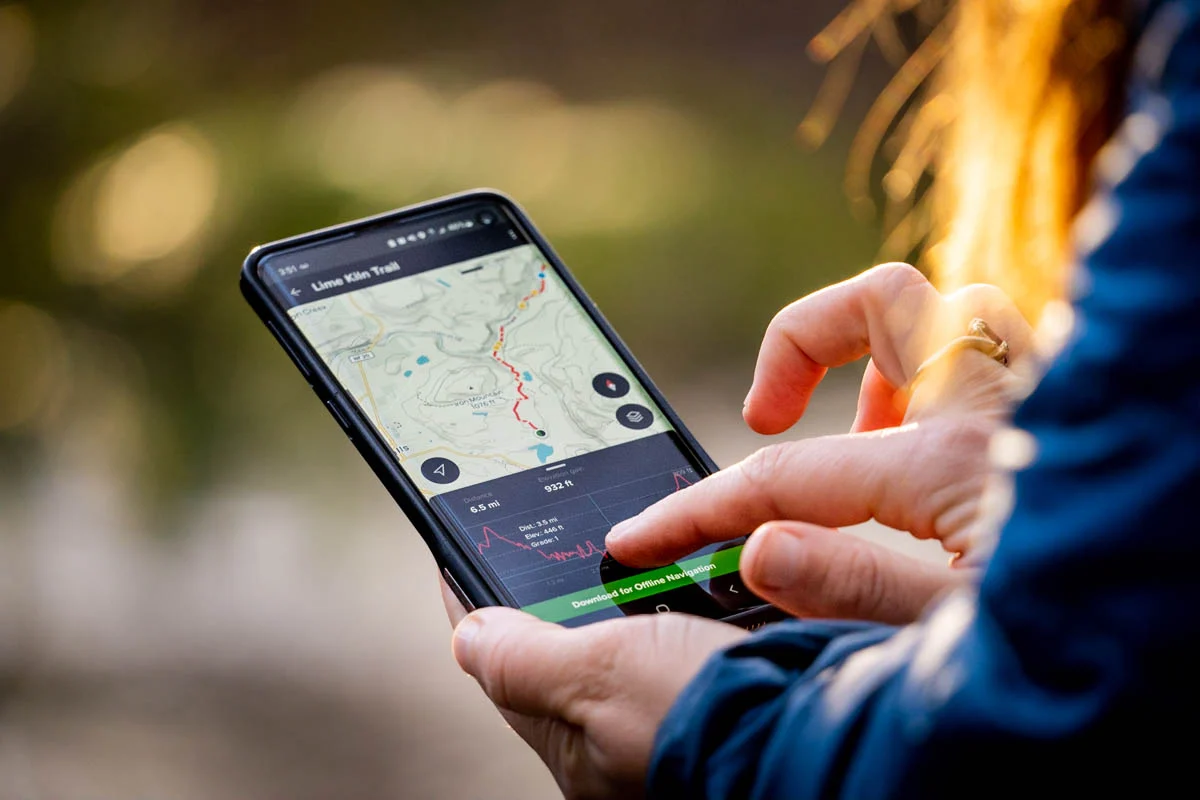
While we are have suggested some awesome hikes in this post, there are thousands more to choose from. At the moment, my absolute fave way to find hikes in a new country or destination, is to use the AllTrails app.
Yep, AllTrails offers access to loads of trails in Norway, complete with trail maps, reviews, user photos, and difficulty ratings Whether you’re venturing onto a family-friendly lakeside path or tackling a challenging alpine route, AllTrails helps ensure you’re well-informed.
Key Features:
- Trail Maps & Navigation: Each route includes detailed maps and elevation profiles. The platform lets you download maps for offline use—a lifesaver in remote valleys where signal can falter.
- Trail Insights & Photos: Get a feel for the trail ahead with user reviews and photos. Evergreen wisdom from other trekkers helps you fine-tune expectations.
- Safety Tools: Features like real-time activity sharing (AllTrails Plus) and “Lifeline” let you share your location with trusted contacts—a smart safeguard when hiking solo or on less-populated trails.
- Free vs. Premium (AllTrails Plus) Options: The free version offers great essentials like route browsing and basic tracking. AllTrails Plus adds perks such as offline maps, route overlays, and quick emergency alerts—for around $30/year.
Getting Started:
- Search “Norway” in the app or site.
- Filter results by difficulty, trail length, elevation gain, or user ratings.
- Read recent reviews and study trail photos to pick a fit for your fitness and vibe.
- Download your chosen trail map—or upgrade if you want full offline access.
- Share your hiking plan with a friend or family member—safety first!
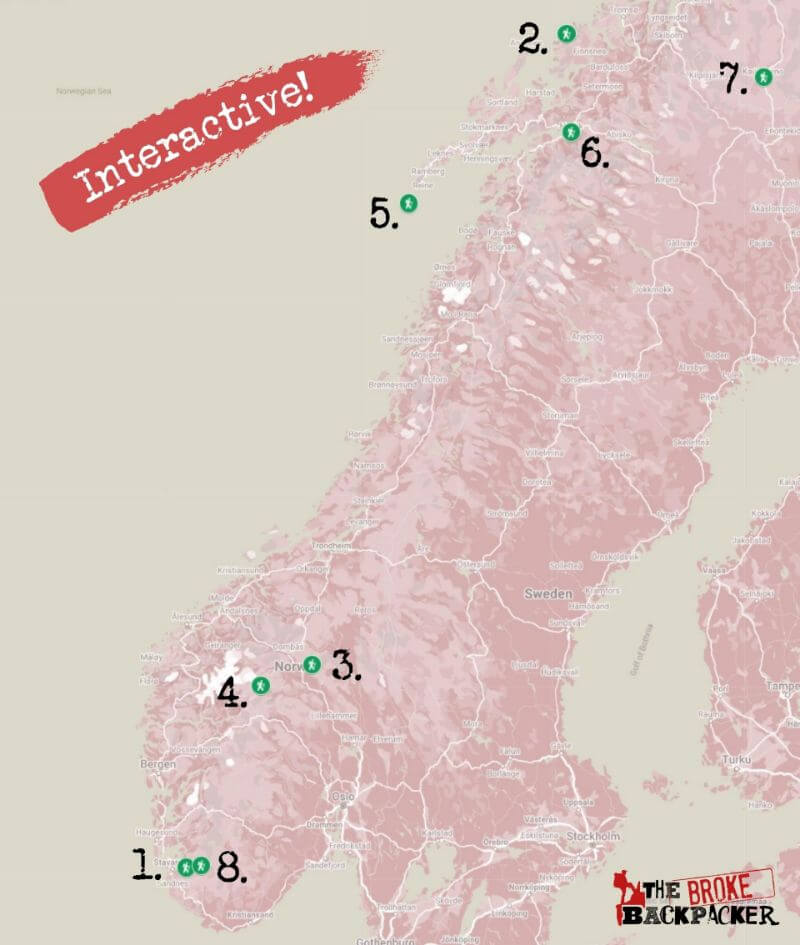
The Top 8 Hikes in Norway
Okay, now that you know how to stay safe when tackling those slopes, let’s take a deep dive into the best hikes in Norway, shall we?
I’ve put together a list of the top trails in the country to help get you started. Don’t worry if you’re just dipping your toes into the exhilarating world of hiking: there’s literally something for everyone (dogs included)!
Experienced hikers will be spoilt for choice, too, since Norway’s rugged wilderness lends itself beautifully to more challenging adventures.
So, grab your best hiking boots, and let’s check out those trails!
- The Preikestolen Hike – The Best Day Hike in Norway
- The Husfjellet Hike
- Rondane Triangle Trail – The Best Multi-Day Hike in Norway
- The Galdhøpiggen Trek
- The Håen Hike – A Fun, Easy Hike in Norway
- The Malmveien Historical Trail
- The Nordkalottruta Route – The Toughest Trek in Norway
- Kjeragbolten
1. The Preikestolen Hike – The Best Day Hike in Norway
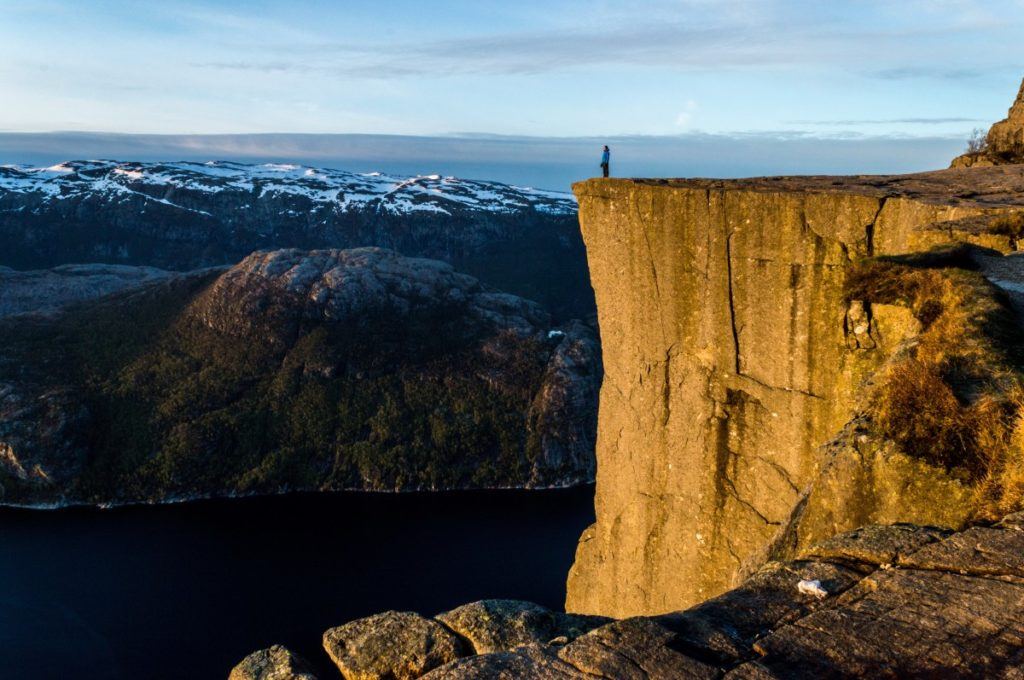
This day hike seems like a good place as any to start off this list. Not only will you be working up some sweat on this moderately demanding trail, but you’ll also be treated to the most sensational views in Norway!
Located in the Forsand Municipality (Western Norway), this trail starts off at the Preikestolen Mountain Lodge, just steps from Lake Revsvatnet. To get there, you can hop on the Preikestolen Express bus from central Stavanger City for around Kr 450 (round-trip adult ticket).
Whilst you can complete this hike in around 4-5 hours, it’s best suited to hikers with a moderate fitness level since some sections can be quite steep and rocky.
I wouldn’t recommend that you venture out on windy days since there are no barriers or fences to keep you from blowing off the edge of the cliff. For better weather conditions, you may wish to plan your hike from April to October. Visiting in winter can be extremely dangerous, and if you do decide to hike then you’ll absolutely need to hire a guide for your safety.
With an elevation gain of 334 meters, this hike leads to the iconic Pulpit Rock, a natural platform that was formed during the last Ice Age. From up there, you can marvel at sweeping views over Lysefjord.
Believe me when I say that Pulpit Rock is quite a sight to behold as it towers 1,982 meters above sea level. Just be sure not to get too close to the edge and watch your footing since the pebbles can get quite slippery!
This hike is perfect for a day trip from Stavanger, but if you want to spend the night, you can always check out nearby accommodation options like the Preikestolen Base Camp.
- Length: 8km
- Duration: 4-5 hours
- Difficulty: Average
- Trailhead: Preikestolen Mountain Lodge, 58.99° N 6.14° E
2. The Husfjellet Hike
Here’s one that totally takes the cake as far as dramatic Norway trails go!
Another super popular hike, Husfjellet, is located on Senja Island, just off the northern coast of Norway. Expect jaw-dropping scenery over Bergsfjord, Steinfjord, and Ersfjord- all tied together by unblemished views of the nearby fjords.
This loop trail has a red marking which means that it’s quite demanding in some areas, so be sure to gear up properly!
If you’re not staying on Senja Island, you can catch a ferry from Tromso to Finnsnes and cross the bridge to the island. The ferry crossing takes nearly 5 hours and costs between Kr 450 and Kr 650. That in itself is one of the most incredible things to do in Tromso in itself.
The trailhead kicks off at the Berg Church, and whilst parking is available in the church’s parking lot, bear in mind that it does fill up super quickly during peak season.
Whilst the trail starts off as a narrow path snaking through a low woodland area, it quickly joins a wider track. This trail is supposed to be demanding, but I must say that the gradual ascent made it feel more like a moderately-challenging hike. Don’t let your guard down, though, since the summit is surrounded by a very narrow path with sharp, jagged edges.
Now, about the technical stuff: you really do need waterproof shoes for this expedition. I would also recommend that you check the weather forecast before venturing out because the trail gets dangerously muddy in the rain.
If you need somewhere to crash for the night after this 4-hour hike, you’ll find plenty of accommodation options in Senja. Alternatively, you can always take advantage of the country’s Right to Roam and set up your tent in the wilderness!
- Length: 7.8km
- Duration: 4 hours
- Difficulty: Average to Difficult
- Trailhead: Berg Church, 69°26’45.8″N 17°17’55.6″E
3. Rondane Triangle Trail – The Best Multi-Day Hike in Norway
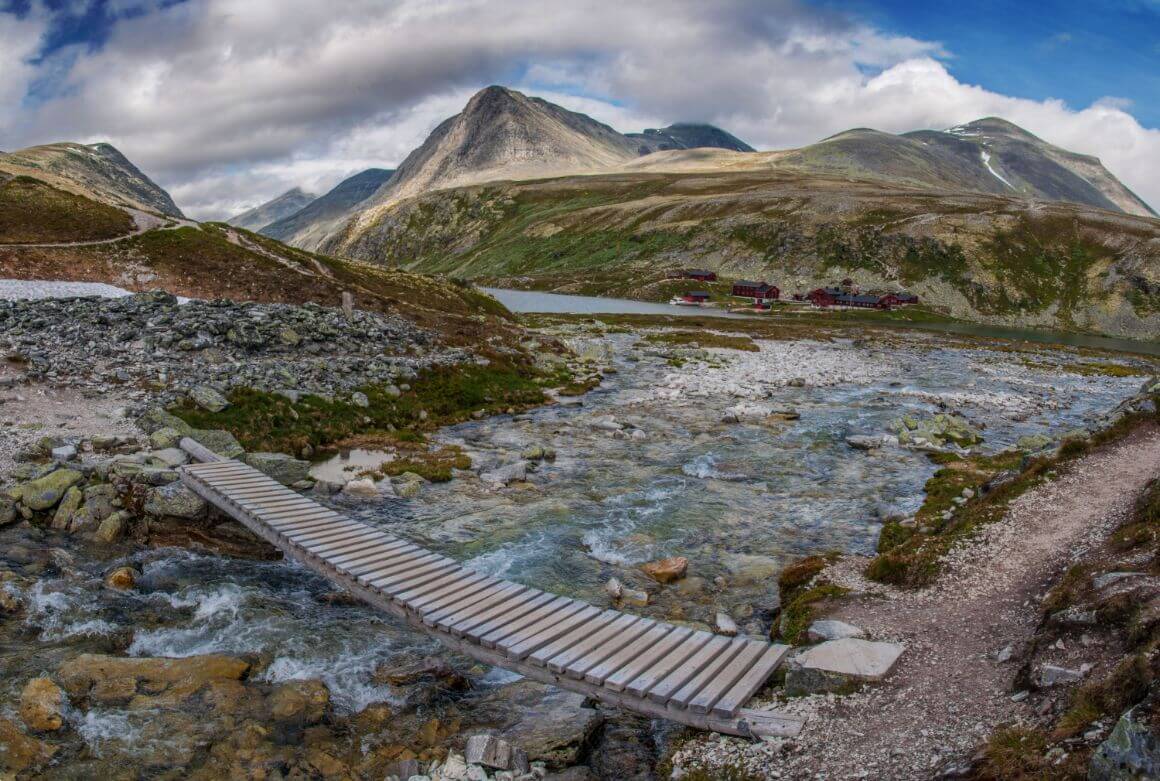
Ah, Rondane. Also known as the mother of all national parks in Norway!
Home to some of the most sensational Alpine landforms in the country, Rondane plunges you smack-bang into the remote wilderness. Highly popular among backpackers, this multi-day trail is said to be among the best hikes in Norway- and for good reason!
For the best hiking conditions, it’s recommended to explore this trail between June and September. The hike kicks off from the Spranget parking lot- although you can always start the loop from the other direction (Dørålseter or Bjørnhollia).
From Spranget, you’ll need to walk for around two hours to reach Rondvassbu. Once there, you hop on a boat that’ll take you across Rondvatnet Lake, and that’s where the fun really begins!
For the next 3 to 4 days, you’ll be hiking through a barren, lichen-speckled landscape. It’s surrounded by rapids, waterfalls, and incredible mountain tops in Smiubelgen, Storronden, and Rondslottet.
You’ll have the choice of two trails after crossing the lake: for something challenging, take the Høgronden to Bjørnhollia route, known for its glorious vistas. I would recommend that you set aside 9 to 10 hours for this portion of the hike.
On the flip side, the easier Rondvassbu- Bjørnhollia trail takes around 7 hours to complete and crosses through the Langglupdalen Valley.
The final leg of your Rondane Triangle trail features a picturesque and easy 12-km hike through the Illmanndalen Valley. Keep your eyes peeled for the massive moraine located across the valley.
Even though it’s a multi-day hike, the Rondane Triangle has a blue marking, so it’s moderately challenging. Three tourist lodges are available along the trail- perfect for hikers who don’t want to camp out.
- Length: 53.7 km
- Duration: 4 days
- Difficulty: Average
- Trailhead: Spranget, 61°50’05.8″N 9°43’52.6″E
4. The Galdhøpiggen Trek
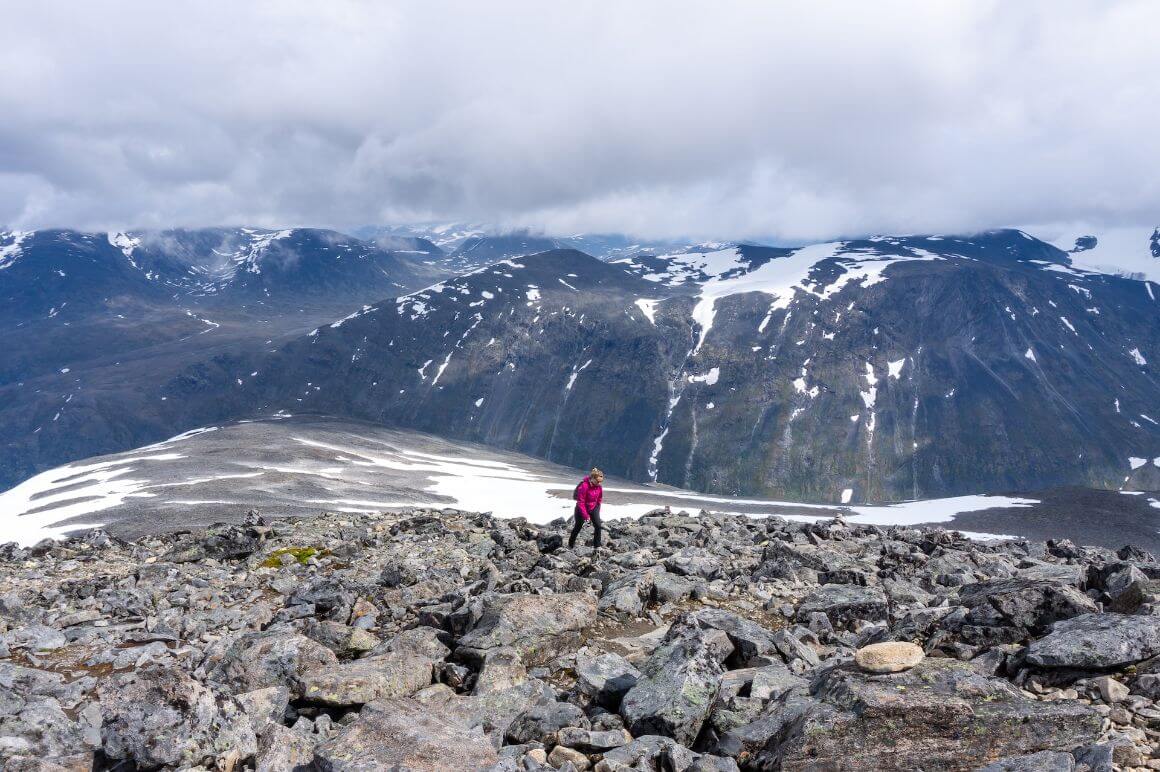
Are you looking for challenging trails in Norway? Then, head over to Jutunheimen National Park, where you’ll find the popular Galdhøpiggen mountain!
At 2,469 meters high, this mountain is the highest in Norway. As such, it draws plenty of hikers in summer, but the trek to the top can be quite arduous. Unbelievable views of southern Norway await, complete with glistening lakes and snow-capped peaks.
Now, there are several trails that lead to the top, but if you’d rather save your energy for the summit, I can vouch for the easy access that starts off at the Juvasshytta Mountain Lodge in the village of Lom. Located just 5km from the summit, this just so happens to be the highest mountain lodge in Northern Europe. Hikers often choose to spend the night there so they can get an early start.
The trail to the summit is quite an intense one that requires plenty of stamina and a sure-footed pace. Not only will you have to navigate your way through imposing boulders, but the hike also features a roped crossing of the Styggebreen glacier. Believe me when I say you really want a guide for that!
Once you’ve crossed the glacier, it’s quite a stiff and strenuous trudge through the snow until you reach Galdhøpiggen’s summit.
If you’d rather bypass the glacier, then I would recommend that you take the even easier trail from the Spiterstulen Mountain Lodge instead.
Late May to mid-September is often said to be the best time to embark on this hike. The rocky yet snowy paths and high altitude can be an issue for some, so make sure you’re prepared.
- Length: 13 km
- Duration: 5 to 7 hours
- Difficulty: Difficult
- Trailhead: Juvasshytta Mountain Lodge, 61°37’30.2″N 8°24’15.4″E
Best Hiking Tour in Norway
This EPIC Hiking Tour in Norway will have you trekking from Bergen to Bergen over 7 Days. It takes all the admin out of your hiking holiday, and you’ll have instant mates to adventure with. You’ll be trekking through many of the trails included in this post!- Number of days: 7 days
- Group Size: Max 15 (average 12)
- Fitness Required: High, some high-altitude hikes or more strenuous activities, but accessible to most healthy travellers.
- Accommodation type: Simple and clean hotels and hostels
 FIND OUT MORE
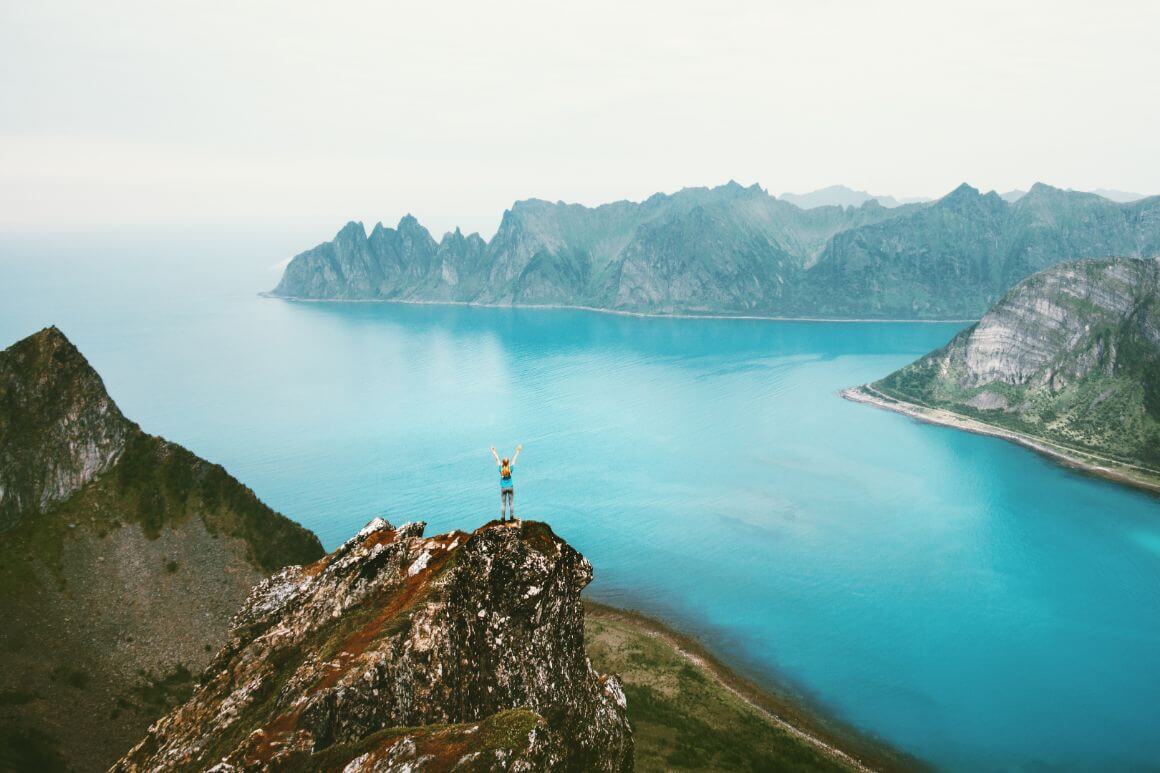
5. The Håen Hike – A Fun, Easy Hike in Norway

Whether you’re just beginning your hiking journey or simply want to enjoy a relaxing walk through the lovely Nordic countryside, this hike ticks all the boxes!
The Håen Hike takes you across Vaeroy Island in the Lofoten archipelago. To get there, you’ll need to take a ferry to Vaeroy and then march on to the summit.
One of the most scenic walks in Norway, the Håen Hike is basically a mountain climb. But rest assured that it’s a leisurely uphill walk punctuated by bay views. On a clear day, you can even spot the Svartisen glacier and mainland Norway in the distance.
At some point, the main trail comes to a curve that leads to a radar station. From there, you’ll find a well-maintained track that leads to the summit. There’s also a viewpoint where you can rest and take in unblemished views of the surroundings.
Best of all, this hike is suitable for both dogs and kids- perfect for families looking for a day out! Just keep a close eye on them once you reach the summit since there are a few cliffs around.
As you near the summit, look around for the restored Eagle Houses. These are basically small stone structures where locals used to hide eagles in the past.
It’s important to know that camping is not allowed near the radar station. However, you’ll find plenty of camping options near the plateau that leads to the top or further down the mountain near the ridge.
- Length: 10km
- Duration: 2 to 3 hours
- Difficulty: Easy
- Trailhead: Værøy Village, N67° 40.343′ E12° 39.485′
6. The Malmveien Historical Trail
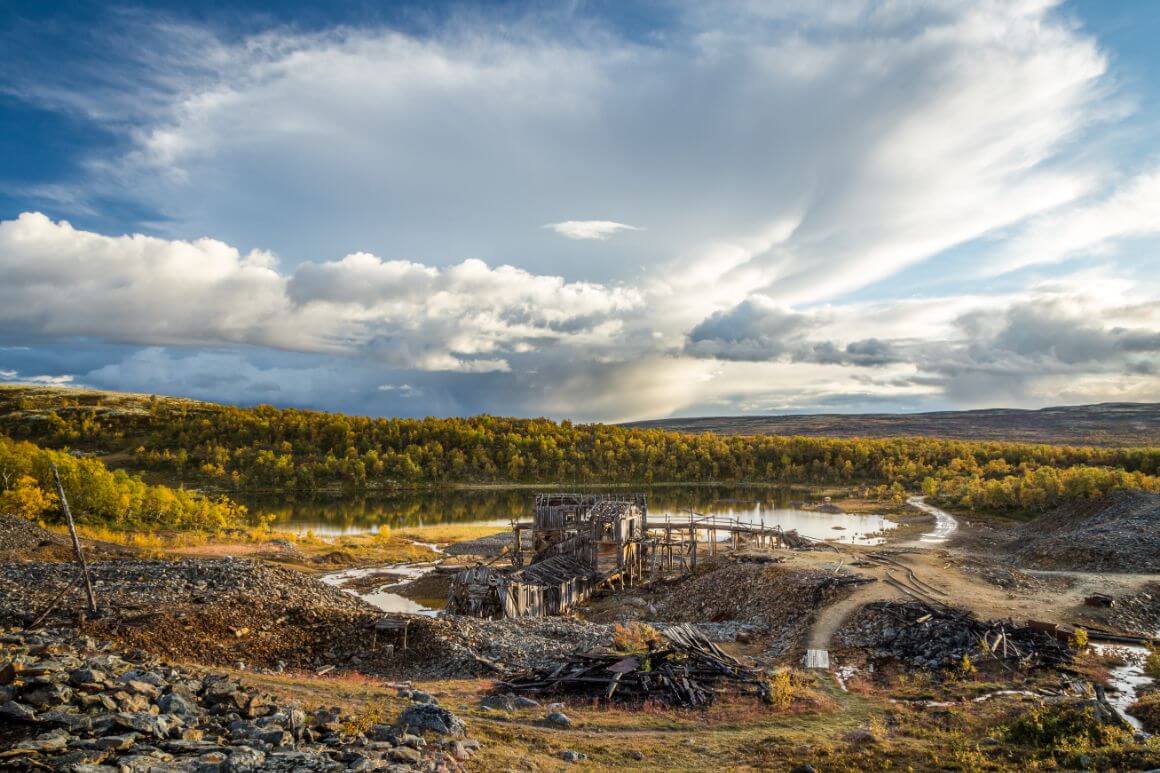
Hiking meets history in this multi-day, blue-marked trail that takes you from Roros to Femundsmarka!
The Malmveien Historical Trail may be a relatively new hike, but it packs a punch. The trailhead is in Roros, a former mining town that’s even earned itself a spot on UNESCO’s World Heritage List.
Various self-catering cabins are peppered along this point-to-point trail. You’ll also find several display boards with information about the Sami cultural monuments, traps, and Stone Age settlements that you’ll experience along the way. This definitely is a summer hike, so you may wish to visit between June and August.
If you don’t want to hike for three days, rest assured that you can always explore sections of the historical trail as part of a day hike!
The first leg of the journey takes you from the Roros Station to Marenvollen, where you’ll find a self-service cabin. During this part of the hike, you’ll cross through various landscapes, including hilly terrains, slag heaps, and a river.
Day 2 is a bit more demanding since you’ll be navigating a mountainous path that snakes up the northern side of the Tamneshøgda peak. A second ascent awaits after crossing the stream that cuts between the mountains Gjetberget and Hestfjellet. Take a moment to savor the views of Vigelen and Feragsfjellet before continuing your trek towards Gjetsjøen Lake, which overlooks ancient chrome mines.
On the last leg of the hike, you’ll cover around 17 km from Fjølburøsta to Langen. No hilly terrains here, though: you’ll walk along a well-maintained road until you reach the bridge over River Feragselva. From there, the historical trail continues until the Langen guest house.
- Length: 48.6 km
- Duration: 3 days
- Difficulty: Average
- Trailhead: Roros Station, 62°34’29.3″N 11°22’44.7″E
7. The Nordkalottruta Route – The Toughest Trek in Norway
If you’re in the mood for a hardcore adventure that’s truly unique, you’ll be glad to learn that this is one of the best long-distance hikes in Norway!
Just a heads-up though: this trail will see you through some difficult conditions with extreme weather, so this definitely isn’t something for first-time hikers. This is the type of hike that you don’t want to undertake alone. Meticulous planning is required and you absolutely need to arm yourself with high-quality weatherproof gear, as well as a sturdy tent. Remember: safety first!
Also known as the Arctic Trail, Nordkalottruta does entail border crossings since it takes in a chunk of Finnish Lapland and Arctic Sweden.
As far as accommodation is concerned, you’ll find several huts that are open from late June to early September on the main trail. Some huts are unstaffed, so you’ll need to carry your own food and supplies. There are a few remote sections where you’ll need to pitch a tent for the night. Campfires are allowed, and water is available on the route.
Expect rough conditions with sporadic way-markings, river crossings, high-altitude mountain ascents, and bogs. You’ll cross through just about every terrain type, including rocky paths, open grasslands, snowy plateaus, and vertiginous mountain trails.
The rewards are plentiful, though, since Nordkalottruta is known for its desolate beauty marked by deep blue lakes, thick birch forests, and the exhilarating sense of completely immersing yourself in the Arctic. Keep your eyes peeled for wildlife like reindeer.
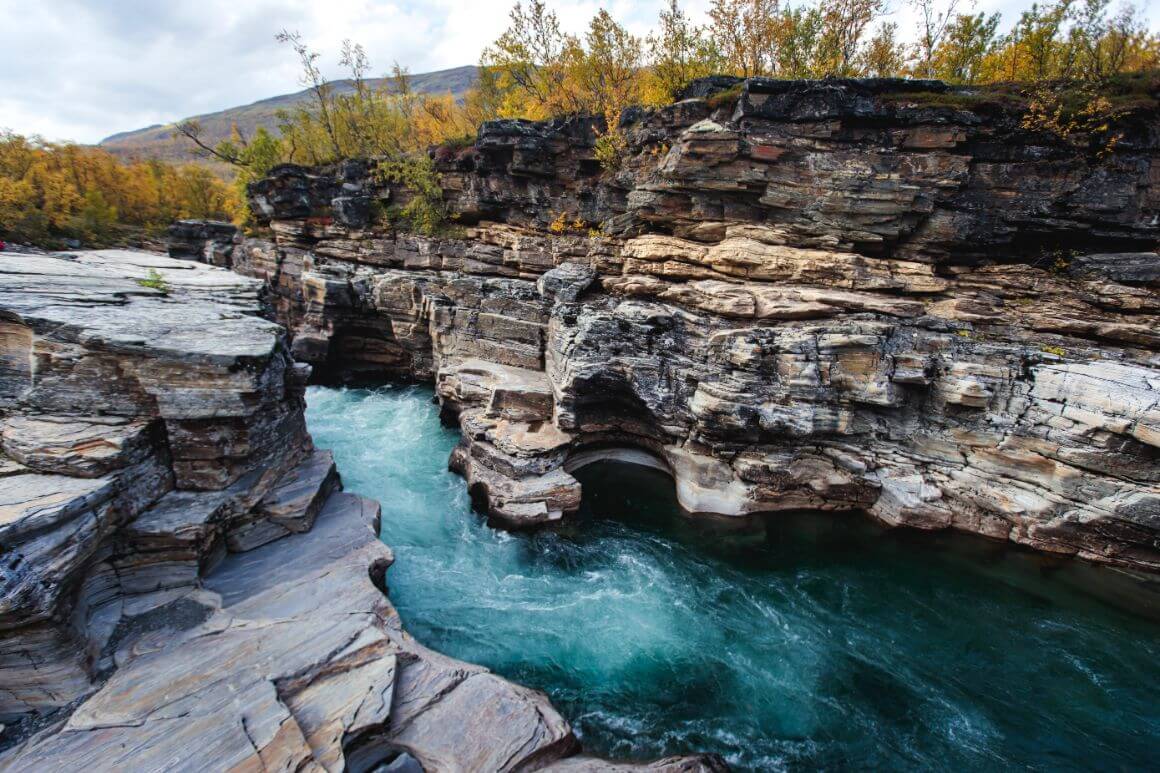
The trail starts off in Kautokeino (northern Norway) and ends in Sulitjelma (Sweden). Along the way, you’ll pass through the Narvikfjell and Sulitjelmafjellet areas as well as the Padjelanta, Abisko, Reisa, and Ovre Dividal National Parks.
- Length: 800 km
- Duration: 45 to 50 days
- Difficulty: Very difficult
- Trailhead: Kautokeino, 69°05’37.9″N 23°04’33.9″E
8. Kjeragbolten
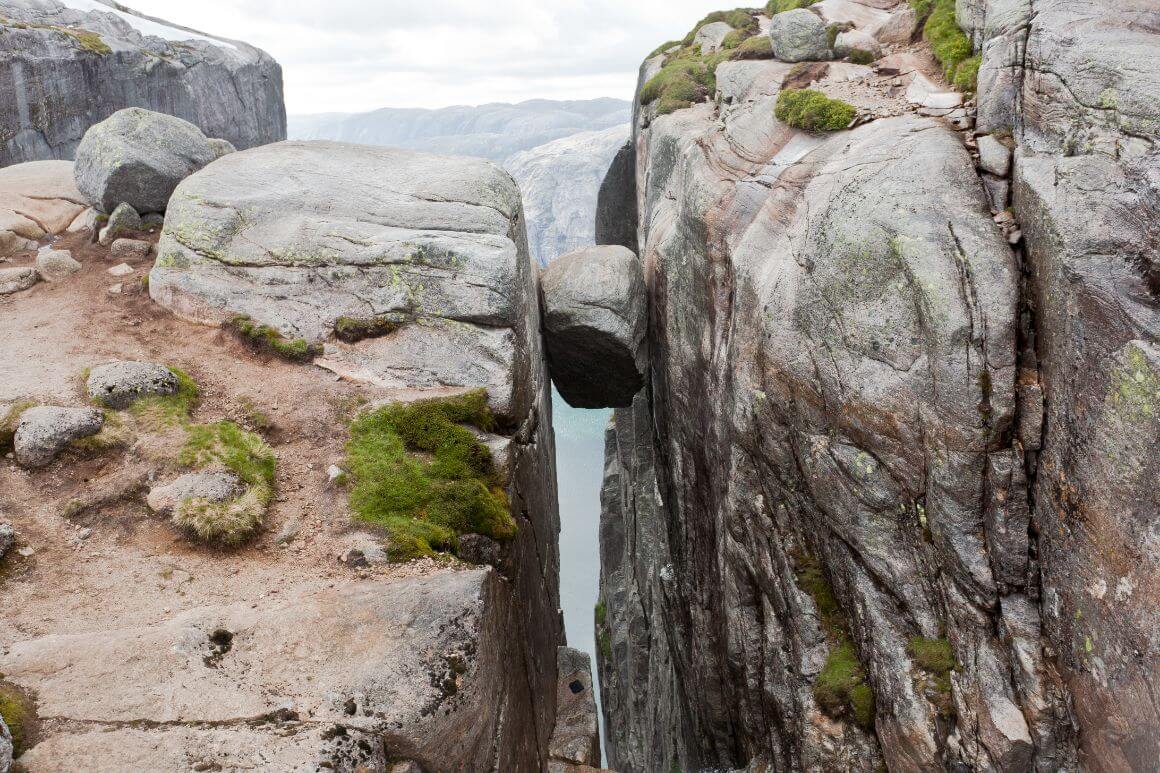
We simply can’t end this list of best trails in Norway without mentioning Kjeragbolten. This is a site that’s been heavily popularised thanks to the unique hanging boulder that’s crammed in a narrow crevice between two cliffs.
As far as boulder hikes are concerned, this one is certainly among the most popular so it’s not unsurprising to see a bit of a crowd in summer. Like virtually all hikes in Norway, Kjeragbolten is best explored during warmer weather (June through September). Don’t even bother attempting this hike in winter because the road is often closed due to snow. It’s best to stick to some of the nearby ski resorts instead.
Whilst you don’t actually need any climbing skills to attempt this hike, the trail does feature three arduous climbs. Chains are available in the steeper areas. On rainy days, you really want to have a super steady step since the descent can be very slippery- something that I learned the hard way!
The second climb takes you through a lush valley where you can even spot some sheep gazing in the distance. This section of the hike is quite short, but it’s also the steepest. You’ll really need to hold on to the chains as you clamber up the rocks.
For me, the scary bit was reaching that iconic boulder. Stepping on that exposed ledge really requires a leap of faith, but it certainly makes for one hell of an experience – and one hell of a photo!
Owing to the sublime vistas that await at the top, this hike is certainly worth it, even if you don’t want to step on the boulder.
The trailhead kicks off from the Kjerag parking lot in Øygardstøl. There’s a fee of Kr 300 to park your vehicle there. This spot also has a restaurant and restrooms.
- Length: 12km
- Duration: 6 to 10 hours
- Difficulty: Average to Difficult
- Trailhead: Kjerag parking lot, 59°02’46.1″N 6°39’03.6″E
Where to Stay in Norway
Now that you’re all clued up on the abundance of trails in Norway and how to stay safe whilst navigating them let’s talk about all the great accommodation options that await! From Airbnbs to hostels in Norway, there’s plenty to choose from.
The first thing that you must know is that Norway houses the largest public hut system in the world since hiking is practically a way of life for the locals! Over 500 self-service and staffed cabins are scattered over the country, all managed by the Norwegian Trekking Association.
Staffed lodges feature various types of amenities, including hot showers, prepared meals, electricity, and shared rooms with 2-4 beds. These lodges are generally found in higher-use trekking areas. Expect to spend around Kr 740 ($85) per night for a private room, complete with dinner, breakfast, and a bagged lunch.
Are you hiking on a budget? Then you can always consider staying at a DNT self-service cabin. These no-frills cabins aren’t staffed and don’t have running water or electricity (candles are used instead). On the plus side, they only cost around Kr 245 ($27) per night.
As awesome as they are, these cabins are generally located in remote areas. Travelers who want to check out all the awesome attractions in Norway may wish to base themselves in a city and commute to the trails from there.
For example, you’ll find plenty of awesome Airbnbs in Bergen, a stunning city that’s surrounded by fjords and mountains. A UNESCO World Heritage Site, Bergen also boasts proximity to one of the biggest glaciers in Europe.
You’ll also find heaps of great accommodation options in Oslo, Norway’s sprawling capital city. This would be a great home base for travelers looking for off-the-beaten-track adventures.
What to Bring on Your Hike in Norway
I’m sure you’re super stoked to head out there and hit those incredible trails in Norway, but before you do, why don’t we go through everything you’ll need for your hiking trip?
After all, having the right equipment on the trail isn’t just for comfort: it can literally mean the difference between life and death. It’s no secret that Norway has glacial winters, so if you’re venturing out then be prepared with several layers, a waterproof jacket, and thermals.
Regardless of the season, appropriate footwear is extremely important when tackling the paths. A sturdy pair of hiking boots with a trusty grip can make a huge difference in terms of comfort!
Speaking of comfort, it’s always a good idea to opt for a backpack with even weight distribution. Once you select your pack, fill it with snacks, mosquito repellent, sunscreen, and a first-aid kit.
It goes without saying that you absolutely need to stock up on water, even if you’re hiking through colder Arctic areas. For multi-day hikes, you can also consider getting a good-quality filter water bottle that’ll allow you to drink from virtually every source!
Longer and more difficult hikes mean more gear but remember to focus on quality. It’s pointless to stock up on overly cheap, crappy stuff- only to have them fail you when you need them the most.
Here’s a list of the essential gear you may wish to consider for your hikes:
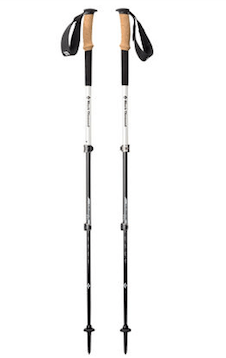
Black Diamond Alpine Carbon Cork
- Price > $$$
- Weight > 17 oz.
- Grip > Cork

Petzl Actik Core Headlamp
- Price > $$
- Weight > 1.9 oz
- Lumens > 160

Merrell Moab 2 WP Low
- Price > $$
- Weight > 2 lbs 1 oz
- Waterproof > Yes
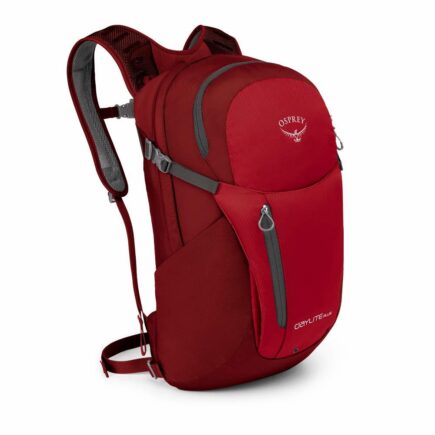
Osprey Daylite Plus
- Price > $$$
- Weight > 20 oz
- Capacity > 20L

GRAYL Geopress
- Price > $$$
- Weight > 16 oz
- Size > 24 oz
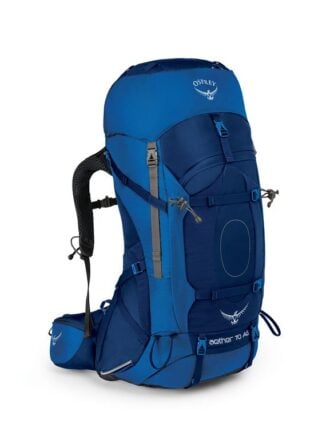
Osprey Aether AG70
- Price > $$$
- Weight > 5 lbs 3 oz
- Capacity > 70L

MSR Hubba Hubba NX 2P
- Price > $$$$
- Weight > 3.7 lbs
- Capacity > 2 person
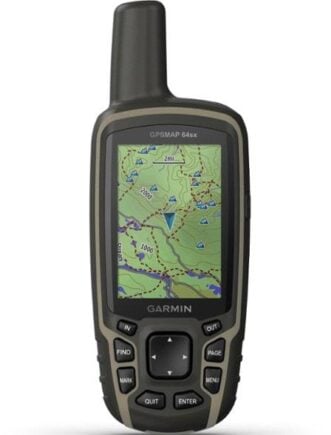
Garmin GPSMAP 64sx Handheld GPS
- Price > $$
- Weight > 8.1 oz
- Battery Life > 16 hours
Don’t Forget Your Norway Travel Insurance
ALWAYS sort out your backpacker insurance before your trip. There’s plenty to choose from in that department, but a good place to start is Safety Wing.
They offer month-to-month payments, no lock-in contracts, and require absolutely no itineraries: that’s the exact kind of insurance long-term travellers and digital nomads need.

SafetyWing is cheap, easy, and admin-free: just sign up lickety-split so you can get back to it!
Click the button below to learn more about SafetyWing’s setup or read our insider review for the full tasty scoop.