The Broke Backpacker is supported by you. Clicking through our links may earn us a small affiliate commission, and that's what allows us to keep producing free content 🙂 Learn more.
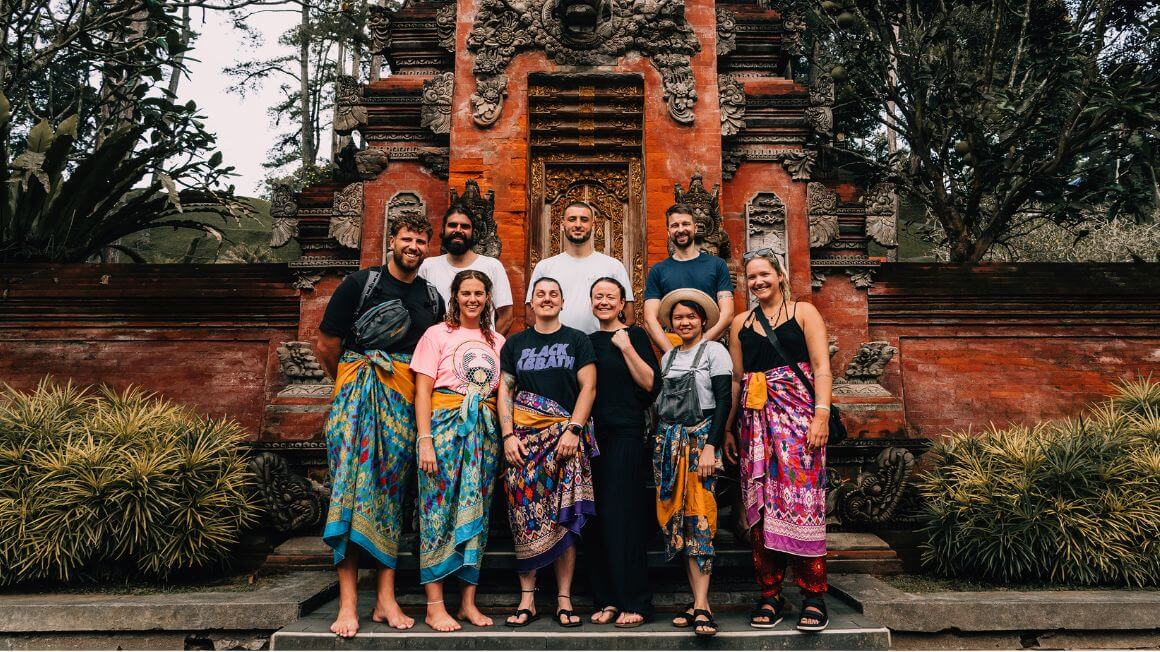
Are you done with the Bali crowds? Want to whet your appetite with something with a bit more of a thrill? Then allow me, my friends, to introduce to you the monster that is Mount Rinjani — an active volcano sitting pretty at 3,726m over Lombok, Indonesia.
As a longtime volcano enthusiast but total hiking rookie, Rinjani wasn’t exactly on my radar when I first landed in Indonesia. I was just running off of the back of a three volcano streak in Java and Bali when I first heard about it.
So off I headed to Lombok, ready to take on anything. After diving into research, I realised that this was an entirely different beast to the Mount Batur frequented by tourists looking to sweat off a couple Bintangs in the morning. Lucky for me, the national park shuts down for three months due to the rainy season—I’d had a narrow escape.
So why, nine months later, did I willingly return to finish what I started? A mix of destiny and sheer masochism, I suppose. It was the hardest thing I’ve ever done, and I’m damn proud of it—but there was a lot I wish I’d known before tackling this trek.
So, let me take you through the highs, the lows, and everything I wish someone had told me before I learned the hard way. This is the ultimate guide to hiking Mount Rinjani.

Photo: @taya.travels
The Broke Backpacker is supported by you. Clicking through our links may earn us a small affiliate commission, and that's what allows us to keep producing free content 🙂 Learn more.
Unlock Our GREATEST Travel Secrets!
Sign up for our newsletter and get the best travel tips delivered right to your inbox.
- What the Hell is Mount Rinjani Anyway?
- What to Expect on Mount Rinjani?
- What Type of Tour Should You Book?
- How to Get to Mount Rinjani
- What to Pack for Your Mount Rinjani Trek
- Hiking Mount Rinjani – A Day-by-Day Breakdown
- What I Wish I Had Done Differently
- Recommendations for Where to Stay After Hiking Mount Rinjani
- FAQs on Hiking Mount Rinjani
- What to Bring on Your Mount Rinjani Hike
- Final Thoughts on Hiking Mount Rinjani
- Buy Us a Coffee!
What the Hell is Mount Rinjani Anyway?
If you’ve spent any amount of time in Indonesia, you know that what makes the terrain so beautiful is its volcanoes. And if you’ve been to Bali, you’ve probably heard of and/or hiked Mount Batur. It’s most people’s entryway to volcano climbing in Indonesia, and if you’re looking to escape the Bali crowds, Mount Rinjani in Lombok feels like a natural progression. But boy, oh boy, is it a big jump up.
Standing at 3,726 metres, Rinjani is the second-highest volcano in Indonesia, just behind Mount Kerinci in West Sumatra. It’s got everything you’re looking for in a volcano trek—insane views, lakes, hot springs and even a mini volcano inside the crater called Gunung Barujari, which likes to erupt every now and then.
On a clear day, you’ll get insane views of the Gili Islands and even Mount Agung in Bali—but be prepared to graft for it… Rinjani might not be the tallest in the game, but it’s still an absolute monster to climb.
What to Expect on Mount Rinjani?
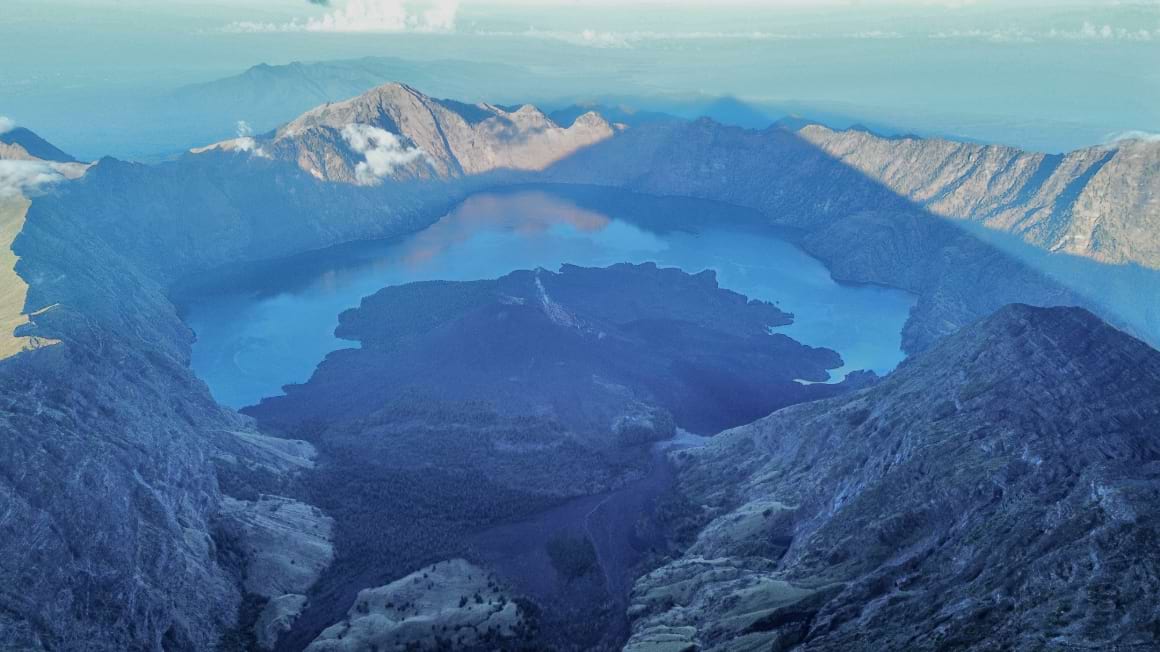
Photo: @taya.travels
The Climb
Rinjani doesn’t mess about. The real killer isn’t just the height—it’s the relentless elevation gain and knee-destroying descents. Over a couple of days, you’ll be hauling yourself up to the crater rim, scrambling to the summit, staggering back down to the crater, rock climbing down to the lake, then dragging yourself back up the other side of the rim before finally making your way down again. Sounds like a breeze, right?
The Terrain
You’ll cover a range of terrain, from beautiful grasslands around Sembalun Village and dense forests to Senaru Village and, of course, the infamous volcanic sand up to the summit. It’s what makes this trek so unique and one of the most famous in Southeast Asia. Every day throws something new at you—scenery-wise and suffering-wise.

Photo: @taya.travels
Wake Up Times
As with any sunrise hike, you gotta prepare yourself for some pretty hardcore wake-up times. Day one depends on where you start the tour, whether that be from the local village or elsewhere in Lombok.
The big boy day, day two, consists of a start time of anything from 2-3 am. For me, I got up by 1:45 am and STILL missed the sunrise because of my slow and steady winning-the-race attitude (between you and me, I was fighting for my life), so factor in your time accordingly.

Photo: @taya.travels
If you’re an absolute speed demon you might be able to wangle a cheeky thirty-minute lie-in and start later. Just make sure you don’t get to the summit too early! It’ll be dark and, more importantly, fucking freezing. You’ll soon feel the chill and want to get down and moving ASAP, so make sure you spend those crucial minutes up on the summit in the light and enjoying the views you’ve worked so hard for. Pitch-black and freezing your arse off at the top isn’t the victory moment you’re after.
If your trek runs longer than two days, the final morning is a leisurely 6 am start. My group, running purely on willpower and spite after a brutal second day of wind and exhaustion, decided to bail even earlier just to get the hell off the mountain. The faster you hobble your way back to civilisation, the sooner you’ll be face-down by the pool with a Bintang, basking in your hard-earned glory.
What’s Included in Trekking Tours?
By law, you have to trek Mt Rinjani with a guide and to be honest, you wouldn’t want to do it without one anyway. Not only does it give this region a well-needed boost in tourism, but the locals are experts for a reason. Not only will your guide show you the way and make sure the itinerary goes smoothly, but they’ll also motivate you to haul your ass up to the summit, and safely.
There are a number of operators offering Mt Rinjani tours and to be honest, some of them truly suck. For good, English peaking guides and plentiful helpings of delicious food, I recommend this one that goes via the Torean Route. Its worth booking ahead to ensure you can bag your slot and not have to risk going with a lesser guide.
Honestly, I was the straggler of the group, and my guide and I soon became absolute besties. I would not have made it through the highs and lows of the three days up that mountain if it weren’t for him.
Along with your guide, you get the unsung heroes of this whole operation: the porters. Even if you could climb Rinjani yourself, I’d go with a tour time and time again just for the privilege of being able to hand off the gruelling task of making sure all the tents, food and gear for three days get to camp.
These guys are absolute weapons—whilst I was crying on the side of the paths by day two, they were speeding past me, in flip flops, 30kg on their backs with a cig on the go.

Photo: @taya.travels
Nothing makes you feel more pathetic than fighting for your life whilst the porters overtake you and are singing tunes on the way up. They’re absolute legends. If I can stress one thing to you: TIP. YOUR. PORTERS. They’re the unsung heroes, and their work is brutal.
All tours include all your camping gear, food and water. As with any tour, the more you pay, the more you get. In true broke backpacker form, I acquired a number through the backpacker grapevine that led me to, conveniently, the cheapest Rinjani tour that I could get my hands on. The plus side was a great backpacker crowd, which made it super social—something that was important to me.
If you can look past the broken zips on the sleeping bags and the less-than-Michelin-starred food (we are on the top of a volcano, after all), then it may well be fine for you. Neighbouring camps who had clearly paid more for the experience looked like they got an absolute feast on *gasp* actual camping chairs.
If you’re after a more polished experience, you can drop a bit more cash for better food, extra comforts, and tents that won’t be airborne at the slightest breeze. But yeah, if I’m living the backpacker life, you can be sure as hell I’ll eat my dinner on the floor without complaint. Especially with these views.
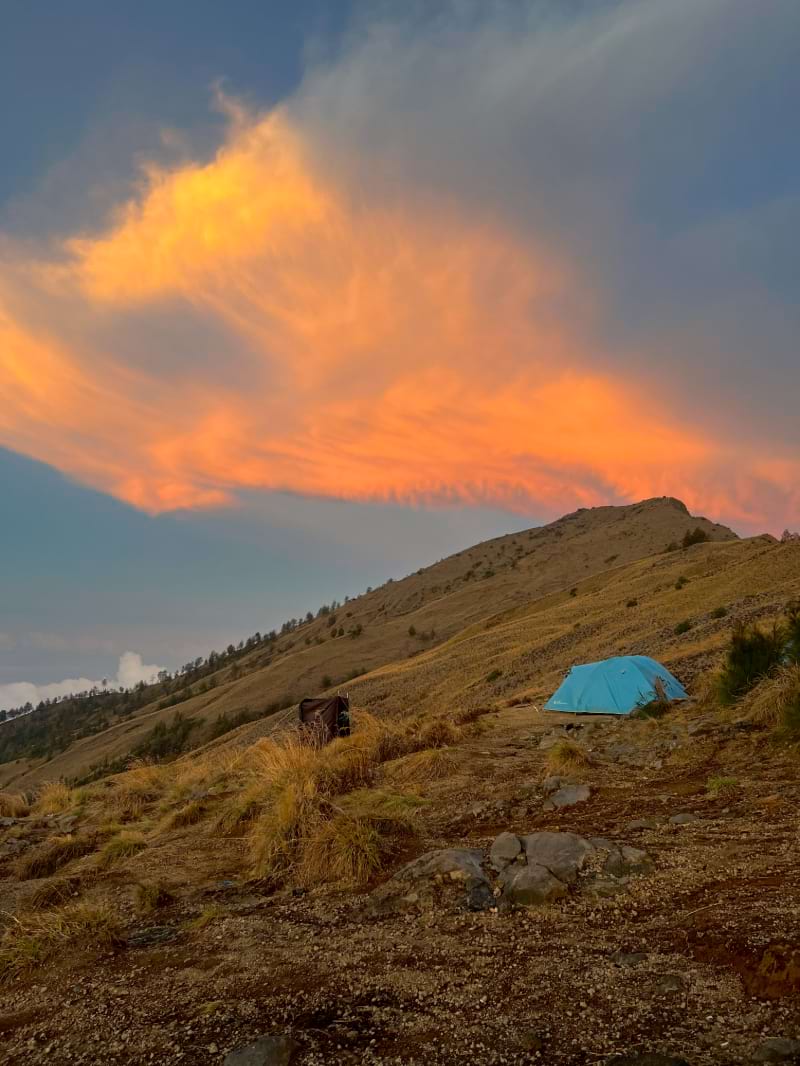
Photo: @taya.travels
When is the Best Time to Trek Mount Rinjani?
Rinjani National Park closes for three months each year for the rainy season, from January 1st to April 1st. The shoulder months on each side can still see their fair share of rain, so make sure you plan accordingly.
Lombok in Dry Season
I had visited Lombok the year prior, after what I had heard was a brutal couple of months of rain. I must admit, everything was a lot more beautiful then. But hey, it might be those rose-tinted glasses you wear after visiting somewhere for the first time.
Saying this, I would say that finding that sweet spot between going after the wet season at a time when you’re not actually that likely to encounter the rain would be the best time to visit Lombok to enjoy the lush green views heading up to the crater.
Here’s a month-by-month breakdown of the best times to do the Mt Rinjani trek:
- May to June: Fresh greenery from the rainy season, fewer crowds, and clear skies.
- July to August: Peak season, best weather, but expect more trekkers.
- September to October: Still great conditions, with fewer people.
- November to December: Wetter conditions start creeping in, but it’s still doable.
The weather changes fast, and one minute you’re enjoying epic views, the next you’re completely swallowed by mist. Hiking through a literal cloud makes for eerie hiking conditions, but it’s all part of the experience.
As a Brit, I’m often used to experiencing all four seasons in one day—just make sure you pack for them! On the same token, just because you plan to do the trek in peak dry season does NOT mean you shouldn’t prepare for rain. Even if it remains dry on Lombok itself, it’ll often feel like hiking through the rain when you go through clouds, but it’s pretty damn cool in my humble opinion.
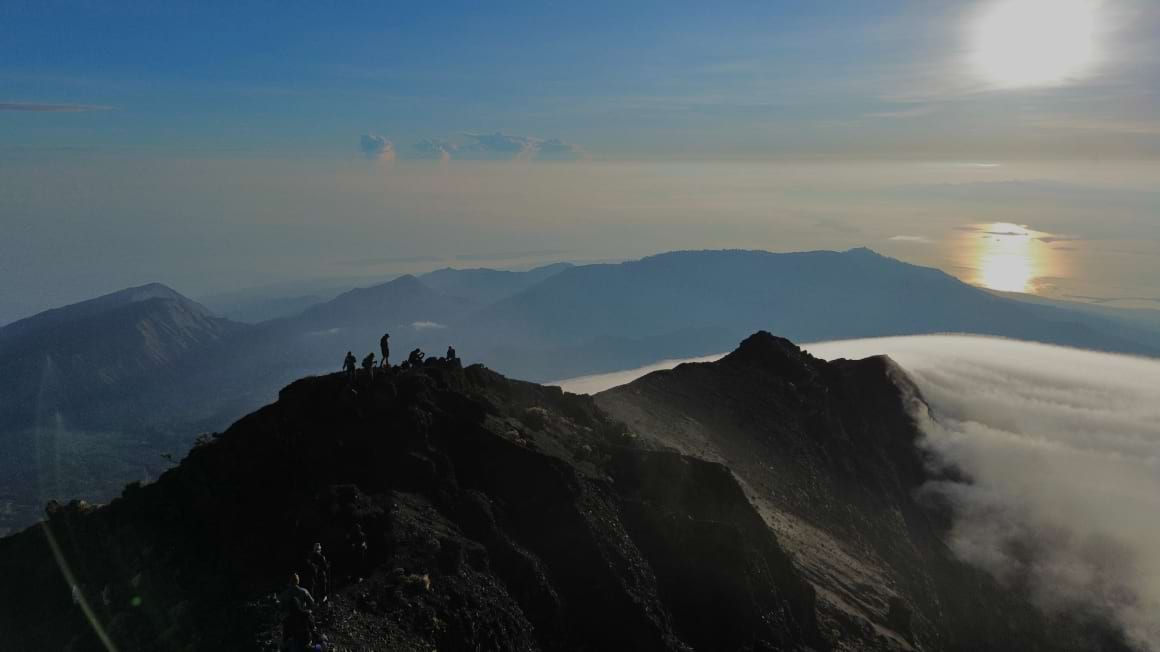
Photo: @taya.travels
What Type of Tour Should You Book?
The most important thing to consider when looking at tours is how many days you want to spend on Mount Rinjani. If just getting up to the summit is your goal, then maybe you just want to do a 2D1N tour.
The 3D2N is arguably the most challenging as not only do you go up to the summit, but down to the crater lake and up to Senaru crater rim. Anything longer than three days follows the same route but with way less hiking per day and more time to chill.
I opted for the 3D2N tour as I was really interested in tackling the crater lake and hadn’t heard much of longer tours, BUT if I were to go back in time, I’d deffo do a longer tour. There was SO much hiking on day two, and considering it was already such a challenge, it definitely took a lot of enjoyment out of it for me.
Photo: @taya.travels
Having an extra day to split up the hike down to the crater lake and back up to the crater rim would’ve changed my experience. But, hey, if you’re short on time or are up for the challenge, I would still recommend it, but don’t say I didn’t warn you!
How to Get to Mount Rinjani
Your journey to get to Mount Rinjani will depend on where you’re coming from, of course. For me, I was already on Lombok, kicking it back in Kuta Lombok in preparation for what was to come.
From Lombok
Because I had booked my tour before (which I highly recommend), my tour provider offered free pick-up from certain points in Lombok, which included Senggigi, Mataram and the Bangsal harbour area. Unfortunately, Kuta was further from their free pick-up zones, so I had to jump in a cab up to the closest city, Mataram, for my driver to pick me up.
I actually learned after that other people on my tour also came from Kuta and offered to pay a lil extra to get picked up directly from Kuta, saving themselves a bit of money and hassle—I’d definitely say it’s worth asking your tour provider about this!
From Bali + the islands
If you’re coming from Bali, the Nusa Islands or the Gili Islands, I recommend jumping on a boat over to Bangsal Harbour in Lombok. From there, you can have your tour provider pick you up or take a taxi up to northern Lombok to one of the villages where you start the trek. Just as a word of warning that Grab and Gojek are few and far between on Lombok, so be prepared to haggle a price for this.
I recommend arriving at least a day or two in advance of your trek, especially from Bali. The drive up from the pier to northern Lombok can be a good couple of hours in itself, and you don’t want to be knackered before the hike even starts from travelling!
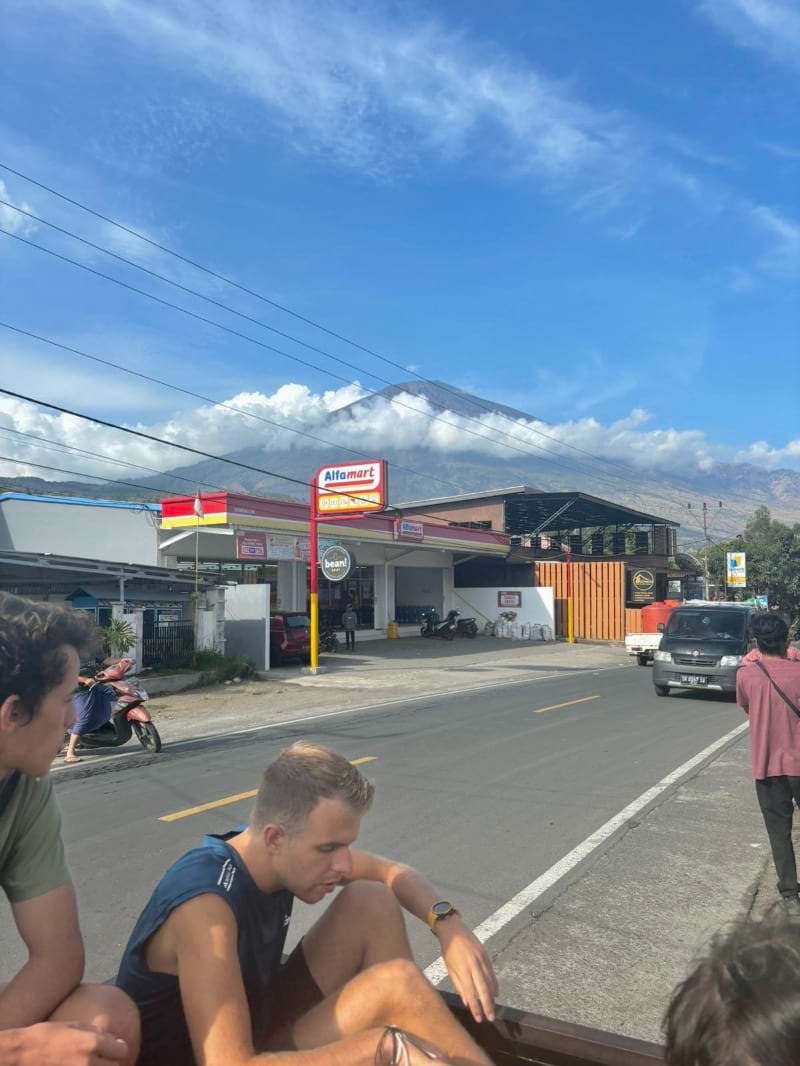
Photo: @taya.travels
I met a couple of people who made their own way up to Northern Lombok a couple of days before the trek to explore the surrounding region. It’s home to some beautiful waterfalls that don’t get nearly half the footfall of the most popular spots in Bali and are way more impressive.
I really wish I had done this, but unfortunately, the weather was not on my side. I wish I could say that I did it after the trek, but honestly, you couldn’t get me on a boat to the Gili Islands fast enough. A well-needed chill-out was in order!
From Further Afield
If you’re flying in just to hike Mount Rinjani or coming from further afield in Indonesia, you’ll be glad to know that Lombok has its own international airport. You can grab a domestic flight from Jakarta, Yogyakarta and Bali, to name a few, along with a couple of international flights if you’re coming from other parts of Southeast Asia.
What to Pack for Your Mount Rinjani Trek
Okay, so you’ve decided what tour to do and have sorted transport to get to Lombok—now what the hell do you pack?!
The aim of the game for packing for your Rinjani trek is the delicate balance of packing as little as you can, whilst not scrimping on the essentials. Everything you pack you’re going to have to carry on your back for 2+ days and, trust me, that bag feels heavy pretty damn quick…

Photo: @taya.travels
You’re going to want your own hiking poles, a solid coat, gloves, and a headlamp. If you’re a budget backpacker like me, they’re probably not stashed in the depths of your SEA backpack, but no stress—there’s always somewhere to rent them. My tour provider made it easy by renting everything out to us the day before the hike. I rocked up with none of the gear and no idea, clearly.
One piece of advice: bring a poncho. I ditched my hefty rain jacket (too heavy to carry) and was thankful for the extra length and lightweight vibe of the poncho when the rain came down. You’ll get soaked no matter what, so you might as well go for maximum coverage with the least weight. If your rain jacket’s a good one, by all means, pack it—my fake North Face I got in Vietnam for $5 wasn’t near and dear to my heart, as you can imagine.
From clothes to secret hidden gems, learn from my moments of pure genius and mistakes.
The Ultimate Mount Rinjani Packing List
Clothing
- A cap – when it’s hot, it’s hot! Protect your face with a cap or shawl over your head.
- Gloves and a hat – when it’s cold…it’s cold. This is a non-negotiable up to the summit. I didn’t bring a hat, and my ears were paying the price for it.
- Warm layers – you’ll need these at night, especially. Sleeping bags are thin, and when it’s windy up at camp, you’ll feel it. You’ll also need them for the summit, so make sure you invest in some decent thermals like these.
- Plenty of socks – I brought all the pairs I had to my name (3, in case you were wondering, the backpacker life, eh?) and it still wasn’t enough, thanks to rainy periods. Wet socks and hiking are not my most favourable combo…
For the Hike
- A comfortable backpack – no more than 30- 40l; waist straps are a bonus to alleviate some of the weight on your shoulders. You can’t go wrong with the Osprey Sportlite 25.
- Hiking Boots – or good, solid comfortable trainers. Salomon Hiking boots are good for both men and women.
- Waterproof Cover – Keeps your stuff dry if it rains.
- A power bank – fairly self-explanatory when you have no power for 2+ days
- Electrolyte Powders – Helps with energy and hydration.
- High-energy snacks – Nuts, protein bars, dried fruit, or chocolate.
- Relevant gear – Don’t go crazy on this one—it could make or break the practicality of that bag of yours on your shoulders. Personally, I couldn’t go up to Mt Rinjani and not pack my drone, and maybe you feel the same way about your camera gear. Just don’t be packing that iPad of yours; where you’re going doesn’t require Netflix.
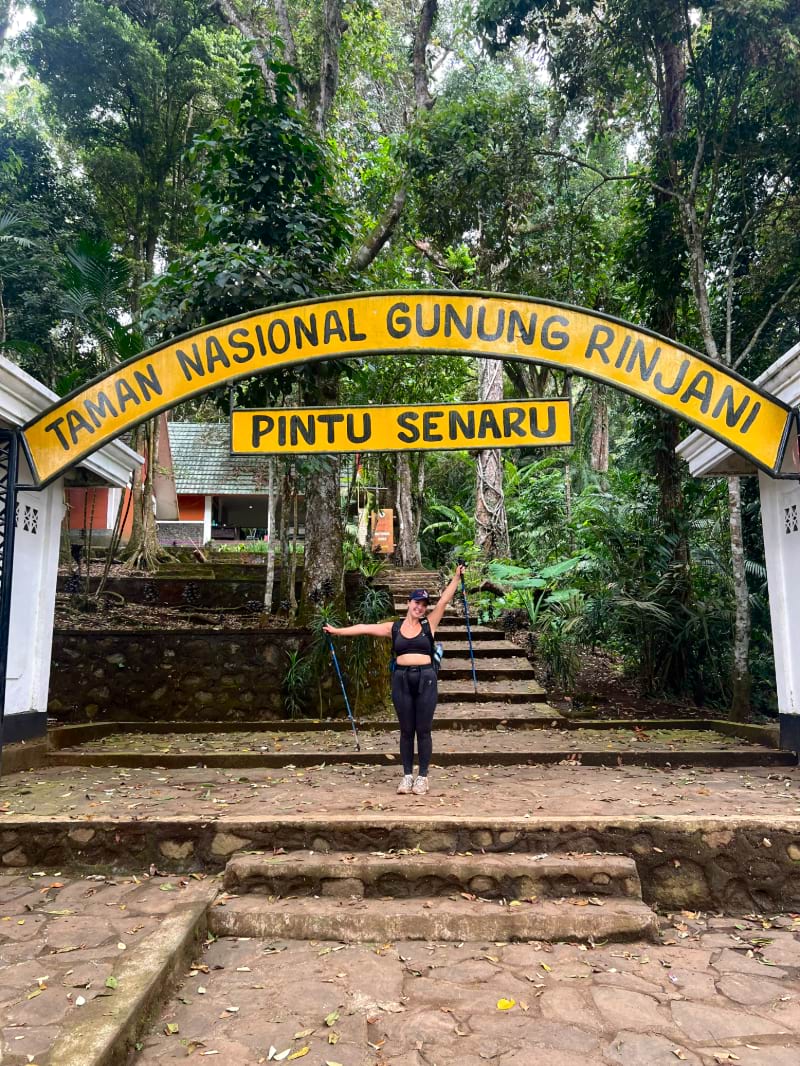
Photo: @taya.travels
For the Camp
- Sandals – I’d been told this before, but left them behind, thinking I’d save some space and massively regret it. Again, after a soggy couple of hours of hiking, I had no choice but to slip these wet shoes on and off once at camp. Having a pair of sandals means you can slip them on and off when needed.
- A travel pillow – this might seem like a bit boujey, but it is so, so worth it. Your body is going to be bits from the hike so the last thing you want is a crick neck from a crappy kip on the floor. This pillow is my ride or die, as it takes up next to no space. Just blow it up and enjoy that sweet, sweet luxury.
- Earplugs – camping on a volcano crater rim with hundreds of other people gets pretty loud. Who would ‘a thunk it? Sleep before these big days is pretty important so having decent earplugs like my trusty Loop Quiet means you can pop those suckers in and get some solid shut-eye.
Toiletries
- Wet wipes!!! – The toilets are questionable as it is, make sure you are stocked up on these bad boys. It also feels like a luxury to have a cheeky wet wipe shower after a day of hiking through mud and sand, as you’ll feel pretty grim by the end of the day. As always, travel and leave no trace, so make sure anything you use up there is taken back down with you.
- Hand sanitiser – Maybe it’s just me, but having slightly cleaner hands does wonders for my sanity
- Medication – Paracetamol, antiseptic cream and blister plasters all seem like the most obvious bits to bring. My absolute life saver, though, was my trusty Deep Heat. After a day of hiking, it was safe to say my back was in bits, and this baby absolutely saved me.
- Sunscreen – The sun at high altitudes is brutal.
Hiking Mount Rinjani – A Day-by-Day Breakdown
Alright, time to get into the real stuff. You’ve got the background, you’ve got the warnings, but what does hiking up Mount Rinjani actually look like? Here’s how it all played out when I took on the challenge—blisters, breakdowns, and all.
Rinjani Trekking Guide: Day 1: Sembalun Village (1156m) to Sembalun Crater (2639m)
Getting Prepared
The first day started with an early rise from the homestay of the trekking company, as we had a forty-minute drive ahead of us to get to Sembalun Village. Classic me forgot her cap, and the sun was beating down on us already at 8 am. So I took my haggling skills over to a local selling souvenirs and bagged myself a little Rinjani cap from a local stall—something to remember from the absolute suffering I was about to endure.
Once registered, we took the obligatory optimistic “before” photo at the starting gates, blissfully unaware of what awaited us. The first day took us through grasslands up to the Sembalun Crater. As I had already been in Lombok for a week by that point, I was aware of how dry the terrain on the island had looked, and I’m sure they were ready for a well-needed rainy season the month after.
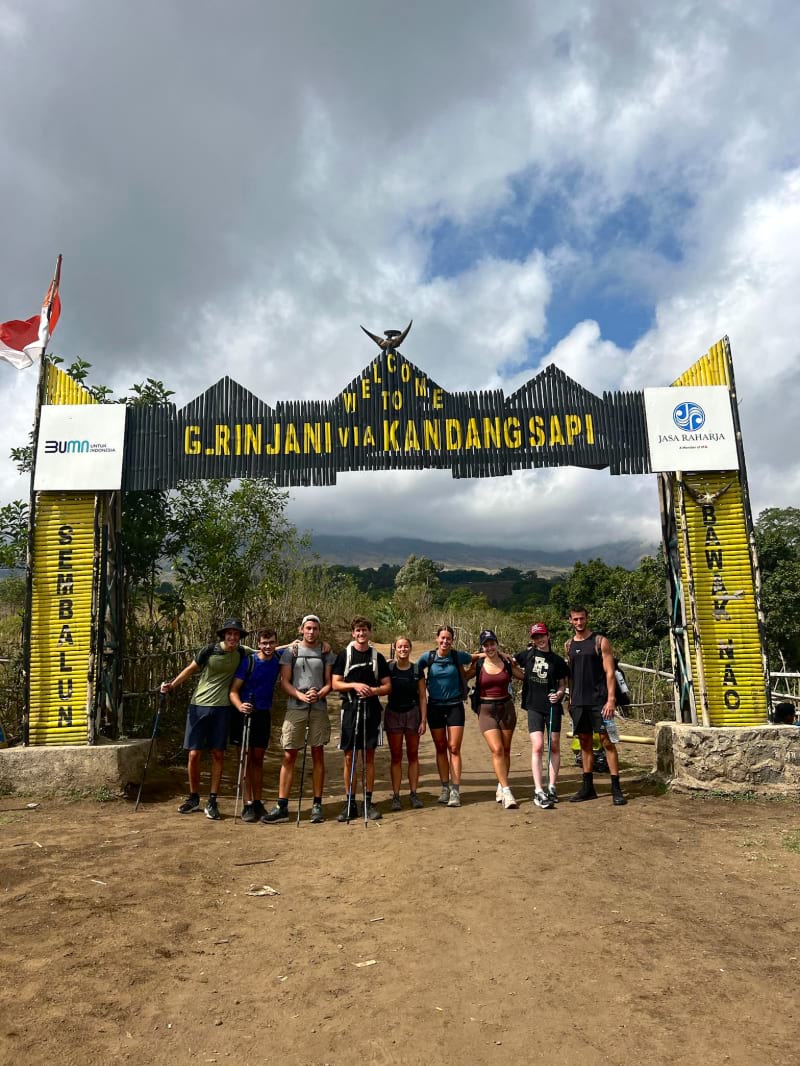
Photo: @taya.travels
Pos 1 to Pos 3
The hike up to the camp is split into three positions. By Pos 1, I was feeling fresh, probably how people feel in the first mile of a marathon, full of misplaced confidence. Naturally, that didn’t last.
Just after Pos 2, the sweat was pouring, and reality started setting in. Thankfully, we stopped for lunch, and even better, there were little stalls selling snacks and hot drinks. One even had a “Starbucks” sign slapped on it, though I doubt the real Starbucks would be thrilled about the branding choice.

Photo: @taya.travels
The final push to camp is where things got spicy. For starters, we hiked straight up into the clouds—very cool in theory, less cool when the rain started lashing down. My poncho was about as useful as a wet tissue, so I just accepted my fate as a soggy gal with a bin bag draped over me. We were out of the wrath of the sun, at least.
The last hour was grim—my motivation tanked, the rain kept coming, and to make matters worse, my group had officially exposed themselves as certified Speed Demons, leaving me trailing behind in my rightful place as Group Straggler. Nothing for it but to keep plodding upwards.
Night One Camp
And what greeted us at camp? A whole lot of nothing. Thick clouds, zero visibility, and the realisation that my socks were destined to stay soggy for the foreseeable future. We flopped onto our camping mats, every muscle in protest, and tucked into dinner while debating whether we were having fun or just suffering in scenic surroundings. Then, like magic, the clouds started lifting. Sunset hit, and suddenly, the views became insane.
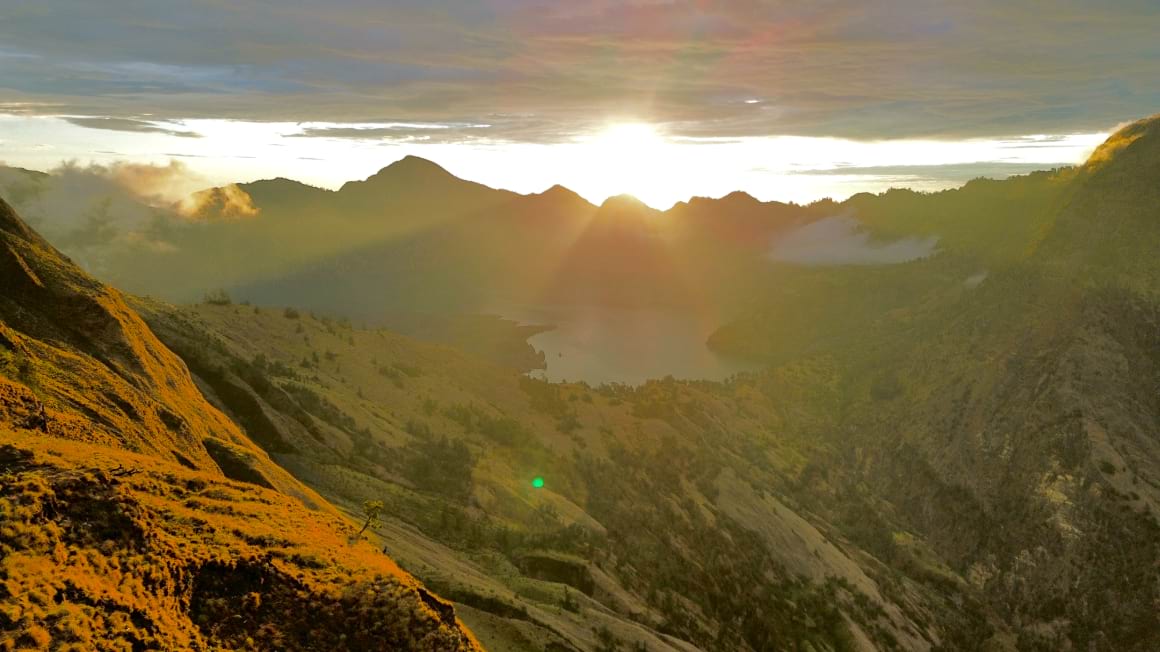
Photo: @taya.travels
For the first time, we caught sight of the summit—and what we’d be dragging ourselves up in just eight hours suddenly seemed vaguely terrifying. And let me tell you, it looked obscenely high for someone who had just been wrecked by day one. But there was no time to dwell. At the scandalously early hour of 7 PM, we crawled into our tents to get whatever sleep we could before the real ordeal began.
Day Two: Part One: Sembalun Crater Rim (2,639m) to Rinjani Summit (3,726m)
Showtime, baby
I’d love to say I woke up at the crack of dawn, but that would have been a dream—at the sweet, sweet hour of 1:45, I woke up to a feeling of dread in my stomach that can only be compared to the morning of an exam or a big trip. The guides came round to each of our tents to offer coffee and toast for us to lavish in the last remains of warmth we’d have in our tents.
I was so cold in the night that I slept in the only long clothes I had. Some might call it sad; I like to think of it as the ultimate hiking hack: pre-warmed clothes for the hike ahead. I was too scared to feel tired at this point, but that was all to come. I couldn’t quite pinpoint the source of my fear—there was never a thought in my head that I COULDN’T do the hike. So if ability wasn’t it, maybe it was just the sheer challenge looking at me in the face and taunting me.
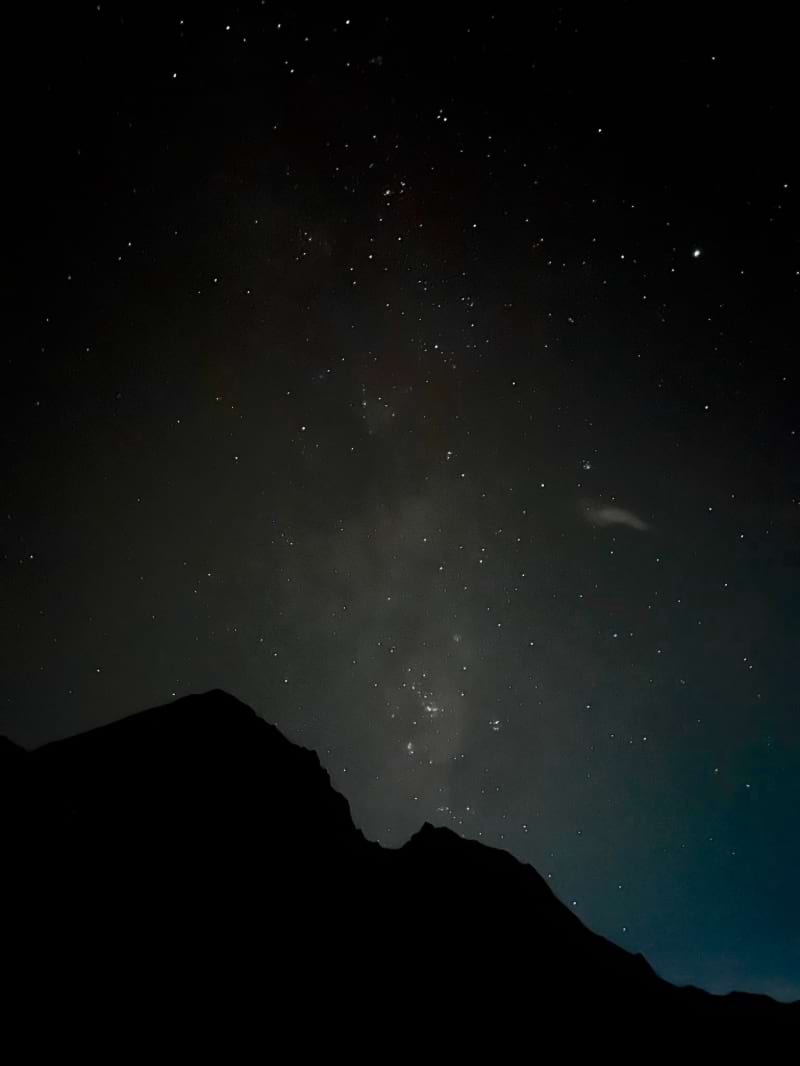
Photo: @taya.travels
Our guide had told us that the hike up to the summit was in three parts: the first was a pretty steep incline, which would make up nearly half of the elevation gain up to the summit. The second was mostly flat and relatively easy; this was the walk along the crater rim to get to the highest point of Rinjani. And the last part was the bit you’d expect: the real hike up to the summit. This part consists of an uphill battle with pure sand and a race to meet sunrise.
First Period
The first two hours were a sweat fest. Challenging, yes, but not anything I hadn’t done before. The terrain at this point was still a mix of rock and grasslands, so physically, it wasn’t too challenging. My body was still in shock from the early start, too tired to process what was happening. At this point, I wasn’t really thinking, just moving.
Second Period
When the ground finally started to level out, I felt a wave of relief that’s hard to describe—I must’ve hit the second part of the hike. The terrain switched to volcanic sand, and as I walked along the crater rim, I could really start to feel the cold. My group had long disappeared into the distance, true to their Speed Demon reputation, and I felt my motivation start to fade, especially knowing that the toughest part was still to come.
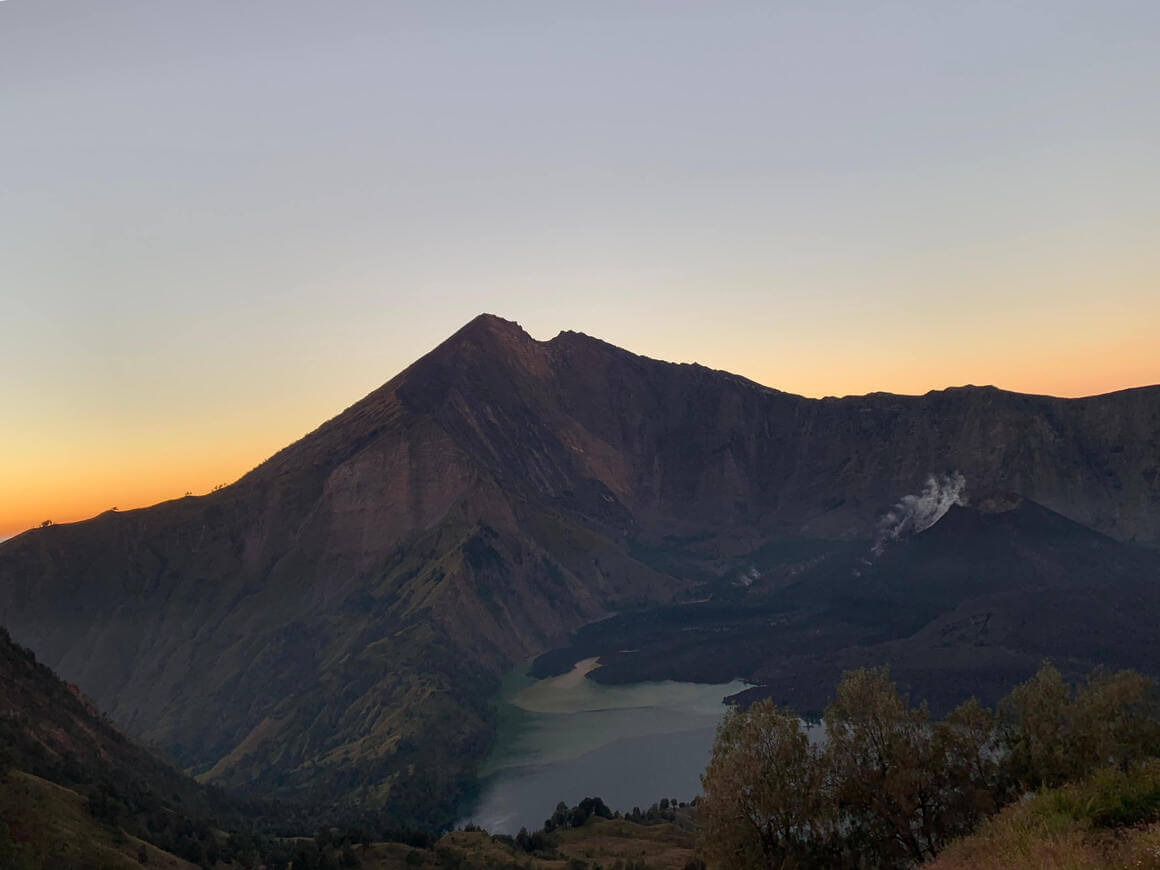
Photo: @joemiddlehurst
Third Period
As the volcanic sand combined with the rising elevation, I knew it was time for the real challenge: the final push to the summit. Breaks that used to happen every 20 minutes were now reduced to 5-minute intervals, and if my body had been numb before, it was wide awake now. Mentally, this is where it all started to fall apart, so I popped in my AirPods and cranked up some tunes.
With Red Hot Chili Peppers – Can’t Stop blasting (classic) and the encouragement from strangers telling me I was almost there, I had to lock TF in. Not that I had much choice—every single muscle in my body was screaming for me to stop, but turning around and heading back down never even crossed my mind. Reaching the summit was the only option at this point. I’d come too far to quit.
And finally…
The first glimpse of the summit flickered into view, giving me a fresh surge of motivation. It honestly felt like I was carrying myself up at this point—the terrain was basically a never-ending stretch of uphill sand. My arms were getting just as much of a workout with my hiking poles as my legs were. Soon enough, the summit was in sight and, with it, the sunrise. I let myself soak in those first few moments of sunlight before diving into the next half hour of my soundtrack.
The end was in sight.
I’d love to say it was a full-on Eye of the Tiger montage, but it was mostly me repeating to myself that I was nearly there while trying not to break down. I had seriously underestimated the mental side of this hike. It wasn’t just physical pain; it was constantly trying to placate yourself over and over again to keep going.
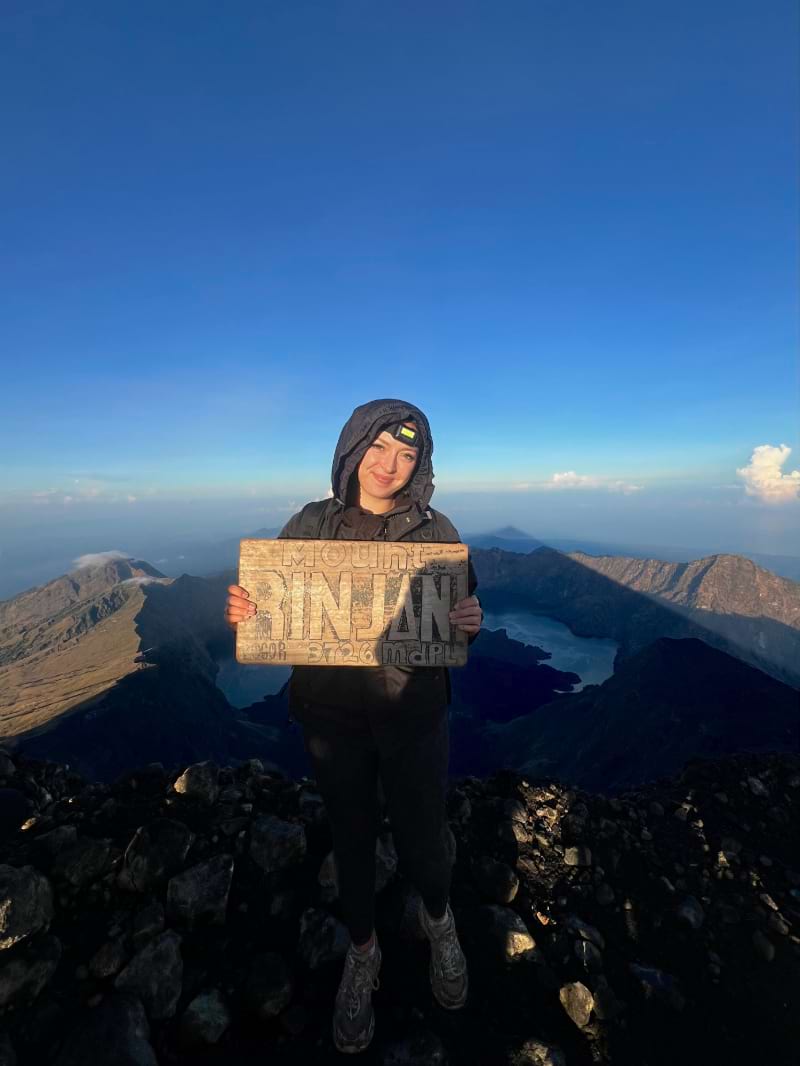
Photo: @taya.travels
Sure enough, the howls of my group, who’d been up there for over an hour, confirmed I had made it. But honestly? I wish I could say there was a massive wave of relief, but I was still completely in shock from the last four hours. Even now, looking back at pictures, everything feels oddly surreal, like it happened to someone else.
Sliding Back Down
And what doth rise, must surely fall. I’ve heard reports of this being the worst bit — the knee-shattering descents and shoes full of volcanic sand. For me? I was having an absolute blast. It was like skiing on your own two feet, only with the dangerous thrill of making sure if you fell, it wasn’t near the crater rim.
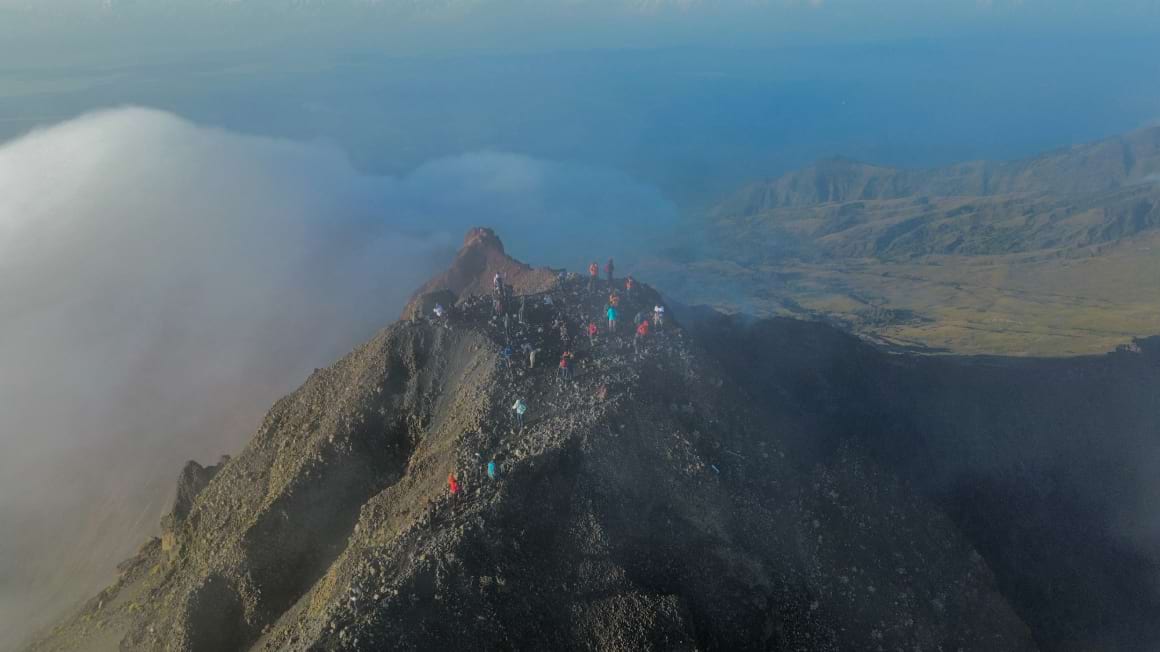
Photo: @taya.travels
Even though we were just retracing our steps back to camp, this part of the trek felt completely different. For one, we were riding the high of having just reached the summit. Forget runner’s high—this was something else.
We were also reaping the rewards of our 2 am start. For the first time, we could actually see the terrain we’d been grinding through in the dark. The Segara Anak lake, framed by the volcano, was a constant reminder of the descent still ahead. Seven hours of hiking down, and it wasn’t even 11 am.
Easy, right?
Day Two: Part Two – Segara Anak Lake and Hot Springs (2,008m) to Senaru Crater Rim (2,641m)
Down to the Lake
What was essentially a rock climb down the crater set us up for the next few hours of our trek. It was over 600m in elevation descent, and if your knees weren’t feeling it before, they certainly were now. Lucky for me, I was a little spider monkey as a kid, constantly crawling out of cots and up kitchen counters, so I felt a bit more in my element compared to the rest of my group going up the summit.
Finally, we were at the point of the whole reason I wanted to do 3D2N and not 2D1N: the hot springs. And let me tell you, after 14 hours of hiking since we started, it couldn’t have come at a better time.

Photo: @taya.travels
After a well-deserved soak, we headed back to the lake to have lunch. The whole morning was shrouded in clouds, so we couldn’t really take in the views, but lo and behold, it started to clear. The lake views were truly insane, and one of the reasons why this trek is so unique is that it has rocky terrain, hot springs, and azure blue lakes. It really does dish out a little bit of everything.
But, as always, the good stuff doesn’t last forever. It was time to start the dreaded hike back up the crater to our camp on the Senaru crater rim. We’d been warned that this climb would be tougher than the day before, but with the summit still fresh in our minds, our group started the final stretch of day two feeling a bit too confident.
That is, I was the only one being too cocky.
Breaking Point
This was the notable point I remember my body finally giving up on me. Maybe it was the exhaustion, maybe it was just one brutal incline too many, but this was where I broke.
I slumped onto the side of the trail, watching porters breeze past like they were out for a casual stroll, while I sat there, my body feeling strangely jelly-like. Here, I let myself indulge in a lil cry.
My guide finally caught up, fresh from yet another smoke break. No idea how he managed to chain-smoke his way up a mountain while it felt like I was barely clinging to life, but there he was, slipping into his backup job as a motivational speaker.
“One step at a time.”
He’d been repeating it since the start, and by now, it was starting to grate on me a little. But he wasn’t wrong. One step at a time had dragged me to the summit 12 hours ago, and it would get me to camp that night too.
His backpack had everything he needed: cigarettes and biscuits. Nothing else seemed to matter. We sat on the grasslands, him smoking, me making a dent in the biscuits, both of us soaking up the rare luxury of not moving our bodies. Luckily for us, we were at arguably the most beautiful part of the trek. The sun was beating down, seemingly making the lake and mini volcano all the more serene.
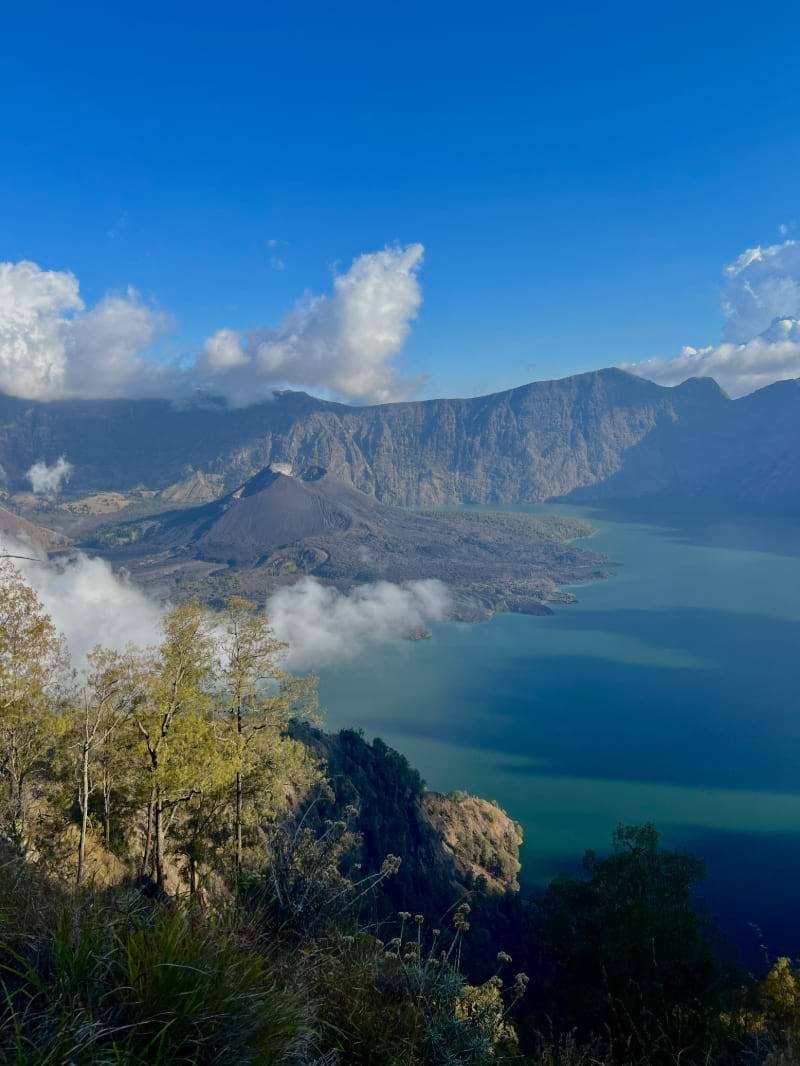
Photo: @taya.travels
Eventually, I dragged myself up, shoved on my big girl pants—though not too big, since I’d finally caved and let my guide carry my daypack—and we cracked on. A few hours later, we hit camp, greeted by a wind so bitterly cold it caught me by surprise. And I’m English.
Dinner was late that night, but any hope of eating together vanished as the wind finally drove us into our flimsy tents. We ate in the dark, cocooned in sleeping bags, before drifting into a surprisingly fitful night of sleep, considering how exhausted we were.
Day Three: Senaru Crater Rim (2,641m) to Senaru Village (601m)
Although the final day meant somewhat of a lie-in compared to the day before, we’d all agreed the night before to set off early—civilisation (and cold Bintangs) were calling. To be honest with you, we were all knackered.
My body felt like I had been kick-punched for twice as long as I’d been hiking, and exhaustion had finally started to present itself after a cold, windy night. Luckily, the itinerary for the day was short and uneventful, just a hike through the forest to finally get to Senaru village.
We hiked in relative quiet for the morning, the mood seemingly peaceful and contemplative. Day one felt like a lifetime ago, but what my brain had blurred out, my body hadn’t forgotten. My ankles, in particular, had had enough. Every few miles, one would roll, a sharp reminder of the sheer toll of the past few days.
Signing Off
It wasn’t until we were rallied under the official Senaru village sign for our final group photos and signing out at the office that it truly hit me—I’d done it. The rush of elation I’d expected at the summit finally arrived.

Photo: @taya.travels
I. Had. Done. It!!!
Those three days had tested me mentally far more than I’d anticipated. I always considered myself a tough cookie, but watching my group push through with what seemed like far less struggle was humbling. As someone who’s always seen themselves as fit and healthy, it was hard to swallow that I’d found it harder than other equally fit 20-something year olds.
It wasn’t until I checked into my cushty guesthouse on Gili Air for the week that I realised it didn’t matter anyway. Speed or no speed, tears or no tears (and, trust me, there were tears), we all set out to do something and achieved it nonetheless. I owed myself more credit for that. If I’d given it to myself in the moment rather than in hindsight, I probably would’ve enjoyed the trek a whole lot more.

A new country, a new contract, a new piece of plastic – booooring. Instead, buy an eSIM!
Jetpac eSIMs work just like an app: you download it, pick your plan, and BOOM! You’re connected the minute you land. It’s that easy.
Read about how eSIMs work or click below to see one of the top eSIM providers on the market and ditch the plastic.
Grab an eSIM!What I Wish I Had Done Differently
Every trek has its regrets, and Rinjani was no exception. My climb was mostly smooth sailing, but looking back, there are a few things I’d change if I ever put myself through that hell again (which, let’s be real, I won’t).
1. Bring tons of socks
The weather up there is anyone’s guess, and slogging through a three-day hike in wet socks is pure misery. I was already battling with a generously gifted pair of hiking boots that were at least a size too big, so I doubled up on socks and prayed for minimal blister carnage. Factor in that and rain on the first day, and that was 2/3 socks out for the running for the rest of the trek.
In short, pack as many socks as you can tolerate carrying because once they’re wet, they’re dead to you.
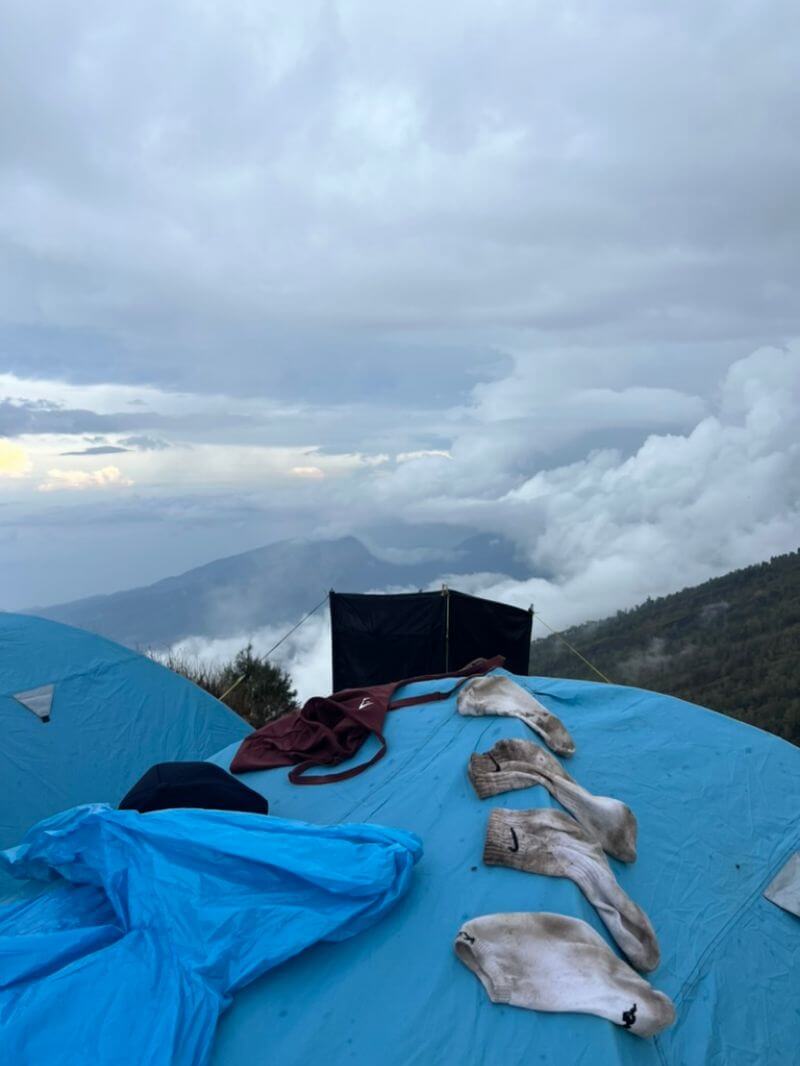
Photo: @taya.travels
2. Be prepared for the mental challenge
I went into Mount Rinjani thinking it’d be all about physical endurance, but the real struggle was in my head. Friends had warned me it was tough, but nothing prepared me for the mental grind of covering that much ground in a single day.
It’s like a marathon—your legs might keep moving, but your brain starts throwing in the towel halfway through. Prepping yourself mentally is just as important as physical training because when the exhaustion kicks in, it’s your mindset that’ll drag you to the summit.
3. Don’t stress about speed
Unless you’re on a private tour or built like a mountain goat, someone’s always going to be faster than you. I wish I’d reminded myself of that more instead of stressing over my speed. My whole group made it to the top, but I wasted way too much energy beating myself up for not keeping their pace. The real win is making it up there at all—so slow down, soak it in, and appreciate the absolute madness of what you’re doing.
Hiking this Indonesian volcano is a challenge, but it’s also breathtaking—take it all in, and appreciate what your body is doing for you.
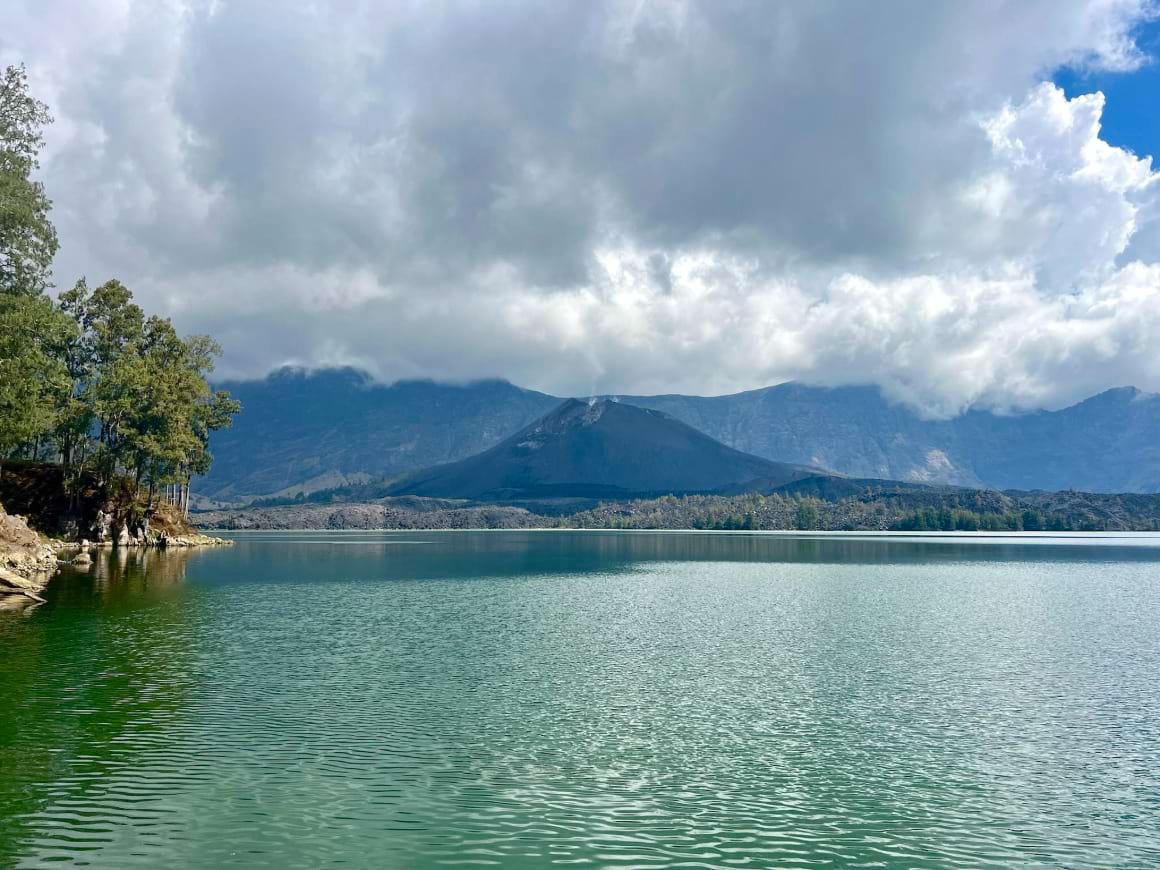
Photo: @taya.travels
4. Enjoy the small moments
Rinjani is brutal, no doubt about it. It might just be the hardest thing you’ve ever done—but it’s not all suffering. The insane views, the campfire camaraderie, and the sheer insanity of sleeping 3,000m up make it something else entirely. I wish I’d spent less time treating it like a battle to win and more time soaking it all in. Sometimes, all it takes is a shift in perspective.
Recommendations for Where to Stay After Hiking Mount Rinjani
Okay, so you’ve assaulted your body for three days. Where the hell do you chill out?! Whether you decide to stay on Lombok, head to the nearby Gili islands or are craving the civiliation back in Bali (if you can call Bali civilised), I’ve got you covered for the best spots to dose up on some serious R&R.
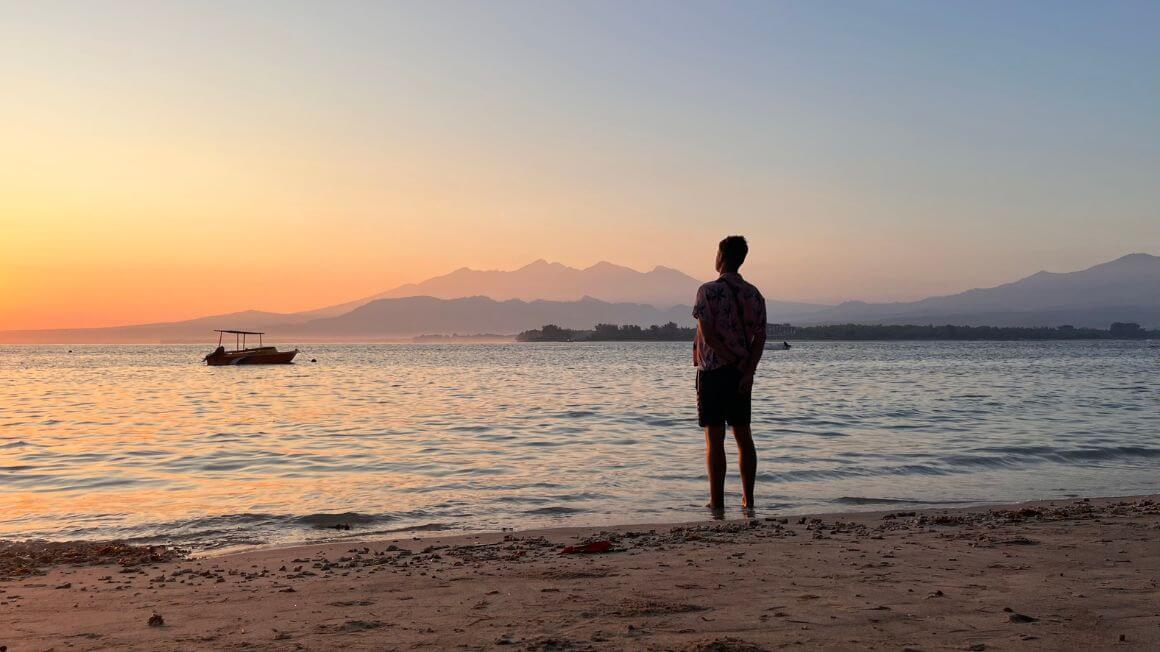
Photo: @monteiro.online
Tribal Coworking Bali | Best Hostel in Bali

Heading back to Bali to get back on the grind? Why not check into none other of Canggu’s first and best co-working hostel? You can get some WELL needed R&R after the trek whilst having everything you need to tap into the occasional email in between Bintangs.
H2O Peaceful Yoga Resort | Best Hotel on Gili Air
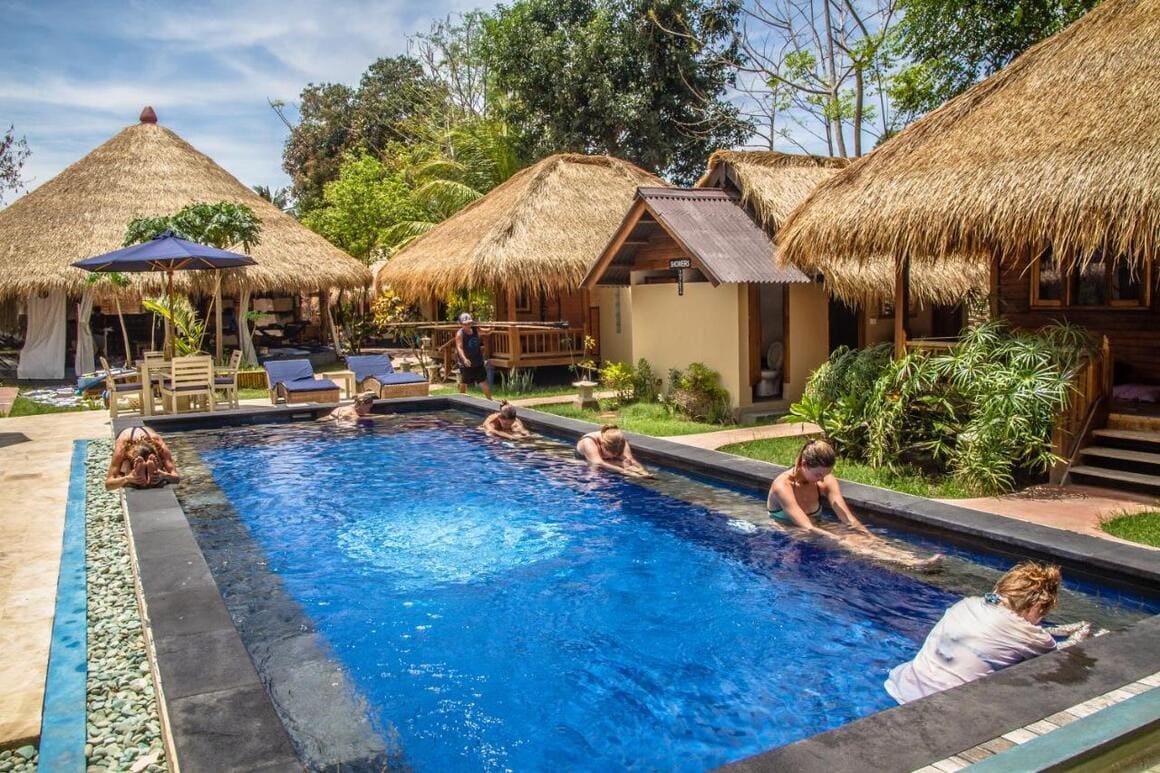
I’m no doctor, but if I was, I’d be prescribing you LOTS of yoga post-Rinjani. You’re gonna be stiff AF. And what better place to get that yoga fix than H2O Peaceful Yoga Resort?! The staff make you feel at home immediately, and there’s a real retreat vibe which will give you the reset you’ll so sorely need.
Puri Rinjani Bungalows & Hostel | Best Hotel in Lombok
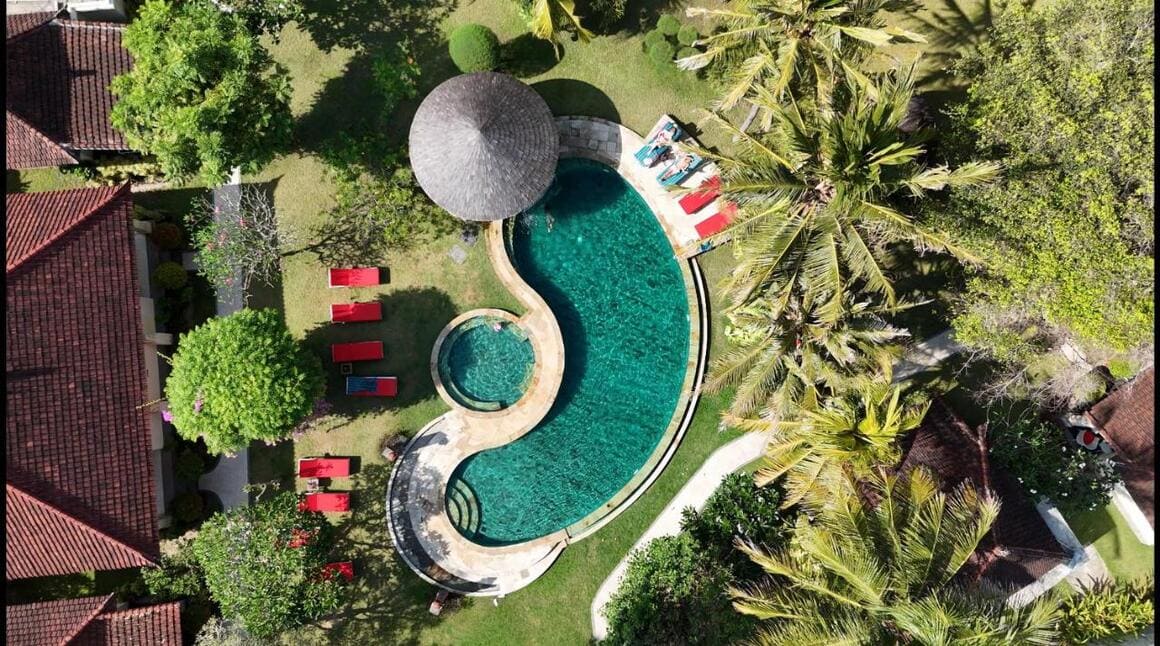
If you want to do as little travel as possible after Rinjani (which I wouldn’t blame you for), head straight down south to Kuta, Lombok. Not to be confused with the samely-name dump back on Bali, Puri Rinjani Bungalows & Hostel in Kuta will dish up a slice of peace and quiet you’ll so sorely be craving after three days up a volcano. Chill by the pool, go for a massage or simply sleep it off in something a bit more luxe than a tent.
Getting Insured BEFORE Hiking Mount Rinjani
Things can go wrong no matter what part of the globe you trot to, but that is especially true when hiking an active volcano.
Start your trek stress-free, knowing, however pear-shaped it all goes, that you’re covered by decent travel insurance.
There’s plenty to choose from, but a good place to start is Safety Wing.
They offer month-to-month payments, no lock-in contracts, and require no itineraries: that’s the exact kind of insurance long-term travellers like me need.
ALWAYS sort out your backpacker insurance before your trip. There’s plenty to choose from in that department, but a good place to start is Safety Wing.
They offer month-to-month payments, no lock-in contracts, and require absolutely no itineraries: that’s the exact kind of insurance long-term travellers and digital nomads need.

SafetyWing is cheap, easy, and admin-free: just sign up lickety-split so you can get back to it!
Click the button below to learn more about SafetyWing’s setup or read our insider review for the full tasty scoop.
FAQs on Hiking Mount Rinjani
Okay, so I’m fully aware I’ve just overloaded you with information. Still need answers to the important Q’s? I’ve got you down below.
What to Bring on Your Mount Rinjani Hike
Hiking Mount Rinjani will have you face-to-face with some of the most beautiful landscapes on the planet. But being prepared is really important to make sure you have the best time possible.
You can get really techy once you start diving into the world of hiking gear. But mostly, you’ll just need some reliable clothes, a decent backpack and a good pair of hiking boots.
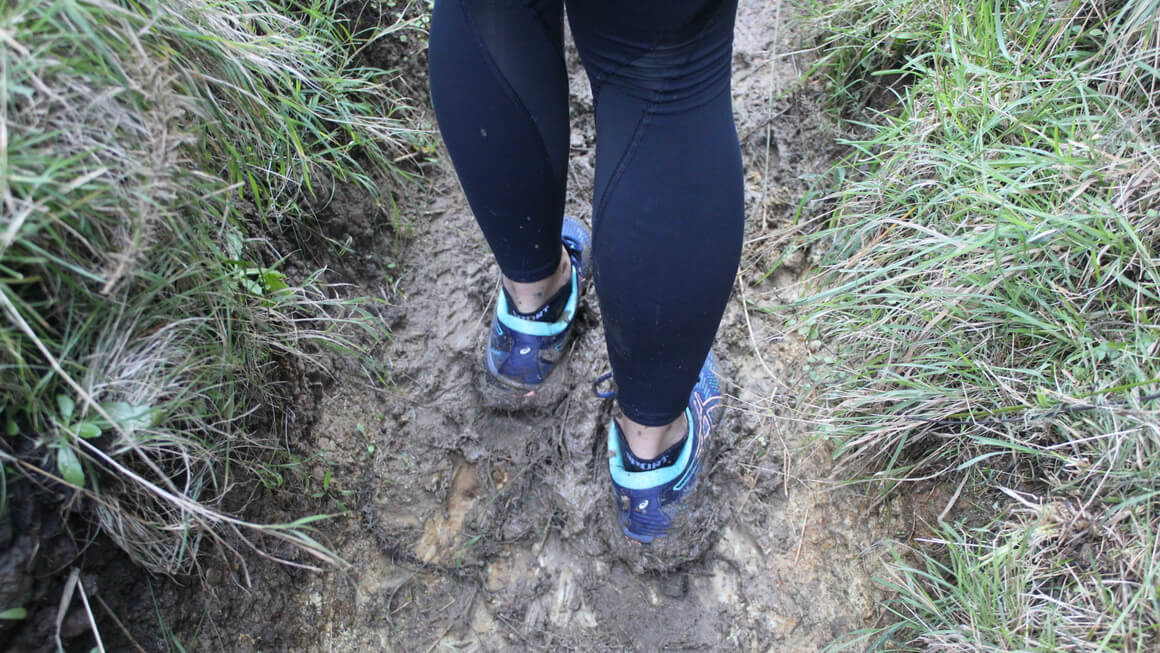
Photo: @danielle_wyatt
The reliable clothing that you need to prepare will depend on the season and weather when you embark on your hike. A good layer of thermals will be important for the cooler months to keep you well insulated. No matter what the season, it’s always going to be SO cold at the summit, so make sure you don’t regret packing a few more layers. The Smartwool Classic Thermal Merino is my go-to for an easy-to-carry extra layer.
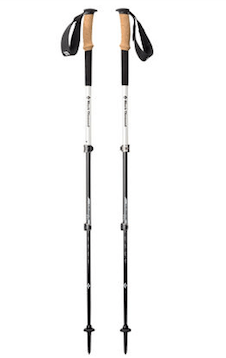
Black Diamond Alpine Carbon Cork
- Price > $$$
- Weight > 17 oz.
- Grip > Cork

Petzl Actik Core Headlamp
- Price > $$
- Weight > 1.9 oz
- Lumens > 160

Merrell Moab 2 WP Low
- Price > $$
- Weight > 2 lbs 1 oz
- Waterproof > Yes
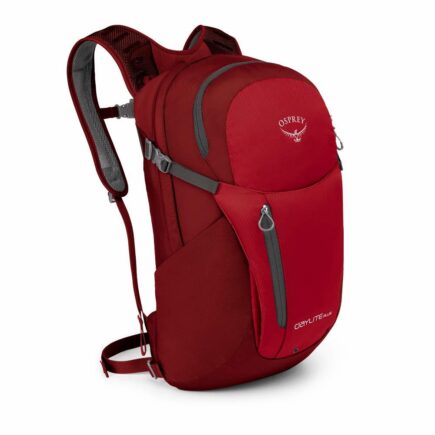
Osprey Daylite Plus
- Price > $$$
- Weight > 20 oz
- Capacity > 20L
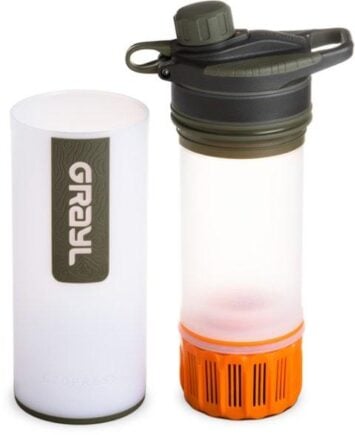
GRAYL Geopress
- Price > $$$
- Weight > 16 oz
- Size > 24 oz
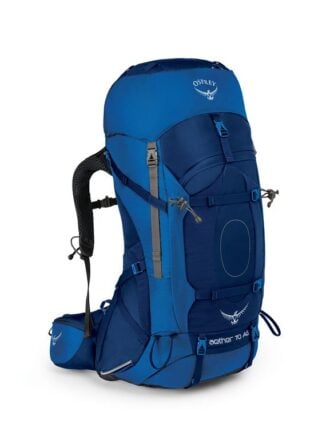
Osprey Aether AG70
- Price > $$$
- Weight > 5 lbs 3 oz
- Capacity > 70L

MSR Hubba Hubba NX 2P
- Price > $$$$
- Weight > 3.7 lbs
- Capacity > 2 person
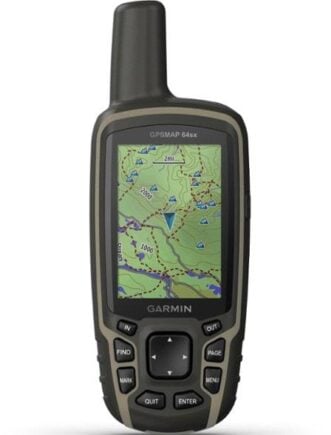
Garmin GPSMAP 64sx Handheld GPS
- Price > $$
- Weight > 8.1 oz
- Battery Life > 16 hours
How difficult is the Mount Rinjani trek?
From my yapping, you can probably gauge that I found it pretty difficult to hike Mount Rinjani. Saying that, so long as you’re fairly physically fit and mentally prep yourself for three strenuous days, I’d still say that hike is fairly accessible to most people.
When did Mount Rinjani last erupt?
Mount Rinjani last erupted in 2016, reminding everyone that it’s still very much an active volcano. The trek only runs when it’s safe, so while the volcano does what it wants, you won’t be climbing it unless conditions are good to go.
Final Thoughts on Hiking Mount Rinjani
And there you have it—the ultimate guide to tackling the beast that is Mount Rinjani. Writing this felt a bit like baring my soul, dragging up some truly humbling moments along the way.
Still, hiking Rinjani was one of the most surreal experiences I’ve ever had. Do I fully understand why humans willingly haul themselves up active volcanoes? No. Will I be doing it again anytime soon? Absolutely not. But I did it, and that’s something I’ll always have on the list of my travelling accolades.
Maybe you’re tougher than me and need the occasional volcano trek to feel alive. If that’s the case, Rinjani’s got your name all over it. And if you do end up breezing through it, feel free to let me know—I TOTALLY won’t take it personally.
Don’t let me scare you too much; hiking Mount Rinjani is a once-in-a-lifetime experience. I hope this guide sets you up for a wonderful trek and allows you to get the most out of it.
Enjoy the highs, push through the lows and good luck friends 🙂
Photo: @taya.travels
Buy Us a Coffee!
A couple of you lovely readers suggested we set up a tip jar for direct support as an alternative to booking through our links, since we’ve decided to keep the site ad-free. So here it is!
You can now buy The Broke Backpacker a coffee. If you like and use our content to plan your trips, it’s a much appreciated way to show appreciation 🙂