The Broke Backpacker is supported by you. Clicking through our links may earn us a small affiliate commission, and that's what allows us to keep producing free content 🙂 Learn more.
Yosemite is one of the jewels in the crown of U.S. national parks. The towering granite rocks of its valleys are so famous that names like El Capitan and Half Dome have probably crossed your sight before.
But they’re just two of the craggy peaks that make views here so dramatic. Combined with the sweeping pine forests, the scenery here is absolutely breathtaking.
And the scale of this place is impressive too. All of Yosemite’s natural goodness is situated throughout its 4 million acres — that’s a lot of space to explore!
So, as you can imagine, hiking in Yosemite is awesome. But if you’ve never visited before, or you’re new to the hiking game, all of this can seem a bit daunting at first. Where do you begin in this immeasurable slice of nature?
Don’t sweat it, though, because we’ve got your back. Our guide to the incredible Yosemite National Park has all the info you’ll need, from all the top hikes, to where to stay, and how to stay safe on the trail.
Let’s check it out!
Do You Want to Travel FOREVER??
Pop your email in below to get a FREE copy of ‘How to Travel the World on $10 a Day!’.
The Broke Backpacker is supported by you. Clicking through our links may earn us a small affiliate commission, and that's what allows us to keep producing free content 🙂 Learn more.
With its millions of acres packed full of towering granite cliffs, magnificent mountains, and giant sequoias, it’s easy to see why so many people are drawn to Yosemite. This vast landscape is ripe for adventures!
But it can be scary: there are so many different hikes and viewpoints that choosing where to start is a hard task.
The main thing to take into consideration is what you want to get out of it. There’s no point in trying to tackle a mammoth hike up to an insane viewpoint if all you want is to enjoy a chilled walk in a beautiful setting.
A Yosemite itinerary takes some planning. Some of the trails will need a permit, and some of these permits are only available through a lottery system. There’s no guarantee upfront, so it’s worth considering a few alternatives in the process.
And as for getting around the park, you have a couple of options too. You can bring your own ride and go from A to B on your own schedule, but that can also turn into a bit of a headache: parking spaces at the more popular trailheads are hard to find. If you want to avoid it, park up at Yosemite Lodge and use the park’s free shuttle bus to get around.
Most of the trails are well-trodden and well-marked, with an array of opportunities for different abilities and fitness levels. It’s important to only attempt these if you’re well prepared, and that’s coming up next…

The USA is blisteringly beautiful. It’s also blisteringly expensive! Visiting two national parks in day can run you $70+ in entry fees.
Orrrr… you kick those entry fees to the curb, buy an annual ‘America the Beautiful Pass’ for $79.99, and get unlimited access to ALL 2000+ federally managed sites in the States totally FREE!
You do the math. 😉
Buy the Pass!Yosemite Trail Safety
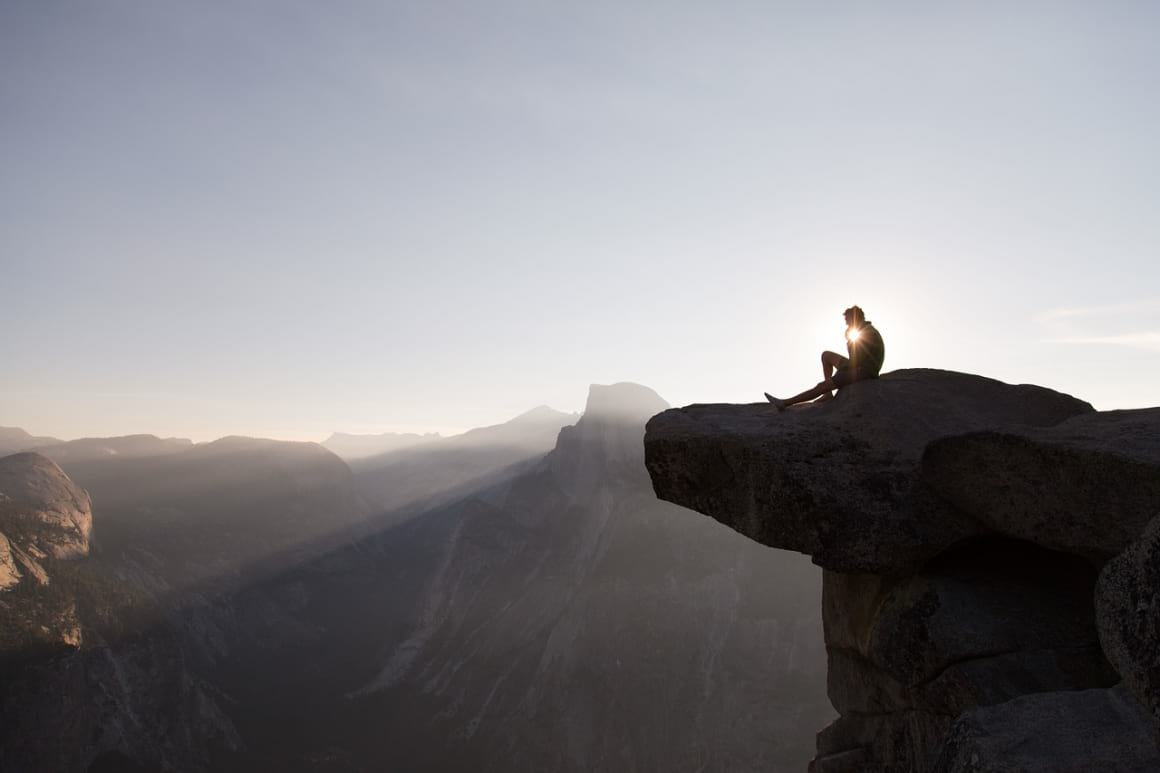
Whatever it is that’s luring you to explore this enticing landscape, you can bet that Yosemite will have the perfect trail for you. Hiking in Yosemite is delicious!
But, whichever trail you decide to hike, the most important thing is keeping yourself and others safe. Yosemite is not a theme park: there are real-life bears, pathways with sheer drops, and scorching heat to contend with.
- Protect against the sun – Hiking in hot temperatures can be dangerous. Make sure you’re prepared to tackle a trail when it’s hot by taking regular breaks in the shade, covering up, and slathering on sunscreen.
- Drink plenty of water – Staying hydrated is super important, especially when the weather is warm. Bring enough water with you for the route and pack a filter water bottle so you can refill from anywhere.
- Wear the right gear – Read up on the route you’re going to take to learn more about special equipment you might need: ropes, harnesses, and all that jazz. Wearing reliable shoes is a must.
- Tell somebody your plans – Hiking alone can put you in danger, especially if there’s no help nearby. Always let somebody else know your plans if you’re going to attempt a hike alone.
- Leave enough time – You do not want to be out on a course when the light is fading, especially when you don’t master your environment. Leave early in the day and plan for extra time in case you get lost. For this case, maybe consider staying at one of the epic Yosemite Airbnbs nearby to be fully recharged for your adventure.
- Do not push it – Pushing yourself is rewarding, but attempting a hike that’s way beyond your abilities can be dangerous. Know your limits!
- Be aware of the wildlife – Yosemite is home to a whole bunch of wildlife — bears in particular. Be informed on what to do when you spot or are under threat by one.
- Get travel insurance – Hiking in Yosemite should be all about good times, but you never know when something might happen. Put your mind at ease and get some good travel insurance for your trip.
ALWAYS sort out your backpacker insurance before your trip. There’s plenty to choose from in that department, but a good place to start is Safety Wing.
They offer month-to-month payments, no lock-in contracts, and require absolutely no itineraries: that’s the exact kind of insurance long-term travellers and digital nomads need.

SafetyWing is cheap, easy, and admin-free: just sign up lickety-split so you can get back to it!
Click the button below to learn more about SafetyWing’s setup or read our insider review for the full tasty scoop.
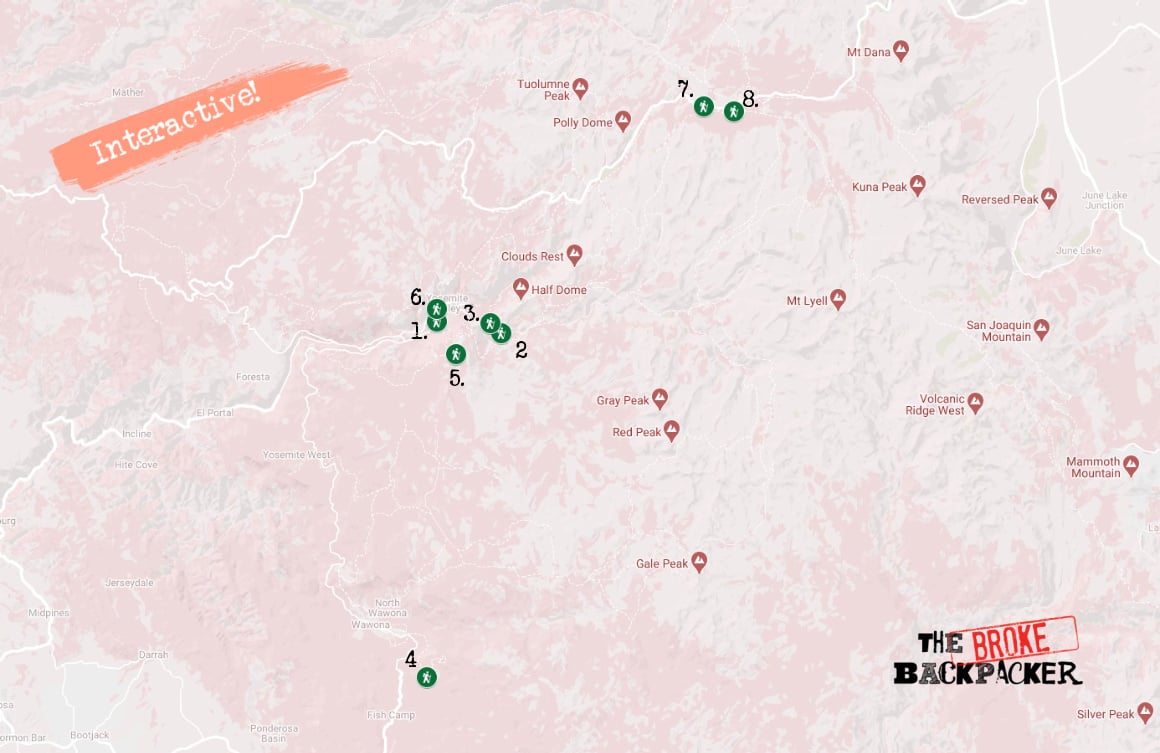
You know about all of the details and the important safety tips now, it’s time to get to grips with the hikes themselves.
We’ve listed the best hikes in Yosemite in different categories to help you out: from mountain climbing adventures to chilled easy-going walks. There’s plenty for you to get your head around here!
- Four Mile Trail – The Best Day Hike in Yosemite
- Vernal and Nevada Falls – Most Beautiful Hike in Yosemite
- The John Muir Trail – The Best Multi-Day Trail in Yosemite
- Mariposa Grove of Giant Sequoias Trail – Must-Visit Hike in Yosemite
- Sentinel Dome Trail – A Fun, Easy Hike in Yosemite
- Yosemite Point – The Toughest Trek in Yosemite
- Cathedral Lakes Trail – Best Hike for Views in Yosemite
- Nelson Lake Trail – Off the Beaten Path Trek in Yosemite
Join our entrepreneurship retreat in Bali!

Ahoy friends, Will here! Introducing a very special project that involves YOU – An 8-day immersive experience in Bali, where I have been living for 7 years now.
If you’re passionate about freedom and designing your dream life, this is your chance to join like-minded folk on the same path and learn from my own wins, losses and lessons over my fifteen years of entrepreneurship, whilst soaking in the best of beautiful Bali.
Expect daily workshops, recharge practices, intention setting and fire ceremonies and perhaps a cheeky game of pool against myself, the one and only undefeated pool legend. All while experiencing the island’s best-kept secrets ?
1. Four Mile Trail – The Best Day Hike in Yosemite

The Four Mile Trail is a great all-rounder of a hike. It’s a bit of a challenge, but rest assured: your efforts will be rewarded.
And while its name can seem self-explanatory, this Yosemite hike actually extends for about five miles. With switchbacks from Glacier Point all the way to Yosemite Valley, you have incredible views all along the way. Half Dome, North Dome, El Capitan… you’ll see it all!
Visually speaking, it’s a doozie. It starts pretty flat, but after about a mile, you’ll enter onto a series of pretty unforgiving switchbacks. They’ll take you along the cliff, through the trees, and down into the valley floor.
We’re not going to lie: the trip down can be pretty strenuous on the ol’ legs. And you’ll need some good shoes, too, as it can get slippy.
If you’re hitting this trail up in summer, leave early. The switchbacks will still be shaded, but later in the day, you’ll have the sun on your back.
- Length: 15km round trip
- Duration: 5-8 hours total
- Difficulty: Easy/Average
- Trailhead: Four Mile Trailhead (37°44’01.6″N 119°36’06.4″W)
2. Vernal and Nevada Falls – Most Beautiful Hike in Yosemite
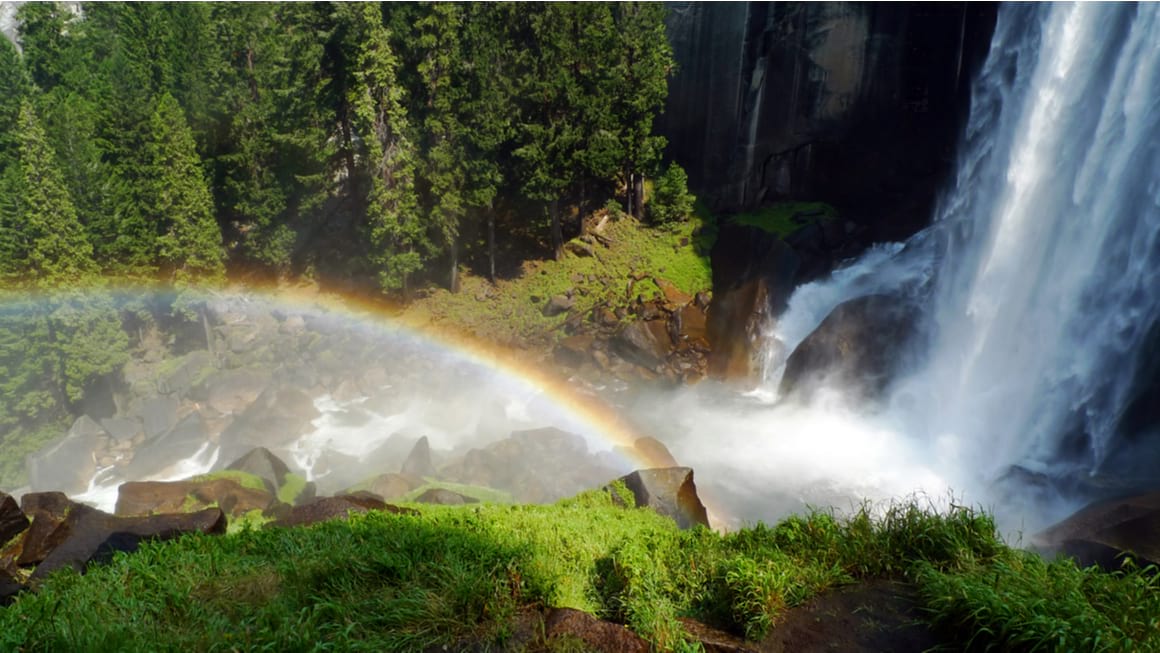
This loop is a must-do trail in Yosemite National Park. It gives you a good overall feel of what this place is all about, and in a fairly short amount of time, too. Plus it’s a good leg workout!
Essentially, you’ll be hiking through classic Yosemite scenery along part of two of the most popular trails in the park.
You can expect absolutely stunning views everywhere — especially at Nevada Falls. The hike kicks off on Mist Trail at the bridge just below Vernal Falls — this part of the trail is busy, but once you’re past the falls, the trail starts to empty out.
You’ll then continue up a steep granite stairway towards Nevada Falls until you lay your eyes on it. You’ll be in the splash zone, so expect a little spray from this powerful watery wonder.
Continue back round along part of the much longer and more famous John Muir trail. Be careful though, it can be slippery coming down.
- Length: 14 km
- Duration: 4 Hours
- Difficulty: Moderate
- Trailhead: Mist Trail Trailhead (37°43’33.5″N 119°32’56.0″W)

Wanna know how to pack like a pro? Well for a start you need the right gear….
These are packing cubes for the globetrotters and compression sacks for the real adventurers – these babies are a traveller’s best kept secret. They organise yo’ packing and minimise volume too so you can pack MORE.
Or, y’know… you can stick to just chucking it all in your backpack…
Get Yours Here Read Our Review3. The John Muir Trail – The Best Multi-Day Trail in Yosemite
Did anyone ask for a challenge? This multi-day hike in Yosemite is absolutely legendary!
The John Muir Trail kicks off at Happy Isles and traces its way through gorgeous landscapes in Kings Canyon and Sequoia National Parks, all the way to Mount Whitney.
It’s touted as one the most famous trails in the USA — the scenery it passes through is nothing short of jaw-dropping.
Within Yosemite National Park itself, the John Muir Trail passes by Half Dome before heading onto Tuolumne Meadows. Then it runs parallel to the main range of the Sierra Nevada. After this, it heads out of the park.
Obviously, you can’t do it in a day. You can’t even scale this mammoth trail in a few days, it’ll take careful planning and imply some camping along the way. But it’s an incredible journey, to say the least.
The best time to tackle this Yosemite hike is between July and early October. It can be strenuous and tough-going at times, so we’d recommend it only to confident, experienced hikers.
It’s also important to note that to even be privileged enough to do the hike, you’ll need a permit for it. It’s pretty competitive: 97% of permit applications are denied… good luck!
- Length: 339 km
- Duration: 10 days – 3 weeks
- Difficulty: Hard
- Trailhead: John Muir Trail Trailhead (Happy Valley) (37°43’57.9″N 119°33’28.1″W)
4. Mariposa Grove of Giant Sequoias Trail – Must-Visit Hike in Yosemite
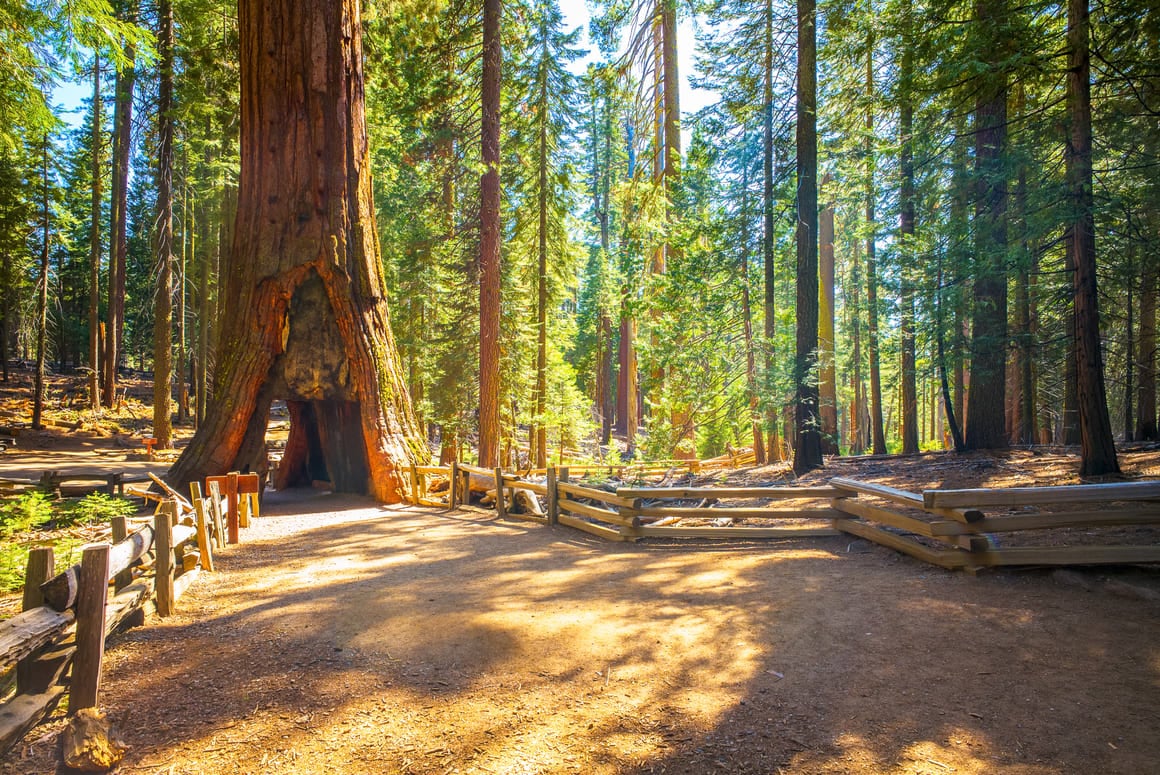
No trip to Sequoia National Park needed: you can see those giant trees right here in Yosemite. All you need to do is head to Mariposa Grove, where you’ll find over 300 of them — some of the trees are over 2000 years old!
There is a selection of paths that loop around the grove so you can really get up close and personal with these amazing trees.
It takes you all across the grove, allowing you to glimpse famous sequoias such as The Faithful Couple, The Bachelor, Three Graces, and The Clothespin Tree — you have your own name, why wouldn’t they??
The route also takes you right up into the far reaches of the grove, where you’ll eventually get to Wawona Point. And that means panoramic views from over 1,200 feet up. Woohoo!
The only thing you need is to get there early. Otherwise, you won’t be able to get a spot in the car park and you’ll have to take the shuttle (which doesn’t always run). It’s a two-mile walk from the Yosemite Visitor Center otherwise.
Everything is very well-marked with boards and signs pointing out the nature and history of the area. This Yosemite trail is easy to explore and we highly recommend it to anyone wanting to explore more of the park.
- Length: 9 km
- Duration: 3 hours
- Difficulty: Average
- Trailhead: Mariposa Grove Welcome Plaza (37°30’09.3″N 119°36’35.8″W)
5. Sentinel Dome Trail – A Fun, Easy Hike in Yosemite
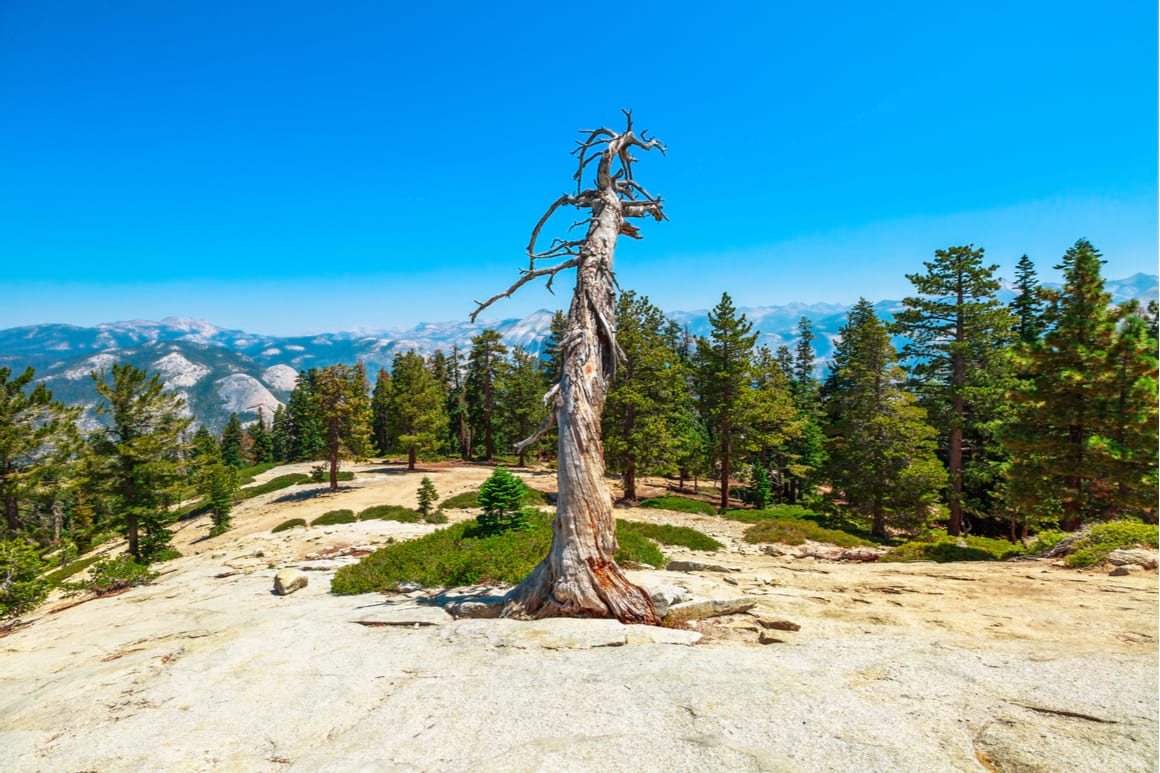
The Sentinel Dome Trail is one of the best hiking experiences in Yosemite for all ages and all skill levels. There are a few ups and downs, and a gradual ascent to the summit, but there’s nothing wrong with taking it slow.
The 360º views from the summit encompass all of Yosemite’s greatest hits: Half Dome, El Capitan, Nevada Falls, Clouds Rest, and numerous peaks of the High Sierras. It’s a great opportunity to take your camera out, just like Ansel Adams did in the 1940s.
You’ll start this hike off at Glacier Point Road before beginning the gentle ascent up to the high dome itself. Then you’ll cross a bridge over a stream and hit the slope as you climb up through the pines.
After that, take a sharp left and voilà: you’re on Sentinel Dome. These are some of the best views in all of Yosemite, and a great choice for casual hikers who don’t want to spend hours out trekking.
- Length: 3.5km
- Duration: 1 hours
- Difficulty: Easy
- Trailhead: Sentinel Dome Trailhead (37°42’45.3″N 119°35’11.2″W)

Drink water from ANYWHERE. The Grayl Geopress is the worlds leading filtered water bottle protecting you from all manner of waterborne nasties.
Single-use plastic bottles are a MASSIVE threat to marine life. Be a part of the solution and travel with a filter water bottle. Save money and the environment!
We’ve tested the Geopress rigorously from the icy heights of Pakistan to the tropical jungles of Bali, and can confirm: it’s the best water bottle you’ll ever buy!
View on REI Read the Review6. Yosemite Point – The Toughest Trek in Yosemite
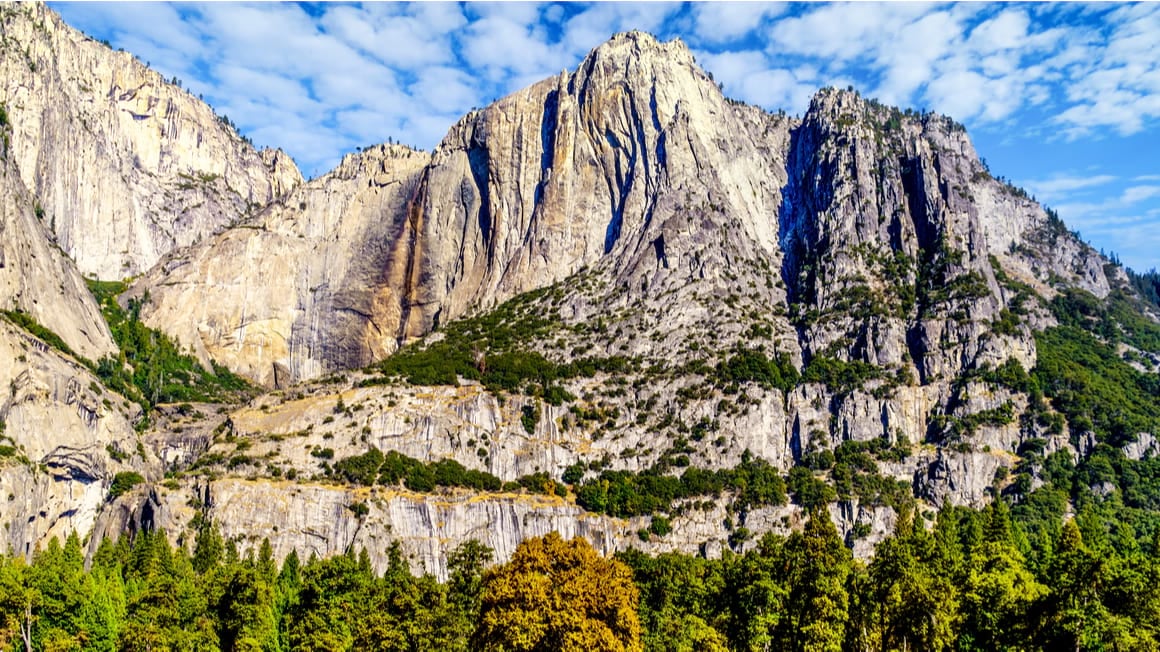
Now, from one of the easiest hikes in Yosemite to one of its most grueling trails: this is the path to Yosemite Point.
On this hike, you’ll mainly be traversing rocks and scaling steep steps for much of the way. And you’ll be exposed to the sun most of the time, too. Steep inclines and endless switchbacks are the name of the game here.
Yes, this is a toughie, alright. But if you like a challenge, then the glorious vista at the top is what you should be aiming for.
It starts with a hike to the Upper Yosemite Fall Trail, which takes you to the top of the valley. Then you’ll head across Yosemite Creek, before tracing the North Dome Trail. Yosemite Point itself will be on your right, standing at 6,939 feet above sea level.
We recommend this one to experienced hikers only — it’s extremely difficult, and you’ll need to bring plenty of water. Split it in bite-sized chunks and cool off at the waterfalls along the way. Bring snacks!
- Length: 13.5 km
- Duration: 8 Hours
- Difficulty: Difficult
- Trailhead: Yosemite Falls Trailhead (37°44’31.8″N 119°36’07.6″W)
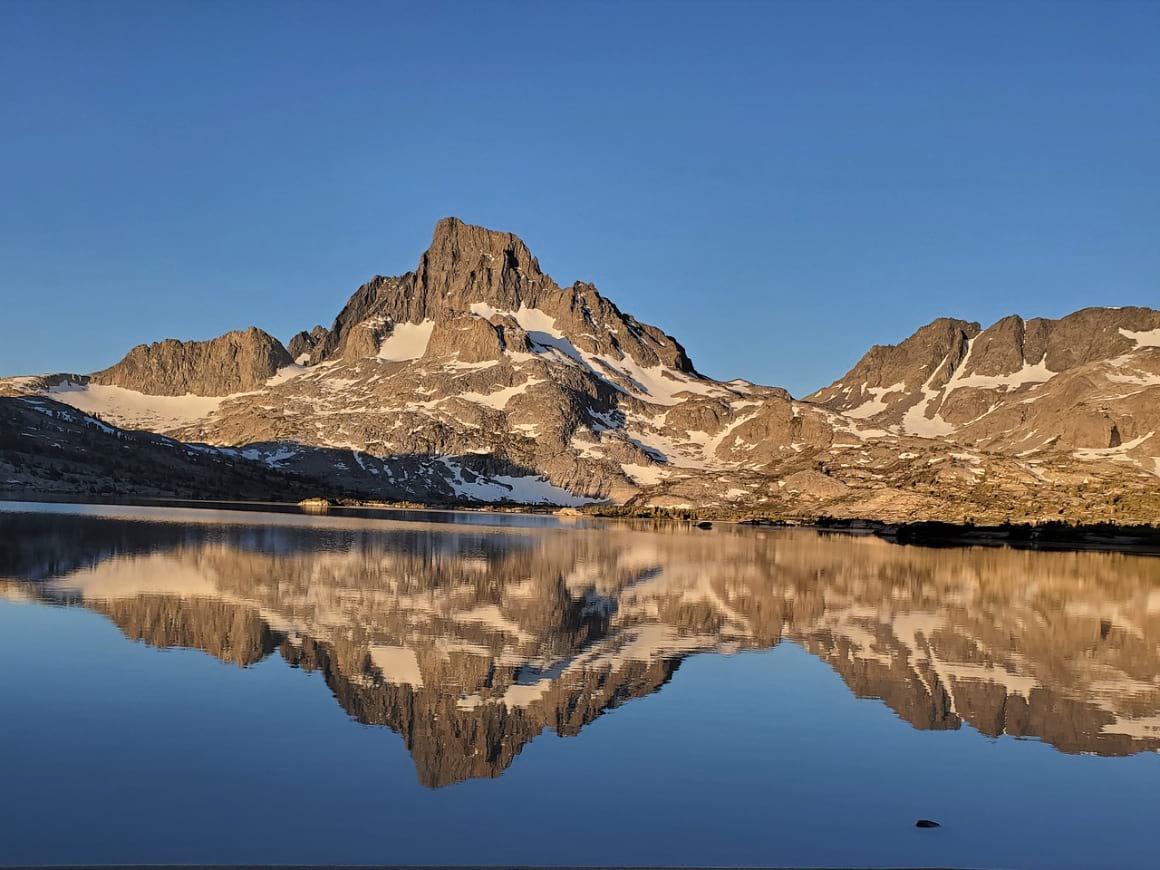
7. Cathedral Lakes Trail – Best Hike for Views in Yosemite
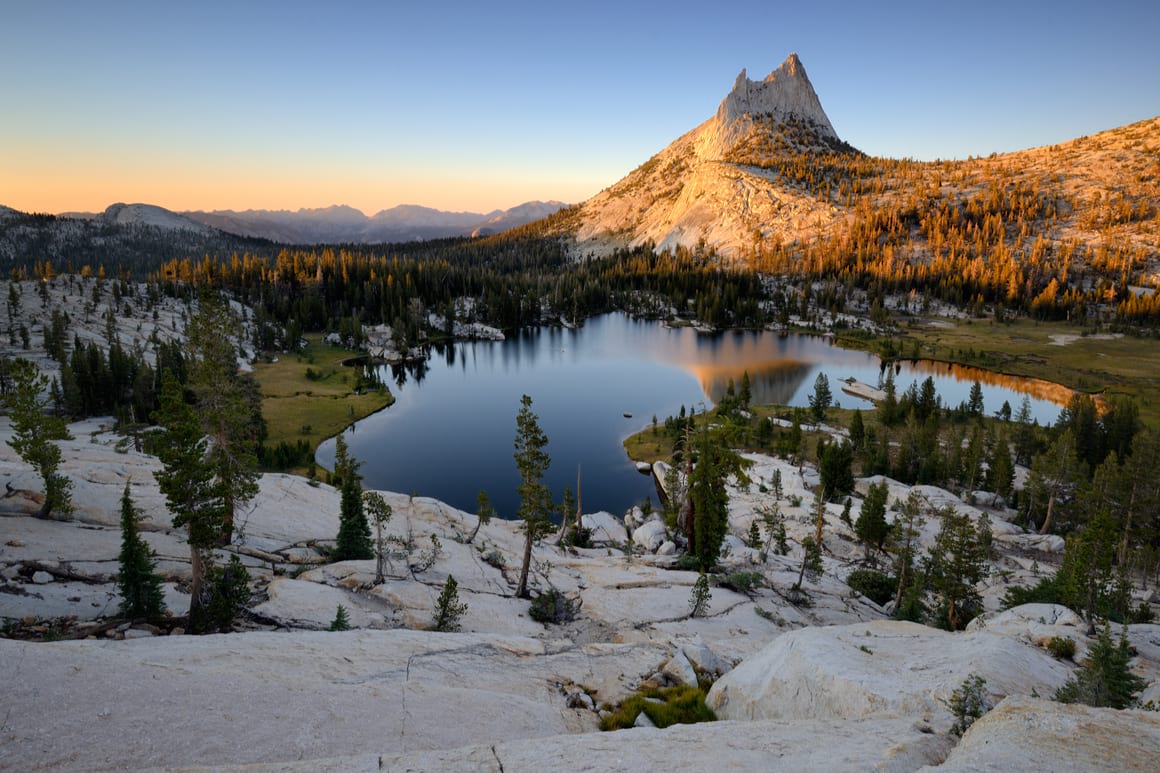
While you also have Yosemite’s “typical” views to enjoy (Tunnel View, for example), there’s much more in this beast of a park to enjoy.
Named after Cathedral Peak which rises, well, like a giant cathedral over the glassy lakes, this high-altitude area is incredibly serene and beautiful.
As lovely as the views are, however, it does take a bit of effort to get there. The path is fairly steep and the first part is particularly hard-going. But for the last portion of it, things start to flatten out considerably.
Before you know it, you’ll be beside the lakes, among the shade and sand, listening to the water flowing and the sound of your mind decompressing.
Strolling around is a reward in itself: there are Alpine meadows strewn with wildflowers and a few prime spots for keen photographers to get the perfect shot. The air quality is particularly amazing — if you’re a fan of breathing too, gulp it all down.
There are a few backcountry campsites up here, so you can extend your stay if you feel like. You do need a wilderness permit for overnight stays, though.
- Length: 13.5 km
- Duration: 5 hours
- Difficulty: Difficult
- Trailhead: Cathedral Lakes Trailhead (37°52’23.9″N 119°22’58.6″W)
8. Nelson Lake Trail – Off the Beaten Path Trek in Yosemite
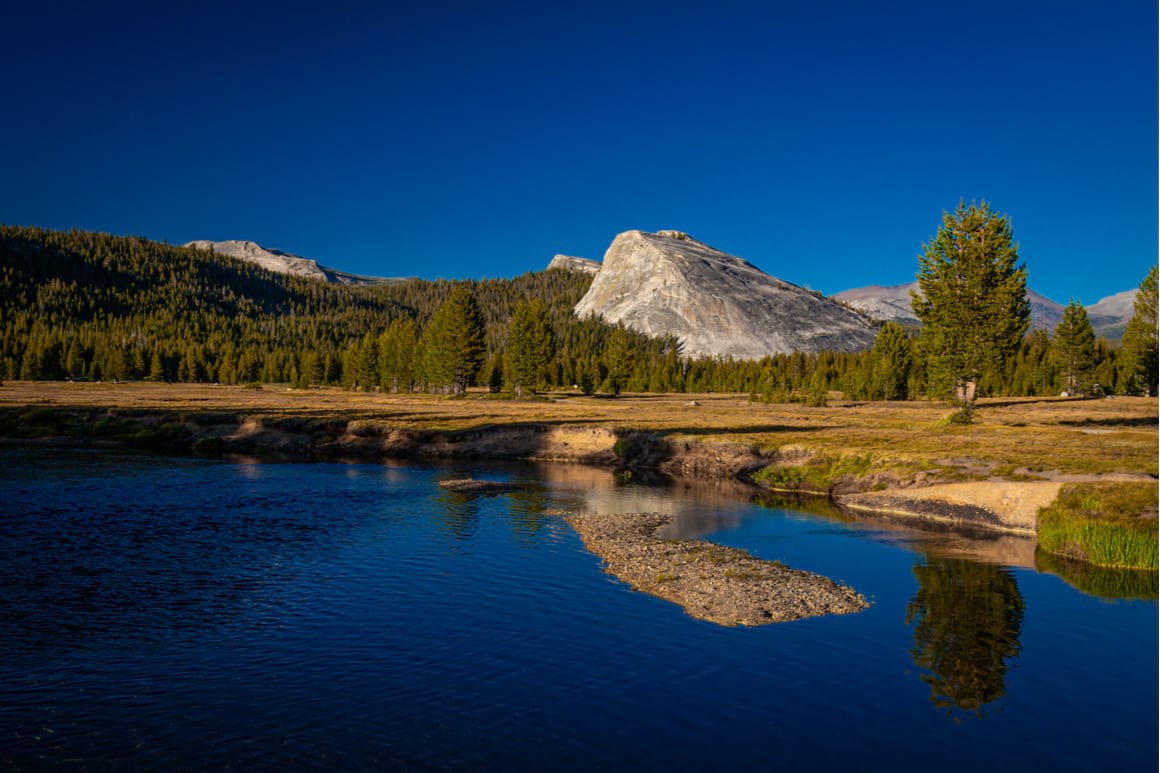
This out-and-back trail is a great way to escape from Yosemite’s busier regions. The boundless beauty here makes for the perfect antidote to schedules and city living.
Beginning at Tuolumne Meadows Campground (where you can park), the hike heads out through pristine forested landscape. You’ll then embark on a 1,000 feet climb before reaching Elizabeth Lake.
This makes for a good rest stop. Refill your water, munch a few snacks, and move on.
After that, you’ll be hiking your way along a pretty straightforward path (although not always well-marked). From this point on, the fun begins. Meandering through lovely meadows, along the narrow valley of Echo Creek, this Yosemite trail will take you to the serene waters of Nelson Lake.
It’s definitely something for those who like their hikes fairly wild — even the trail isn’t as well marked as more popular routes in the national park.
There are quiet backcountry campsites around Nelson Lake if you feel like making the most of this remote part of Yosemite. Don’t forget that wilderness permit though!
- Length: 18 km
- Duration: 6 hours
- Difficulty: Moderate
- Trailhead: Tuolumne Meadows Campground (37°52’11.8″N 119°21’29.6″W)

Things go wrong on the road ALL THE TIME. Be prepared for what life throws at you.
Buy an AMK Travel Medical Kit before you head out on your next adventure – don’t be daft!
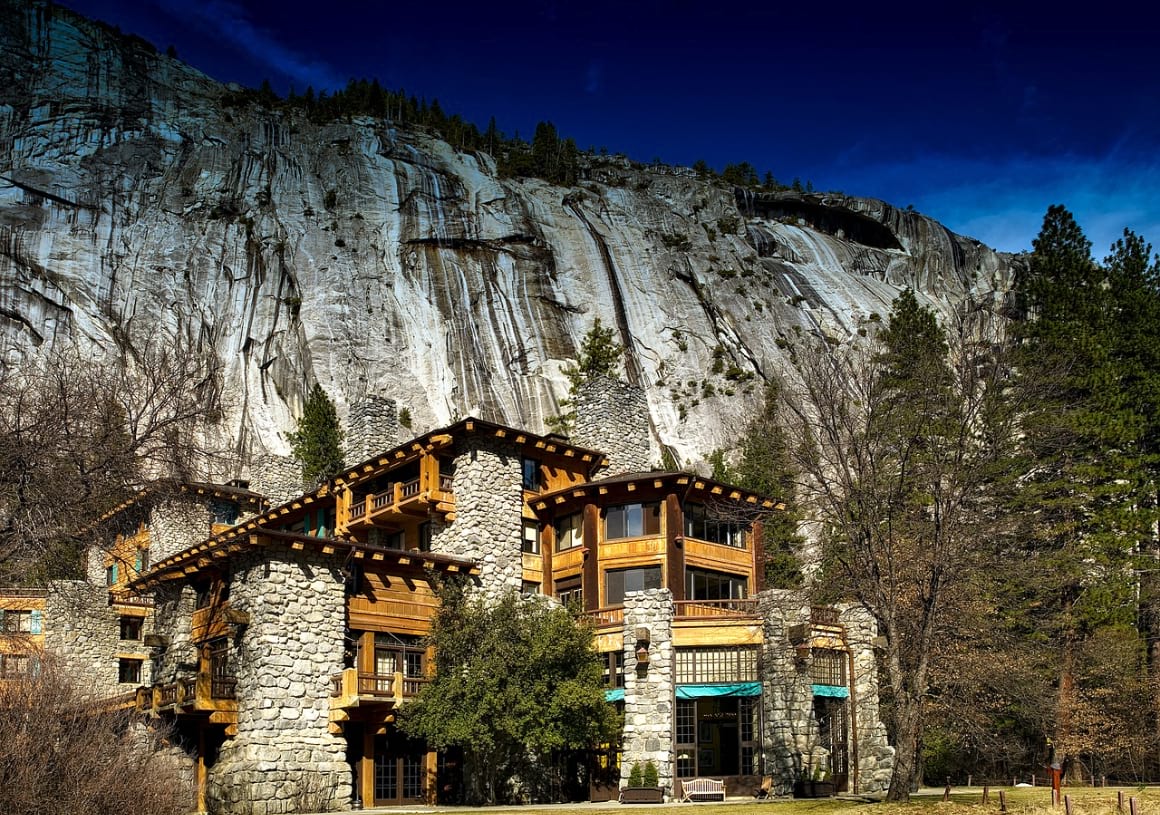
Buy on REIAs you can see, there’s a lot of exploring to be done here. And if you don’t stay for the night, you won’t really get the full experience. So now you need to decide on where to stay in Yosemite.
Luckily for you, there are a bunch of different types of accommodation options available — both inside and outside the park’s boundaries.
Inside the park itself, there’s Yosemite Valley. It’s a killer location if you want jaw-dropping views from your window. You can also camp here, but you’ll find cabins for a more plush and cozy experience as well.
Yosemite is one of the best places in the US to camp in the spring in particular, when temperatures and crowds are both super manageable.
Yosemite West has a few upscale options if you’re into that — sleek, modern cabins, and lodge-style accommodation with excellent conveniences. As for the views? Expect masterpiece-level sights from your window.
Throughout the whole park, there are stunning bed and breakfasts you can stay at. These unique accommodations are perfect for a little more comfort on your hiking trip and range all the way from high-end luxury joints to more budget-friendly options.
But if you don’t want to be right in the thick of it, you could try Mariposa. It’s just a short drive from the entrance to the park, and accommodation options range from villas, hotels, and sexy cabins.
Camping in Yosemite is definitely possible too, but it’s not a free-for-all. There are rules you need to know, such as how to store your food away from bears. And you’ll need a permit, or else you’re not allowed to camp.
Luxury Home in Yosemite: Forest Park Lane
If you’ve read some of our other guides, you’ll know that we love the stylish interiors and exceptional guest service that come with Airbnb Plus properties. It’s extra cash, but it’s totally worth it if you want to live like a king for a few days. This charming bungalow is where it’s at!
Stylish Studio in Yosemite: Peregrine Lodge
Nestled among the trees of Yosemite West, this is our top pick for self-catering accommodation in the national park. Peregrine Lodge is a great choice for a romantic getaway to one of the most beautiful parks in the world.
Modern Hotel in Yosemite: Yosemite Valley Lodge
Want to stay right in the heart of Yosemite? This hotel has long been established as the best place to stay for exploring the region. It has a modern feel and cool furnishings, with a private balcony in every room.
You can also take a look at VRBOs in Yosemite for something a bit different!
We’ve tested countless backpacks over the years, but there’s one that has always been the best and remains the best buy for adventurers: the broke backpacker-approved Osprey Aether and Ariel series.
Want more deetz on why these packs are so damn perfect? Then read our comprehensive review for the inside scoop!
View on OspreyNow that you’re all amped up for your trip to Yosemite, it’s time to get packing. Depending on what you plan to do, we have different recommendations on what you should take on your hiking trip.
A multi-day trip out into the wilderness will mean backcountry camping, so you will have to consider tents, food supplies, and extra clothes. But, if you’re only thinking about a day hike in Yosemite, your backpack will be more streamlined (possibly a harness and some ropes).
Good walking shoes are crucial for hiking in Yosemite, no matter the trails you choose. Opt for a sturdy pair that you can rely on, and test it before you come (they might rub). And just in case something happens, pack a first aid kit with plasters and other supplies.
Hydration is another key concern, so bring along a nice reusable bottle in your pack. You can refill from anywhere along the way if you use a filter water bottle — plus, a whale smiles every time you refuse single-use!
Get yourself a good, reliable daypack to stash all of your gear, and make sure that it fits you well and is comfortable on your back when loaded up.
Here’s a handy packing list so you don’t leave anything out:
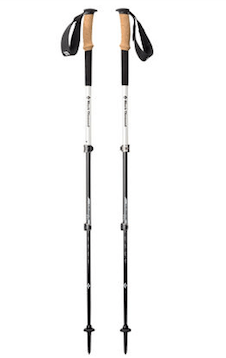
Black Diamond Alpine Carbon Cork
- Price > $$$
- Weight > 17 oz.
- Grip > Cork

Petzl Actik Core Headlamp
- Price > $$
- Weight > 1.9 oz
- Lumens > 160

Merrell Moab 2 WP Low
- Price > $$
- Weight > 2 lbs 1 oz
- Waterproof > Yes
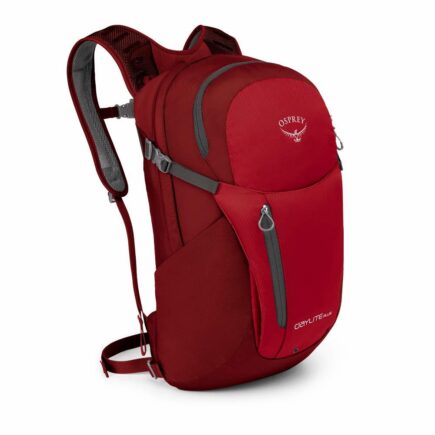
Osprey Daylite Plus
- Price > $$$
- Weight > 20 oz
- Capacity > 20L

GRAYL Geopress
- Price > $$$
- Weight > 16 oz
- Size > 24 oz
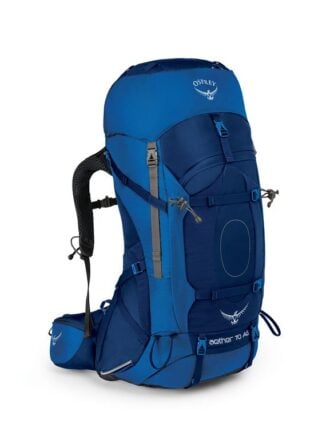
Osprey Aether AG70
- Price > $$$
- Weight > 5 lbs 3 oz
- Capacity > 70L

MSR Hubba Hubba NX 2P
- Price > $$$$
- Weight > 3.7 lbs
- Capacity > 2 person
Garmin GPSMAP 64sx Handheld GPS
- Price > $$
- Weight > 8.1 oz
- Battery Life > 16 hours
Don’t Forget Your Yosemite Travel Insurance
ALWAYS sort out your backpacker insurance before your trip. There’s plenty to choose from in that department, but a good place to start is Safety Wing.
They offer month-to-month payments, no lock-in contracts, and require absolutely no itineraries: that’s the exact kind of insurance long-term travellers and digital nomads need.
SafetyWing is cheap, easy, and admin-free: just sign up lickety-split so you can get back to it!
Click the button below to learn more about SafetyWing’s setup or read our insider review for the full tasty scoop.
Buy Us a Coffee!
A couple of you lovely readers suggested we set up a tip jar for direct support as an alternative to booking through our links, since we’ve decided to keep the site ad-free. So here it is!
You can now buy The Broke Backpacker a coffee. If you like and use our content to plan your trips, it’s a much appreciated way to show appreciation 🙂