Until 1951, Nepal was off-limits for foreign travellers; a secretive, isolated kingdom kept under wraps from outsiders…
But a change of regime gave birth to a new era of travel, and Nepal has remained a magnet for intrepid adventurers for over 70 years.
It was the summiting of Annapurna I – before that of Everest – that captivated the world of mountaineering and turned the spotlight on Nepal as an outdoor-lover’s haven in the Indian subcontinent.
This guide will offer everything you need to know to explore the majestic Annapurna region and get to grips with experiencing Nepal on foot. There’s a magical culture of generosity and kindness to discover, against a backdrop of some of the most impressive peaks to be found anywhere on earth.
There are three main routes we’ll cover here – the Annapurna Circuit, the Annapurna Base Camp (Sanctuary) trek, and the Mardi Himal Trek. These are each superb journeys in their own right, and escape the much heftier permit fees that visits to some parts of the Annapurna Conservation Area require.
Read on for all you need to wander your way through the Annapurna massif.
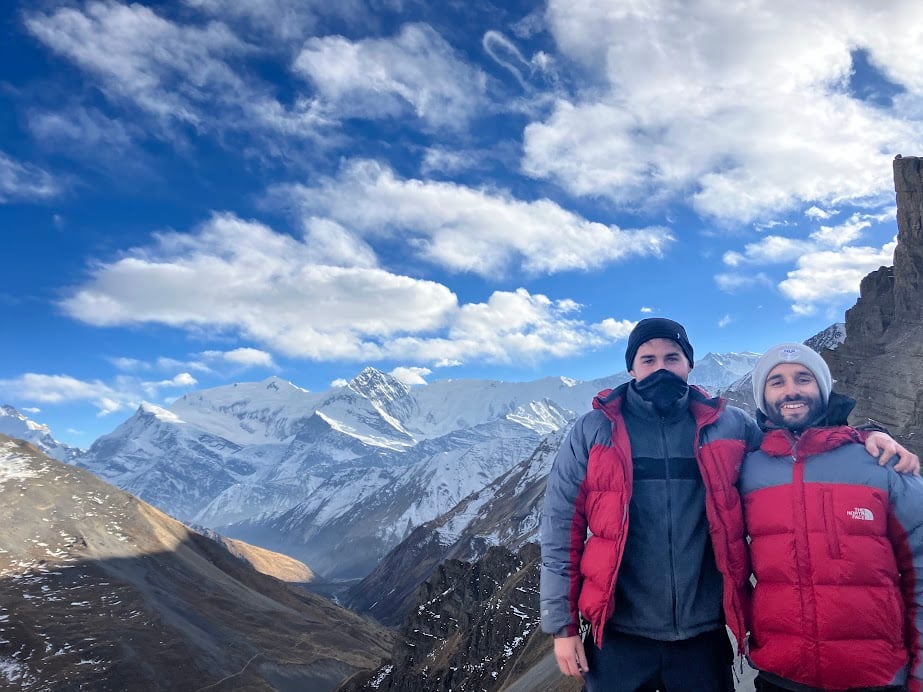
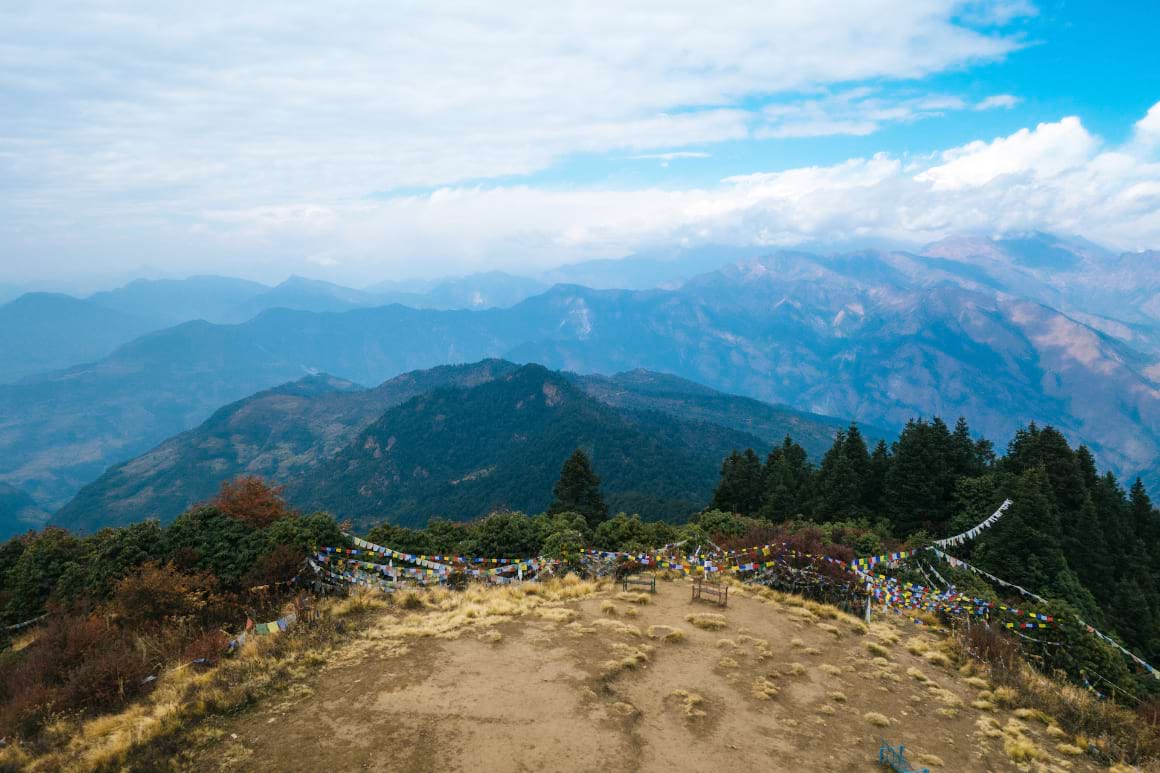
Photo: Ciaran Nye
The Broke Backpacker is supported by you. Clicking through our links may earn us a small affiliate commission, and that's what allows us to keep producing free content 🙂 Learn more.
Where is the Annapurna Region?
A household name when it comes to backpacking Nepal, the Annapurna Conservation Area covers nearly 3000 square miles of stunning terrain, and spans five districts in the central part of the country.
This includes the Annapurna massif, a monstrous range of mountains home to thirty peaks over 6000m. Here you’ll find Annapurna I, the tenth-highest mountain in the world, and the first over 8000m on earth to be summited.
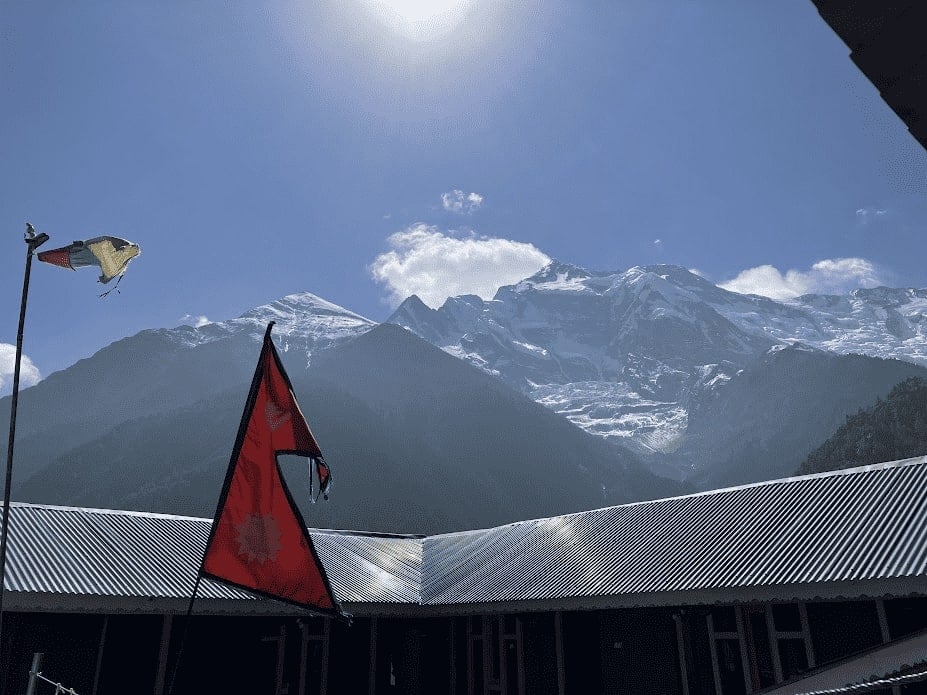
Photo: Ciaran Nye
If that’s not enough, the Khali Gandaki gorge – which the Annapurna Circuit weaves through – is believed by many to be the deepest gorge in the world. Across the gorge lies Dhaulagiri, the world’s seventh-highest peak at 8167m.
As you’d expect, it’s a ridiculously impressive and unique part of the world that feels almost ethereal at times.
The starting points for most treks in the area are easily reached from Pokhara. This backpacker hangout is also an ideal place to sort your stuff. Shop for nearly-genuine but well-made outdoor equipment for your foray into the mountains, and stash any surplus travel gear while you’re away.
When is the best time to visit the Annapurna Conservation Area?
There are two main trekking seasons in Nepal: Autumn and Spring.
The Autumn season includes September, October and November, when clear skies should permit superb panoramic views of the jagged skyline. Temperatures are typically quite mild and the chances of heavy snow are relatively low. The trail and teahouses may well be quite lively. Across October, you’d also catch the festivals of Dashain and Tihar, giving rise to an abundance of kites, lights, and bamboo swings.
The Spring season covers March, April and May. As it melts, the preceding snowfall breathes new life into the rhododendrons (Nepal’s national flower), and, like Autumn, the temperatures should be manageable. The weather can be changeable, however. For example, this year, a relatively dry and mild February gave way to heavy snow and extremely nippy weather throughout March. Pack wisely, whatever season you’re aiming for.
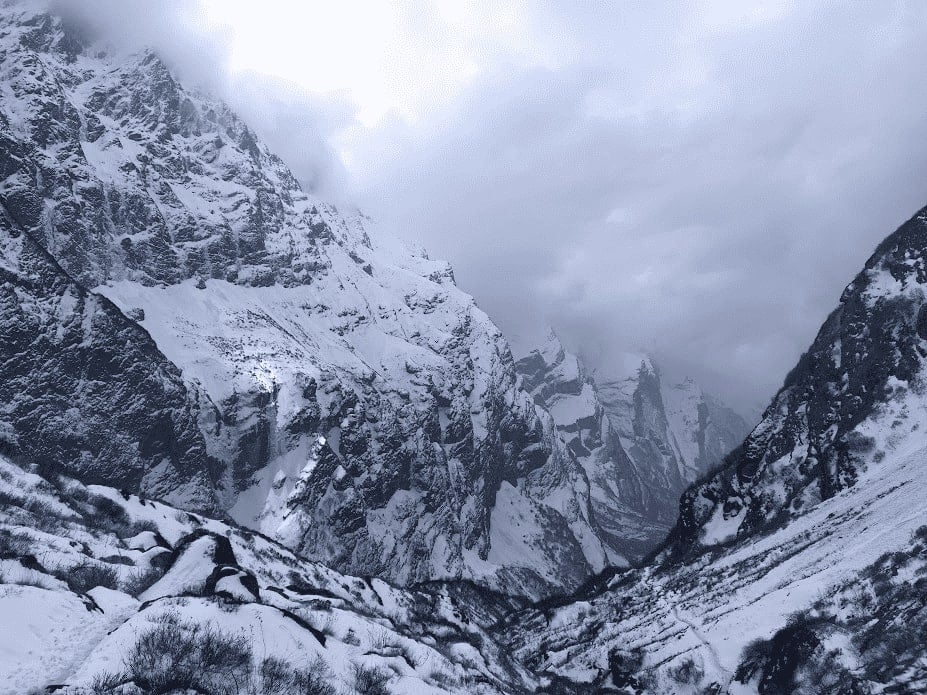
Photo: Ciaran Nye
Trekking in Winter is less common, but certainly possible: December, January and February can be uncompromisingly chilly. We’re talking lows of minus 20 degrees Celsius. On the Circuit, be prepared for the possibility of days spent in teahouses waiting for the pass to reopen, and invest in a proper winter sleeping bag (read on for the low down on gear).
But there are enough teahouses that remain open to take on the treks discussed here, and your resolve will be rewarded with clear views of snow-capped peaks and a relatively empty trail.
Last and least appealing, is the monsoon season (June, July and August). The rains obscure the views, the trails become sodden and mudslide-y, and the leeches come out to nibble. (If you want to trek in the summertime, you’re better off heading to the Karakoram Mountains of Pakistan, the Indian Himalayan region, such as Ladakh or Himachal Pradesh, or Nepal’s Upper Mustang which is protected from the rains.)
Introducing the Routes…
I would urge you not to overthink which trek to do: the main thing to consider is time, as something like the Circuit takes a good chunk of the calendar, and it’s better not to be rushing around. Each route has its charms and challenges, which are likely to change on each and every journey on foot. Read on and see which takes your fancy.
1. The Annapurna Circuit
The Annapurna Circuit Trek is one of the most renowned and cherished trekking routes in the world, found on many travellers’ bucket lists.
First opened in the late 70s, the circuit takes you high into the Annapurna massif and right to the edge of the Tibetan plateau, crossing the Thorong La Pass at 5417m. This is one of the highest mountain passes in the world. Not too shabby.
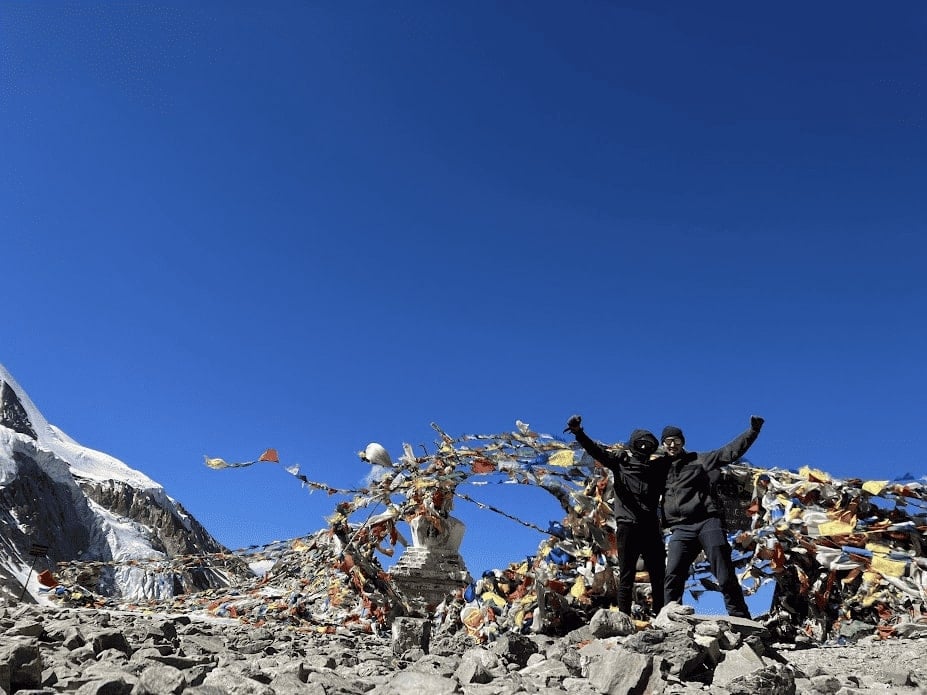
Photo: Ciaran Nye
The circuit is a significant undertaking. Completing the full route usually takes around three weeks. However, this can be shortened by taking a jeep up and down the valleys either side of the pass for some of the way…
If you have time, it’s certainly worth going all in by starting in Besisahar and finishing in Nayapul. It’ll be better for both the body and gaining respect from hippie-trail hikers who did it back in the day…
Get ready for a stunning stroll: the Annapurna Circuit is a classic for a reason.
How many days does the Annapurna Circuit trek take?
The full circuit takes around 20 days, while variations on the route can massively reduce the distance covered and time taken to around 10 days.
It may be tempting to skip walking parts of the ‘road’ section, but to be honest, the traffic is usually minimal on the track and the views are still excellent so don’t be too quick to hop in a 4×4. Climbing from the original start point of Besisahar or nearby will pay dividends in terms of acclimatisation.
Suggested Annapurna Itinerary and Notes
The trail is well supplied, with teahouses scattered relatively frequently along the path. The below table contains a suggested itinerary but can also be used to plan your own, using the village names, altitude and distances between them.
Keep things flexible on your trek, both by stretching, and building in some leeway in case you need an extra day of acclimatisation (or just don’t fancy leaving the hot springs in Tatopani).
| Day (Suggested itinerary) | Waypoints (Village, cumulative distance, altitude) | Notes |
|---|---|---|
| 1 | Besisahar, 0km, 800m | Direct tourist bus from Kathmandu or Pokhara (leaves early in the morning). Local buses are available throughout the day but a change in Dumre is usually necessary. |
| 2 | Bhulbhule, 7.5km, 840m | |
| Ngadi Khola, 12.2km, 925m | Furthest point reachable by bus. (Can take onward jeep if desired). | |
| Bahundanda, 16.3km, 1275m | ||
| 3 | Syange, 22km, 1100m | |
| Jagat, 26.4km, 1300m | A common point to start from. | |
| Chamje, 29.8km, 1430m | ||
| 4 | Tal, 34.7km, 1700m | Don’t go right after Tal! Flooded previously which has eroded the old trail. Stay on the left side of the river. |
| Dharapani, 41.3km, 1860m | ||
| 5 | Danagyu, 45.7km, 2190m | |
| Timang, 48.4km, 2750m | ||
| Thanchok, 51.8km, 2650 | ||
| 6 | Chame, 56.7km, 2700m | |
| Bratang, 63.2km, 2800m | Apple orchards! | |
| 7 | Upper Pisang, 70.5km, 3400m | Upper and Lower Pisang are very close, but recommend sleeping higher for better acclimatisation. There is a small shop in Lower Pisang. |
| Ghyaru, 75.2km, 3700m | ||
| Ngawal, 80.4km, 3670m | Be ready for quite a tough climb around here. | |
| Bhraga, 87.3km, 3470 | ||
| 8. 9. (Acclimatisation day) | Manang, 89.5km, 3550m | One of the bigger settlements, many lodges and shops. Highest point the road reaches (although starting here is not recommended). Often used for a rest day to acclimatise. Option to visit Tilicho Lake as an out-and-back. Extensive food options. |
| Gunsang, 93.3km, 3920m | ||
| 10 | Yak Kharka, 98.9km, 4030m | |
| Thorong Phedi, 105.8km, 4450 | Can also cross Thorong La Pass from here – start early in the day for better weather (usually less wind). | |
| 11 | High Camp, 107km, 4830m | Can get busy. |
| Thorong La, 110.7km, 5416m | Highest point on the trail. Start early in the day for better weather (usually less wind). | |
| 12 | Muktinath, 121.4km, 3756m | Another fantastic option: take Lupra pass to Jomsom (via Lupra). Personally, one of the best days on the trail. |
| Kagbeni, 132.1km, 2800m | Yak Donalds is apparently very good. | |
| Ekle Bhatti, 134.7km, 2800m | ||
| 13 | Jomsom, 141.6km, 2720m | Highly recommend Hotel Bob Marley! Excellent fire-pit. |
| Tukuche, 154km, 2600m | ||
| 14 | Kokethani, 165.8km, 2550m | |
| 15 | Ghasa, 176.7km, 2010m | |
| Kopchepani, 182.8km, 1630m | ||
| 16 | Tatopani, 193km, 1200m | Several hot springs to visit! (Tatopani means ‘hot water’ in Nepali.) Very affordable. |
| Ghara, 198.4km, 1700m | ||
| Chitre, 204.9km, 2390m | ||
| 17 | Ghoperani, 207.7km, 2860m | Can link to Annapurna Base Camp trek here, or Poon Hill for sunrise. |
| Nangethanti, 210.2km, 2510m | ||
| 18 | Ulleri, 218.2km, 2060m | |
| Birethanti, 230km, 1310m | ||
| 19 | Naya Pol, 231.7km, 1070m | Local buses back to Pokhara. |
How do I visit Tilicho Lake?
On the Annapurna Circuit, you’ll have the option for an out-and-back trip to Tilicho Lake, the highest glacial lake in the world!
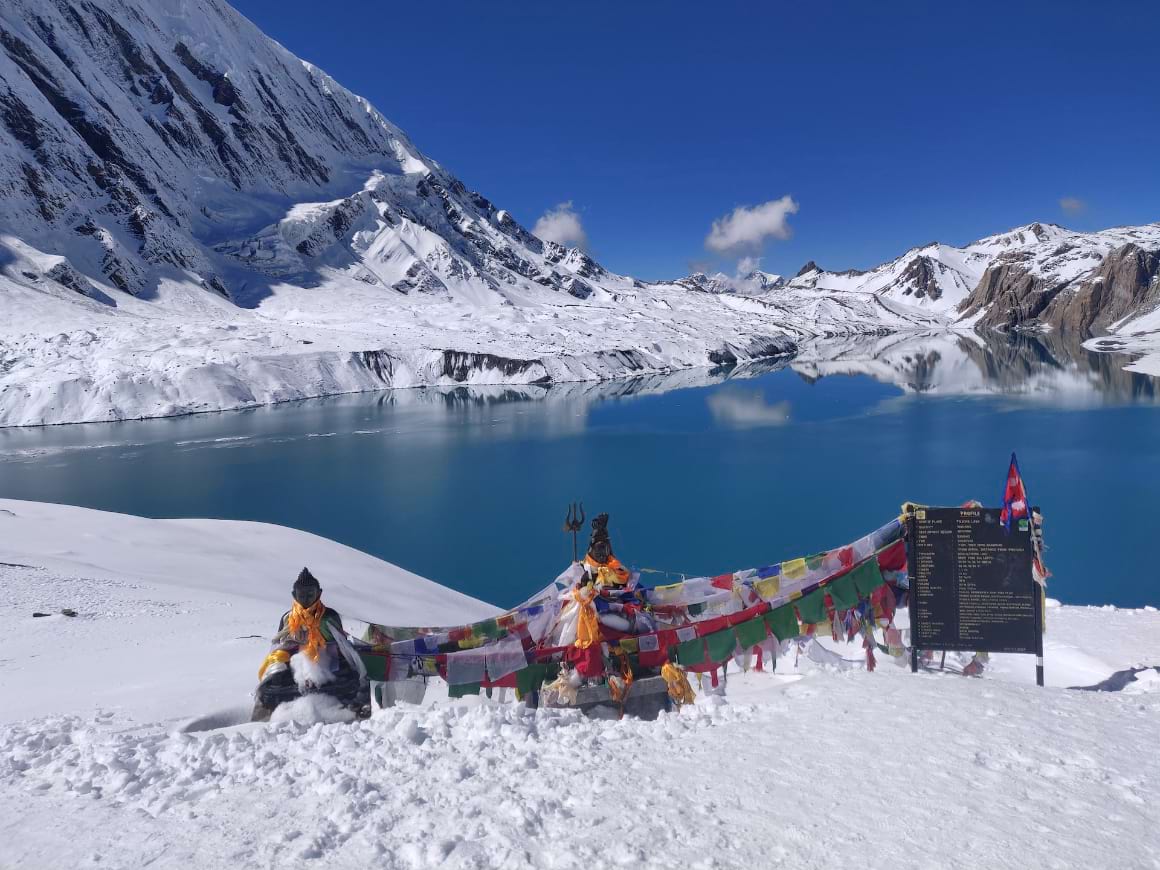
It’s not an easy side-quest. You’ll start from Manang at 3519m, and climb up to above 4900m to reach Tilicho, usually over two or three days. Along the trail you’ll find Shree Karka and Tilicho Base Camp for overnighting, as you can’t stay at the lake itself.
In winter, don’t be too surprised or disappointed if the water is frozen…it’ll still be a wicked couple of days out.
2. Annapurna Base Camp (Annapurna Sanctuary)
The Annapurna Base Camp lies right in the heart of the ‘Annapurna Sanctuary’ which is a protected area but not an official Nepali national park.
The full trek can be completed in around a week, covering 100km and reaching 4130m, although route variations can be made.
This place is something special, both physically, and culturally. Held as sacred by the Gurung people, this glacial basin is only accessible via a thin pass between the peaks of Hiunchuli and Machhapuchhre.
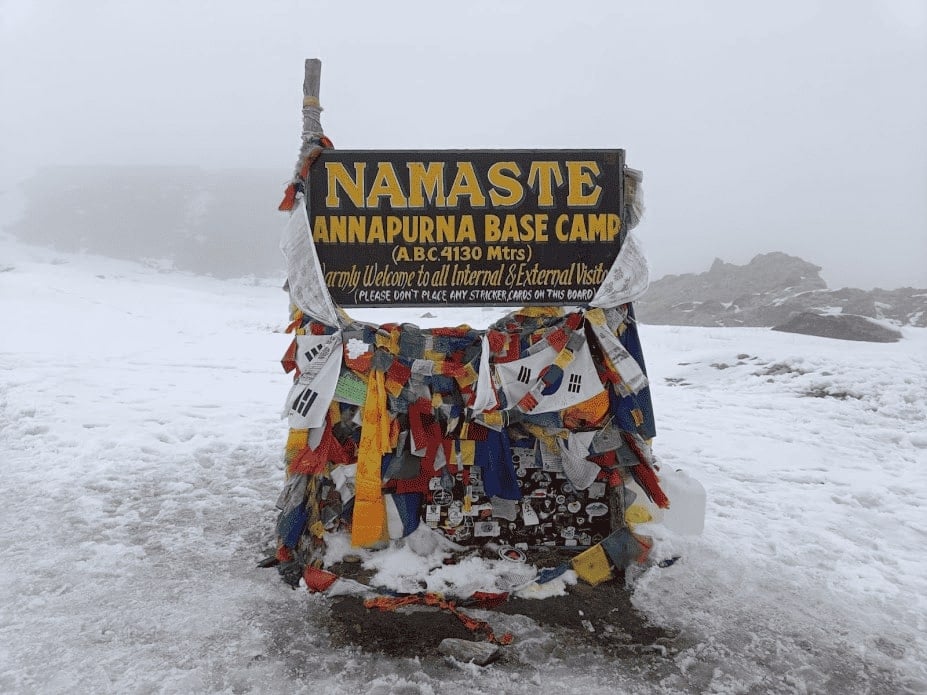
Photo: Ciaran Nye
The Base Camp itself can feel quite bizarre. You’ll find statues of climbers lost on epic expeditions in years gone by, yet today, you might wake up to skiers and wedding parties being dropped off by helicopter to catch the morning sun…
However, you’ll sip your chai with a sense of satisfaction having reached this surreal spot on foot and braving the weather. Watching the sunrise hitting the dramatic skyline is a just reward for taking on this outstanding Nepali adventure.
How many days does the Annapurna Base Camp (Sanctuary) trek take?
The Annapurna Base Camp trek can take between 7-10 days, depending on fitness, whether you’ve previously acclimatised to the altitude, and route options. See the suggested itinerary below for inspiration, but don’t be afraid to use the list of villages to create your own plan (being mindful of altitude gain).
Suggested Itinerary and Notes
It would be very difficult to get lost on the Annapurna Base Camp trek, as all villages tend to lie on the single trail leading to the basin. A list of places to stay can be found below.
Popular ‘linkages’ include adding on a day at Ghorepani for a sunrise at Poon Hill, or joining the Base Camp route at Ghorepani having completed the Annapurna Circuit anti-clockwise.
These options are noted on the table below.
| Day (Suggested itinerary) | Waypoints (Village, cumulative distance, altitude) | Notes |
|---|---|---|
| 1 | Phedi, 0km, 1180m | Buses to Phedi from Pokhara (depart from Hari Chowk Bus Park, or Baglung Bus Park). |
| Dhampus, 1.6km, 1697m | ||
| Pothana, 5.6km, 1984m | ||
| Bherikharka, 8.8km, 1801m | ||
| 2 | Landruk, 14.1km, 1622m | Connect to Mardi Himal trek here if desired. |
| Jhinu Dhanda, 19.5km, 1739m | ||
| Taulung, 20.5km, 2165m | ||
| Chomrong, 21,3km, 2132m | Chomrong Cottage and their chocolate cake is worth all the hype. | |
| Sinuwa, 24.4km, 2352m | ||
| 3 | Bamboo, 27.8km, 2304m | |
| Dovan, 30.0km, 2520m | ||
| Himalaya, 32.7km, 2859m | ||
| 4 | Deurali, 35.5km, 3195m | |
| Machhapuchhare Base Camp, 39.0km, 3682m | There’s wi-fi available here, somehow… | |
| 5 | Annapurna Base Camp, 41.9km, 4130m | |
| *return along same trail initially* | ||
| Machhapuchhare Base Camp, 44.9km, 3682m | ||
| Deurali, 48.4km, 3195m | ||
| Himalaya, 50.7km, 2859m | ||
| Dovan, 53.5km, 2520m | ||
| 6 | Bamboo, 55.7km, 2304m | |
| Sinuwa, 59.1km, 2352m | ||
| Chomrong, 62.2km, 2132m | Chomrong Cottage and their chocolate cake is worth all the hype. | |
| Taulung, 63.2km, 2165m | ||
| *deviation from outward route, recommended* | Continue back to Landruk if linking on Mardi Himal Trek afterwards. | |
| Gurjung, 67.1km, 2047m | ||
| 7 | Tadapani, 70.7km, 2700m | |
| Deurali, 75.0km, 3116m | ||
| Ghorepani, 78.3km, 2873m | Stay overnight here for sunrise at Poon Hill! (Additional climb to 3193m). Ghorepani also links to Annapurna Circuit if you’d like to combine both routes. (Could then add on Mardi Himal for a monumental hat-trick…) | |
| Nangethanti, 84.1km. 2543m | ||
| 8 | Ulleri, 89.2km, 2043m | Get ready for a seemingly infinite number of steps. |
| Birethanti, 97.2km, 1045m | ||
| Nayapul, 99.1km, 1040m | Local buses available back to Pokhara. |
3. Mardi Himal
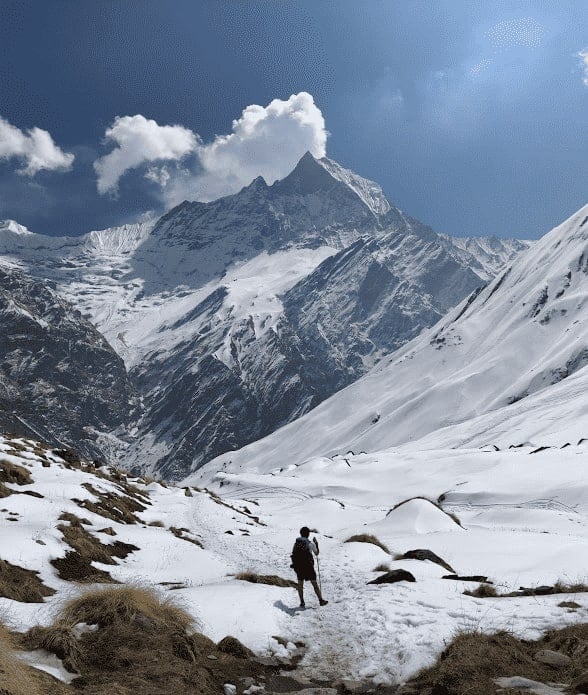
Photo: Ciaran Nye
Mardi Himal is a relatively new trekking route, and it’s an absolute cracker.
On the Annapurna Base Camp trek, you look across the valley at an imposing landscape that appears unattainable. This is where the Mardi Himal route takes you.
Passing through rich rhododendron forests, you’ll eventually reach the High Camp teahouses, which seem to be dotted precariously on the ridgeline. It’s a truly remarkable place, and the final push to Mardi Himal Base Camp is equally majestic.
Plus, if you’re short on time, the trek can be completed in well under a week, and the Himalayan views are up there with the very best to be found.
What’s not to like?!
How many days does the Mardi Himal trek take?
The Mardi Himal trek is usually completed in 4 days. The elevation gain is quite fierce if you head straight from Forest Camp to High Camp, so if you’re struggling at all with fitness or the altitude, add in an extra sleep at Low Camp.
For the immersion in the mountains you’ll be rewarded with, this it’s a superb shorter trek option that’ll take you up to 4500m.
Suggested Itinerary and Notes
Like with the other routes discussed, you can use the following list and a paper map to devise your own plan, however, you can’t sleep at the Base Camp, so sleeping at High Camp is certainly the best option.
The itinerary for the way back just depends on personal preference and speed, but don’t go so quick you miss savouring the views.
| Day (Suggested itinerary) | Waypoints (Village, cumulative distance, altitude) | Notes |
|---|---|---|
| 1 | Kande, 0km, 1750m | Buses to and from Pokhara. |
| Australian Camp, 2.5km, 2050m | Fantastic sunrise spot. | |
| Pothana, 3.6km, 2000m | ||
| Deurali, 5.6km, 2140m | ||
| 2 | Forest Camp, 13.5km, 2450m | |
| Low Camp, 16.9km, 3000m | For a first time trek at altitude, a night at low camp could be added if desired. | |
| 3 | High Camp, 21.2km, 3520m | Set out early towards Base Camp for an out and back. |
| Upper View Point, 25km, 4150m | If the weather is poor, this may be the highest reachable spot. Small hut. | |
| Mardi Himal Base Camp, 26.5km, 4500m | ||
| *return along same trail initially* | ||
| Upper View Point, 28km, 4150m | ||
| High Camp, 31.8km, 3520m | ||
| 4 | Low Camp, 36.5km, 3000m | |
| *deviation from outward route, recommended* | ||
| Sidhing, 39.2km, 1950m | Jeeps to Pokhara available. | |
| Lumre, 45.5km, 1200m | Buses back to Pokhara. |
After an early out and back to Mardi Himal Base Camp, you can then stay again at High Camp.
Alternatively, there’s certainly time to continue back down the trail towards Low Camp, or even get a 4×4 back to Pokhara that same evening from Sidhing (public bus from Lumre) if you’re speedy.
Beware, in the depths of winter or otherwise, if the snow is thick, it may well be that reaching the Base Camp isn’t possible and that the Upper Viewpoint stops you in your tracks. The trail can easily disappear in the snow and clouds, and it can become unclear what is solid ground and what is the edge of a steep drop.
Don’t take stupid risks at this point in trying to push on. Even if the viewpoint is the furthest trekkable point, it’s still super exciting being up on the ridgeline freshly covered in snow.
The Mardi Himal Trek is gaining in popularity, and rightly so. It almost feels as though you can reach out and touch Machhapuchre (‘fishtail’) from the upper reaches of the trail, while the dense forest below provides some cool variation in terrain.
A Few Other Options in Annapurna Region…
Here’s a quick overview of some other trekking routes in the region to consider. There are so many ridiculous spots in this area, grab a map and head somewhere – it’s likely to be a winner.
4. Manaslu Circuit
An epic 12-14 day excursion over the Larke Pass, reaching 5100m. This route is more expensive than the Annapurna Circuit, as additional permits are required.
These include the Annapurna Conservation Area Permit (needed for the ABC, ACT and MH treks too), the Manaslu Conservation Area Permit (MCAP), and a Restricted Area Permit (RAP). During the Autumn season (September to November), the RAP is $100 for the first week and then $15 for each extra day in the restricted area.
These figures are lowered to $75 and $10 for the rest of the year. It’s also rightly essential to take a guide on this route – this was always the case, well before the recent rule changes, due to the area being restricted and more remote than other routes.
If you’re able to shell out for the permits and guide, this beast of a trek is guaranteed to be a grand adventure.
5. Poon Hill
Poon Hill is an introductory-level trek, over 3 or 4 days. The climax is waking up early in Ghorepani to witness sunrise at Poon Hill, offering panoramic views of both Annapurna and Dhaulagiri.
Be ready for a chunky number of stairs on the first day from Nayapul, and some potentially busy trails: this route can become quite a highway in busy season. But if you’re short on time or new to trekking, the reward/effort ratio is strong as the views are still spectacular.
6. Mohare Danda
A fantastic alternative option for a short trek, just outside the Annapurna Conservation Area, which requires no permit or guide! The route is much more off the beaten path than the likes of Poon Hill, which means quieter trails, more peace and lower costs. It is outside the Annapurna Conservation Area, but still affords enviable views of the Himalayan ranges.
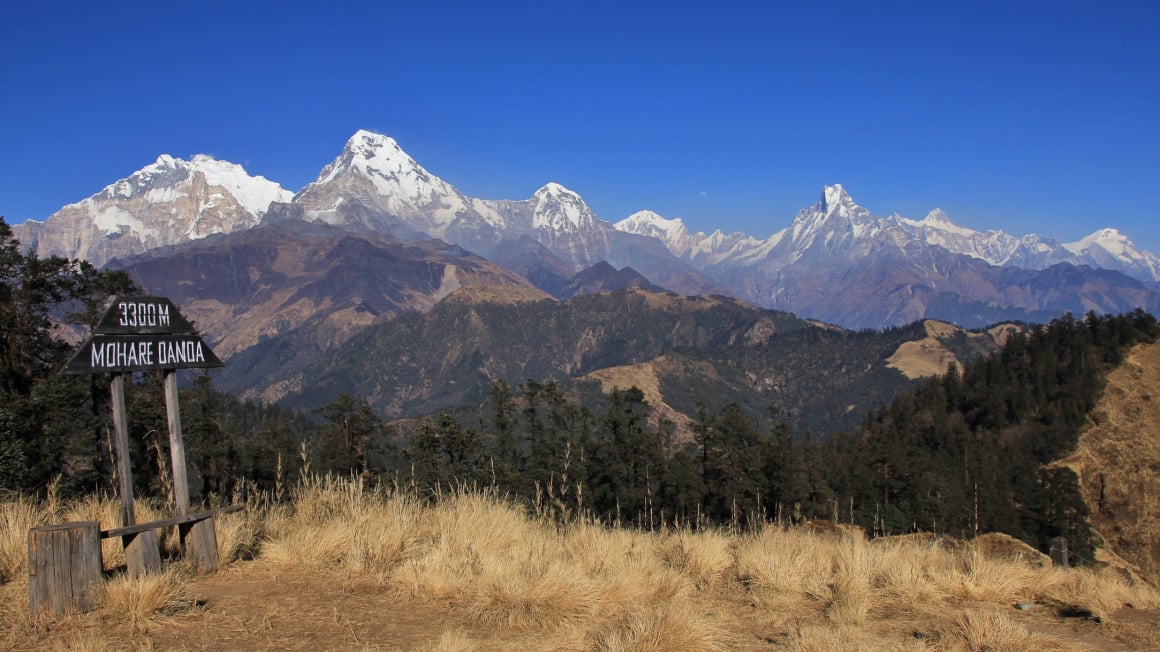
This 3-4 day route is reached from Pokhara by taking a bus to Beni. The trek peaks at the 3300m station of Mohare Danda (‘Danda’ is equivalent to hill in Nepali) for a scenic sunrise across Annapurna and Dhaulagiri. Finish in Tiplyang (buses run back to Pokhara).
This local outing should not be overlooked!
7. DIY!
Once you’ve got the hang of it, why not try and construct your own route? Be mindful of the permit zones – this is easier outside of the Annapurna Conservation Area – but don’t be afraid to head to places off the tourist trail.
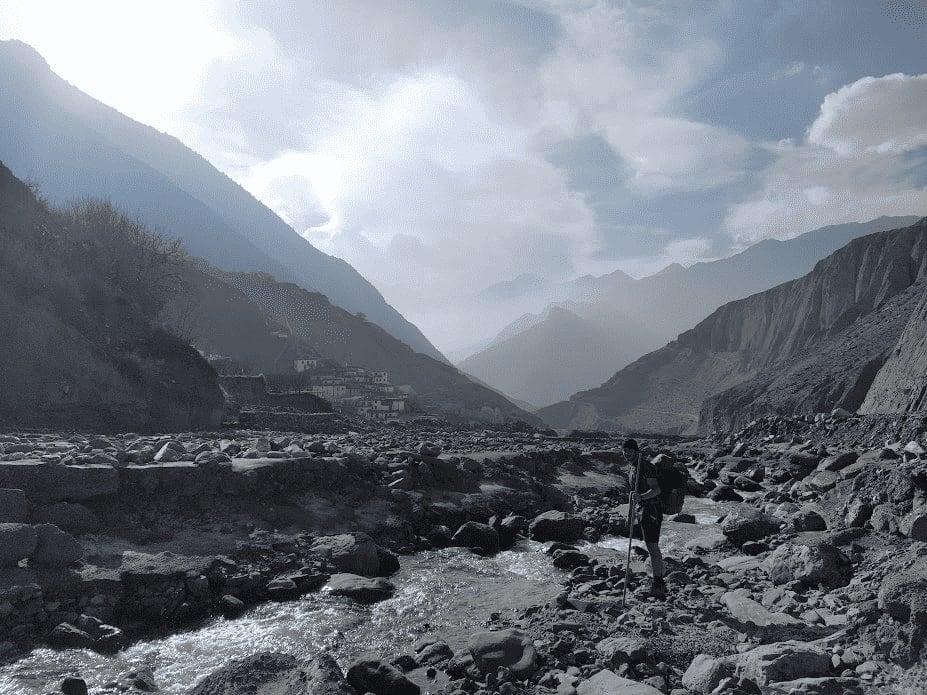
Photo: Ciaran Nye
Spending 10 days on foot in the mid-hills between Pokhara and Kathmandu was one of the best travel experiences I’ve ever had. The kindness of Nepali villagers means you’ll be treated like family, and after your trip, longing to return soon!
Permits, Rules and Regulations
In April 2023, new rules were introduced that compel all trekkers to hire a guide when undertaking treks in the Annapurna Conservation Area. This decision was made citing (reasonable) safety concerns for FITs (‘free independent trekkers’), but remains controversial. This means there are three things to sort out for the routes covered in detail here: a TIMS card, an ACA permit, and a guide.
On the usual trekking trails, there are ‘checkpoints’ in certain villages, where you’ll have your ACAP permit checked and stamped (this has always been the case, before the new rules were introduced).
You must obtain this permit before starting the trek, at the Immigration Offices in either Pokhara or in Kathmandu (opening hours are reduced during off-seasons; check on the door in advance of your trek). This is also where you’ll grab your TIMS card. Take your passport, insurance policy details, and passport photos if you have some (if not, you can usually get them taken in the office for free).

Photo: Ciaran Nye
The ACAP costs 3000 rupees and the TIMS card 2000 rupees, for a total set-back of around $38.
In addition, hiring a guide can cost between $20-40 per day, meaning the new rules add greatly to the backpacker’s budget.
On one hand, the news rules seem to benefit trekking agencies. On the other hand, many teahouses and local restaurants are concerned less FITs will lead to reduced income for their businesses and families.
However, some trekkers have recently been completing the circuit independently, and reported having no issues at all when getting their permits checked, despite being guideless. This is obviously not guaranteed, and the situation is likely to evolve over the coming months and seasons.
The Annapurna Circuit Trek group on Facebook is a useful source for the latest deets on what’s happening week-by-week.
Here are some commonly raised pros and cons of hiring a guide:
Pros:
- You’ll gain added insight into Nepalese culture and history.
- You’ll have experience and expertise on hand for navigating more risky areas like the Thorong La Pass.
- Guides will usually help organise permits and the trekking itinerary – less admin for you.
Cons:
- Significantly increases daily costs (extra $20-40 per day).
- Limited flexibility on schedule in case of altitude sickness or individual preference (particularly if in a group).
- Guides often have deals with tea-houses that may limit your choice.
Preparing for your Annapurna Trek
Preparing for a big trek may seem like a daunting task. There are things to prepare, like gear, route-planning and some permit-related admin.
Fortunately, you don’t need to be a sponsored athlete, master orienteer or avid form-filler to swiftly get your ducks in a row and be ready to head high into the mountains.
Aside from gear, it’s also extremely important to be aware of weather conditions before hitting the trail or even starting the trek. On 14 October 2014, a record-breaking storm dumped nearly 1.8 meters of snow in the Annapurna region which led to a series of devastating avalanches that resulted in the deaths of at least 43 people, 21 of these trekkers.
While mountain weather can change quickly, I highly recommend having a satellite device with you, and to ensure you get updates on conditions at each teahouse you stop at.
What should you pack for Annapurna trekking?
Firstly, if you’re reading this on the bus and realise you’ve left something at home on the bed, rest assured you can find all you need for trekking at the shops in Pokhara or whilst backpacking Kathmandu.
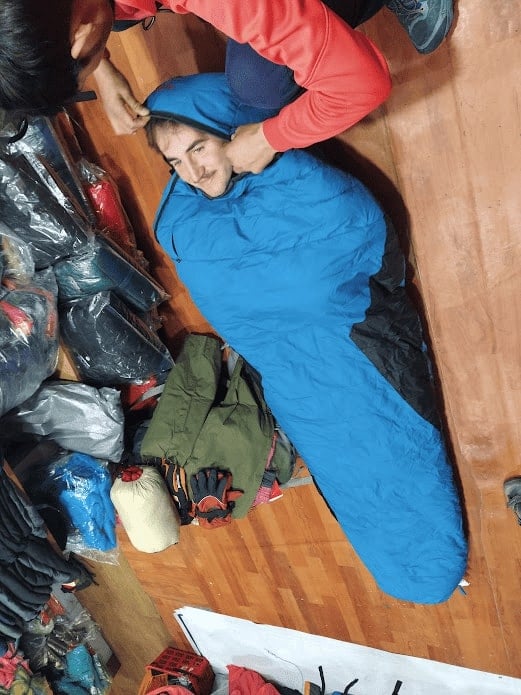
Photo: Ciaran Nye
What to pack exactly will depend on personal preference and weather. Use the list below as a checklist.
A word of warning/comfort: don’t pack a different t-shirt for every day, there’s simply no need.
If desired, you can hand-wash items along the way and dry them above the fire in a teahouse, but nearly everyone stinks to high heaven by around day eight, so don’t overly stress. You’ll be in good – probably nose-blind – company.
If you’re looking to make a long-term investment in some clothing for multi-day hiking, check out merino. It’s a breathable, temperature-regulating and odour-resistant blessing for backpacking in colder climates.
There’s usually a healthy supply of gear circulating in the hostels on Lakeside, with backpackers selling, trading or giving away items after finishing their treks. Kiwi Backpackers Hostel on 5th Street is a hub of backpacker activity, and one of the best hostels I’ve ever stayed in.
What to Pack for an Annapurna Trek:
Here’s exactly what you should bring on any trek in the Annapurna Region.
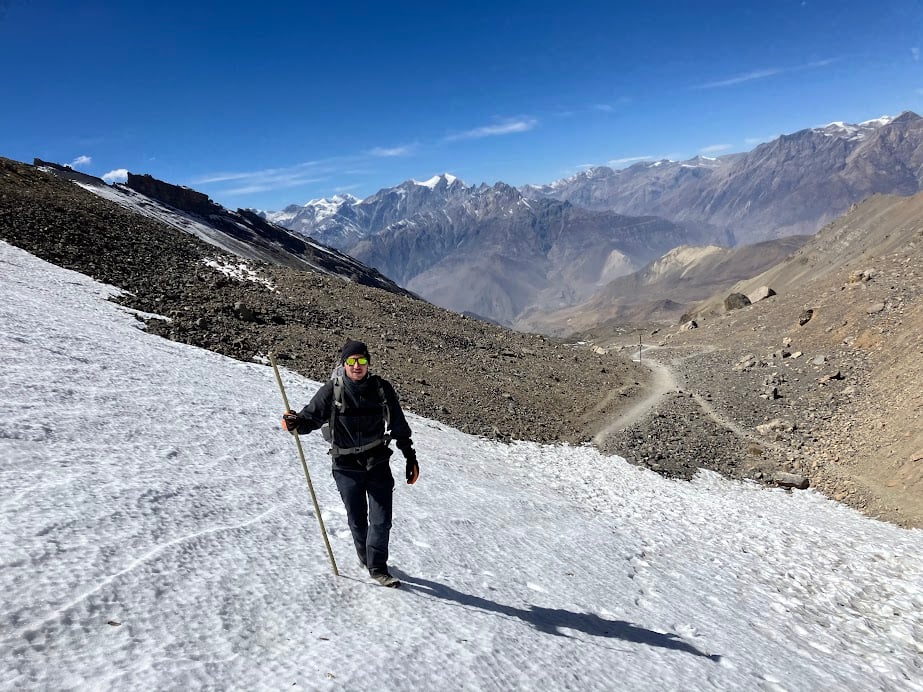
Photo: Ciaran Nye
- Osprey Aether Backpack: Sturdy and comfy, with good support and a rain cover. It’s truly the best pack out there.
- Clothing: (Ideally) lightweight, quick-drying shirts, trousers, and shorts.
- Base layers: It can be numbingly chilly at the high points of each route.
- Mid Layer(s): Go for fleece or soft shell.
- Arc’teryx Beta AR Jacket: Or hiking poncho (good for keeping cool).
- Waterproof Trousers: Ideally can be put on over shoes.
- Patagonia Down Sweater Hoodie: Like a portable hug.
- Hat and Gloves: Sun hat if desired; warm beanie and gloves for higher elevations.
- Abaco Sunglasses: Protect your eyes!
- Water Bottle(s): At least two litres of capacity.
- Marmot Never Summer Sleeping Bag: Rated at 0F and -18 C, you can’t be better prepared than with this epic bag.
- Water Treatment: Purification tablets or a water filtration system (like the Grayl Geopress).
- First Aid Kit: Grab basic medications and blister treatment from a pharmacy before leaving. Consider Diamox (see altitude section).
- Lip Balm: Chops may otherwise become drier than a moth sandwich.
- Headtorch: With spare batteries/ charger. A real adventure isn’t complete without one.
- Sunscreen: High SPF for sun protection.
- Hanging Toiletry Bag: Toiletries themselves are cheaper in Pokhara than on the trail.
- Physical Map: Found all over the place (shops, hostels, etc).
- Micro Fibre Towel: Compact, dries fast and gets the job done.
- Footwear: More to follow…
- Black Diamond GTX Gaiters: Particularly if wearing low-rise walking shoes or trail runners.
- A good travel camera: The scenery justifies the extra weight.
- Black Diamond Carbon Trekking Poles: Can be an absolute boon on uphill sections. Alternatively, pick up a sturdy bamboo stick en route, with which you will become inseparable.
- Kahtoola Microspikes: ‘Micro-spikes’ can be found cheaply in Pokhara. Highly recommended in Winter.
Can I rent rather than buy gear for my Annapurna Trek?
Yes! The trekking shops on Lakeside in Pokhara and Thamel in Kathmandu will allow you to rent all sorts of gear without breaking the bank.
A down jacket and sleeping bag will each cost around 150-200 rupees to rent per day ($1.15-$1.50), and if you want to stay out in the mountains for longer than planned, you can usually just pay the difference on returning. (Just in case, take photos of the condition of the gear you hire as you leave the shop.)
What footwear is best for Annapurna trekking?
A hotly debated topic.
What type of footwear to go for is largely down to personal preference, within the reasonable bounds of frostbite prevention.
Hiking boots are the most popular choice, as they provide top-notch ankle support, superior weatherproof protection in case of snow, and shielding from rocky ground beneath. Be sure to wear them in advance though, to prevent a blistery first few days on the trail.
Photo: Will de Villiers
Boots are a shrewd choice. However, they can feel clunky, and you may find yourself hankering for something more nimble.
An increasing number of trekkers are using trail running shoes, when not in the depths of winter. A pair of waterproof (look for Gore-tex) trail running shoes can provide solid support while remaining light and agile. You’ll want a pair with deep treads (grip) on the sole and a sturdy construction. Combine with a pair of gaiters in case of snow.
Chuck in some flip-flops/ jandals/ slippers for downtime in the teahouses. Your feet will be eternally grateful.
Why You Should Travel With a Water Bottle
As travellers, we have a joint responsibility to reduce the environmental impact of our excursions, and plastic waste is one of the biggest problems facing Nepal’s Annapurna Region.
Travelling with a filtered water bottle is a wise move. There’s no better option than the Grayl Geopress: this water bottle and filter system removes all manner of threat, including viruses and heavy metals – no mean feat. This bottle is a popular choice amongst trekkers and backpackers in Asia.
It’ll last for years, reduce plastic waste, and save you money. The Grayl Geopress is a sound investment for anyone taking on some Annapurna trekking.
Life on the Trail
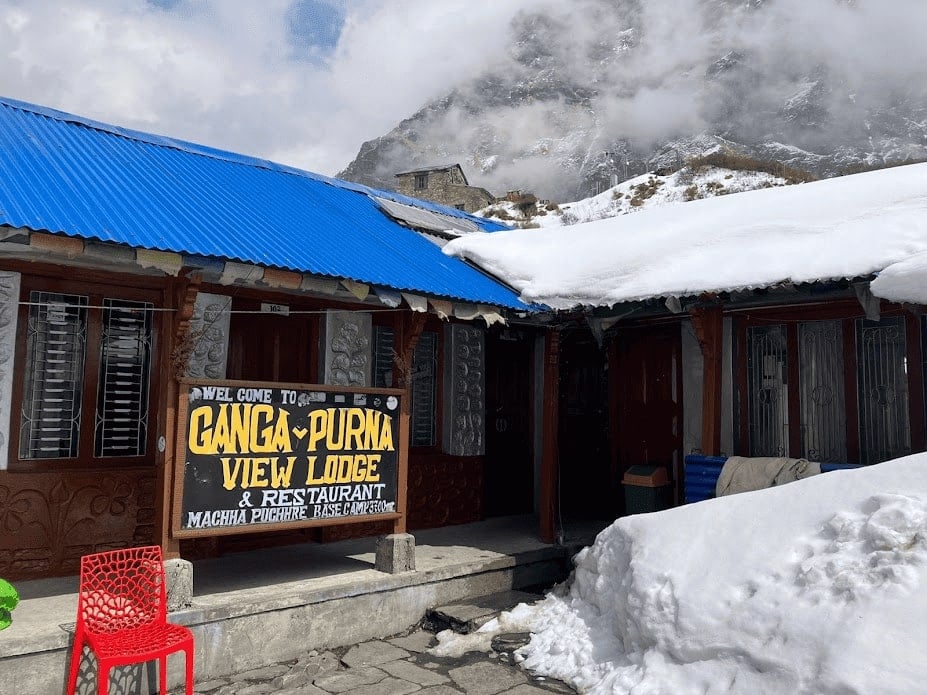
Are there places to stay on an Annapurna Trek?
On all treks discussed in this guide, there are a plethora of accommodation options available. This means you won’t need a tent or shelter to take on these Annapurna treks. Luxury!
These are in the form of teahouses – some large, some small – and you’ll find them in the villages along the trails, plus some extras dotted in between.
What’s more, your room for the night is usually offered very cheaply or even for free, provided you eat dinner and breakfast at the teahouse where you stay. Here are a few things to keep in mind when choosing your residence for the night:
- Check out the views for sunrise and sunset!
- Ask if using a hot shower, wi-fi and electricity is available and included in the rate agreed, or whether you’d have to pay extra. You can often strike a ‘package deal’ if you chat to the owner.
- If it’s cold, a fire to sit around is an unrivalled treat. (Even if it’s a yak dung inferno..)
- Of course, the price!
You’ll be given a simple private room for the vast majority of stays, which come with beds, blankets and pillows.
You’re more likely to get a plug socket at lower altitudes. Otherwise, there’ll probably be a shared extension cable in the kitchen area but you may have to pay.
Gas-heated showers can be found throughout the treks, except near the highest points of each route. Toilets are a mix of squat style toilets and Western designs, but take your own loo roll! It grows crushingly expensive further up the hillside, and splashing your behind from a bucket of icy shards in the early hours might not be ideal.
Sitting round the table in a teahouse after a long day’s trek is a quintessential part of a Nepali trekking experience; playing cards and sharing tales with locals and fellow travellers is sure to leave lasting memories to treasure.
What food is available while trekking in the Annapurna Region?
The Nepali word ‘Annapurna’ can be translated as ‘everlasting food’, which certainly seems fitting when it comes to Dal Bhat.
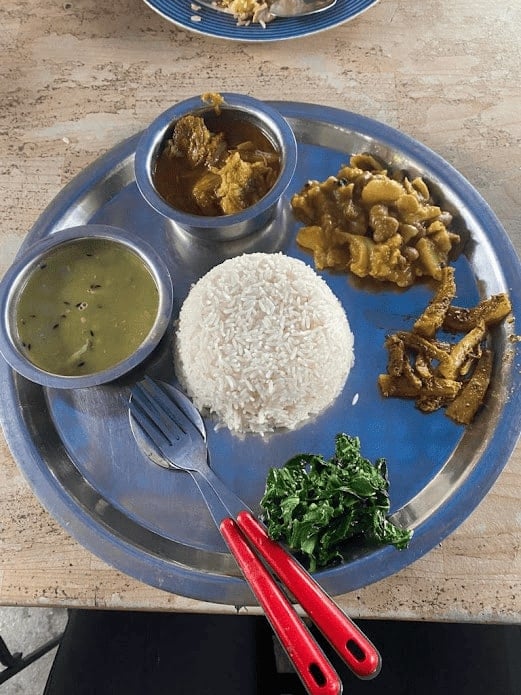
Photo: Ciaran Nye
This national dish is a staple for people all across Nepal, and is likely to become a dearly treasured feed when trekking in the Annapurna region.
Dal bhat consists of steamed rice paired with dal (cooked lentils or other pulses), accompanied by a varying array of saag (spinach cooked in spices), papad (poppadom), vegetable tarkari (seasonal vegetables) and pickle amongst other things. You can order small bowls of meat to go with it too.
And, in very healthy news for us lovers of value, most elements of dal bhat can be replenished at no extra cost!
You’ll also find things like fried rice, noodle soup, curry and even some surprisingly good pizza, cooked on a stove. Try thukpa, a classic Nepali noodle soup with a warm broth.
Porridge, omelettes and toast are all usually there too. At least once, give ‘Tibetan bread’ (or ‘Gurung bread’) a go, with honey. For breakfast, this is an absolute triumph.
Food is expectedly more pricey than in Pokhara but not outrageously so. See an example menu below, typical of those found on the Annapurna Base Camp trek. For reference, one US dollar is currently equal to around 130 Nepalese rupees.
Dealing With the Altitude While Trekking in Nepal
Trekking in the Annapurna region naturally means you’ll be dealing with some serious loftiness.
For example, Thorong La – the pinnacle of the Annapurna Circuit – is just about the highest mountain pass in the world.
The sub-par oxygen levels found here are likely to have some kind of effect on all trekkers, and the severity of its impact doesn’t seem to be linked to physical fitness. Your gym-obsessed mate could find themselves back of the pack, being overtaken by heavy smokers flying up the hills.
While it’s a bit of a lottery in that sense, there are things you can do to reduce your risk of feeling groggy or worse, which I’ll cover here. Altitude sickness is not something to mess about with, and one of the most dangerous aspects of Nepal, so here’s a breakdown of some key tips and information surrounding AMS, HACE, and HAPE.
What is altitude sickness?

Altitude sickness essentially refers to the ill effects on the body of being exposed to lower levels of oxygen.
Acute mountain sickness (AMS) is the mildest form of altitude sickness, but should certainly not be ignored. Symptoms include:
- Headache
- Nausea/vomiting
- Loss of appetite
- Fatigue
- Dizziness
If these crop up, it’s important to STOP ascending. Acclimatisation and rest can give the body sufficient time to adjust to the conditions, before continuing with care.
On the other hand, the more serious high-altitude pulmonary edema (HAPE) and high-altitude cerebral edema (HACE) require rapid descent, and are life-threatening emergencies. HACE refers to fluid buildup in the brain, while HAPE refers to fluid buildup in the lungs.
Symptoms of HACE include:
- Severe weakness
- Drowsiness
- Acting drunk
- Personality changes
- Balance issues
Symptoms of HAPE include:
- A cough
- Pink sputum
- Breathlessness at rest
Keep an eye on each other and report any symptoms to mates and locals at teahouses. HAPE and HACE require immediate attention. Descend down the mountain right away, while limiting physical exertion as much as you can while doing so.
How to Minimise Risk of Altitude Sickness:
As mentioned previously, developing symptoms of altitude sickness when trekking is seemingly unrelated to overall fitness. However, there are things you can do to reduce your risk. Here are some tips for trekking in the Annapurna region:
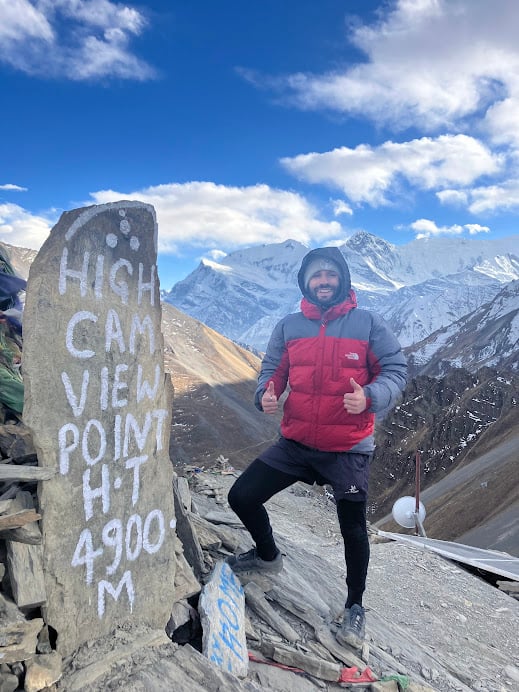
Photo: Ciaran Nye
- Limiting daily ascent when above 2500m is the best way to reduce your risk. Ascending no more than 500m a day is optimal, while more may be manageable for some. It’s quite common for trekkers to climb more than this in a day on occasion, but be careful in doing so, and be sure to stop and rest for a day or more if you develop symptoms.
- Drink loads of water! Increase your intake as you ascend.
- Consider using Diamox (acetazolamide). This is by no means essential, but taking Diamox a day or two before ascending to high altitudes can speed up acclimatisation. (If you have any other health conditions, check with your doctor before doing so). Side effects can include tingling fingers and lips – a quite odd, but not particularly troublesome sensation.
- Keep plans flexible to build in any acclimatisation days that become necessary.
- Walk high, sleep low! Walking to a new ‘high point’ but sleeping below it when possible can be great for your body.
- Look after your mates! Check in on one another and keep an eye out for anyone struggling or showing changes in personality.
Getting Insured BEFORE Trekking Annapurna
Altitude sickness is no joke. Make sure you’ve got some good travel insurance before heading up there!
ALWAYS sort out your backpacker insurance before your trip. There’s plenty to choose from in that department, but a good place to start is Safety Wing.
They offer month-to-month payments, no lock-in contracts, and require absolutely no itineraries: that’s the exact kind of insurance long-term travellers and digital nomads need.

SafetyWing is cheap, easy, and admin-free: just sign up lickety-split so you can get back to it!
Click the button below to learn more about SafetyWing’s setup or read our insider review for the full tasty scoop.
How Much Does it Cost to Complete an Annapurna Trek?
This will greatly depend on whether you opt for a ‘package tour’ or not.
For broke backpackers, going without a tour is certainly the more budget-friendly option, and you can easily meet trekking mates on the route itself, or in hostels before setting off.
Without a package tour, a decent budget is around $25-30 per day, excluding the cost of hiring any gear and a guide. Rooms are very cheap ($2-3 per night) or even free when you eat there, so the main daily costs go on calories and any toiletries.
A guide costs around $20-35 a day, which can be shared amongst a group.
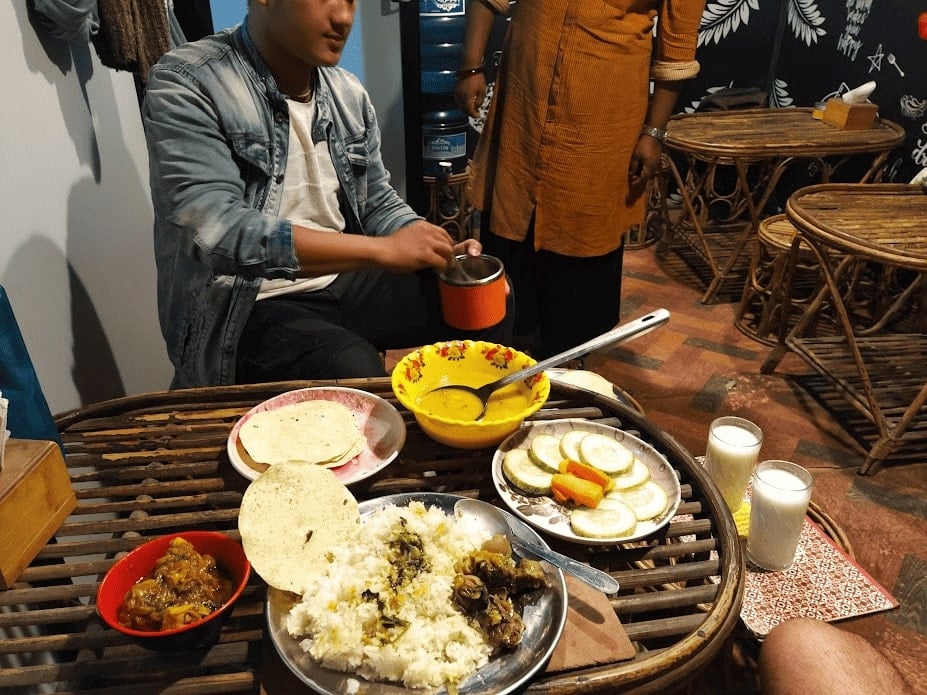
Photo: Ciaran Nye
There are no ATMS on the circuit – take more cash than you think you’ll need! You never know if you might need an extra day of rest due to altitude, or fancy the occasional beer. (My mate and I didn’t heed this advice, got addicted to Snickers, and ended up with a budget of $7 each for the last couple of days, which was far from ideal.)
Another key money-saving tip: take your own loo roll! Its price seems to rise exponentially with the trail.
Overall, trekking in the Annapurnas isn’t a great deal more expensive than backpacking in other parts of Nepal, largely thanks to the generous portions of Dal Bhat served up of an evening.
Nepali Customs and Phrases
Travelling in Nepal is an immense privilege. Along with some introductory Nepali to get to grips with, here are some tips to help you remain a conscientious rambler.
- Order food together, and if asked, make breakfast choices the night before. This will reduce the amount of fuel needed to heat food.
- Minimise plastic waste! Take a filter bottle instead of buying water as you go.
- Ask before taking photos of anyone.
- Reduce your meat intake, as most is not fresh and carried up the mountains from lower villages.
- Learn some lingo!
Nepali is not a particularly difficult language to learn for English speakers, especially for a handful of essential phrases. Make an effort and it’ll be hugely appreciated! It’s one of the tips for Nepal that I feel really made such a difference to my experience.
- Namaste = hello/ greetings (polite).
- Dhanyabaad = thank you.
- Kasto cha = how are you?
- Ramro cha = it is nice/ beautiful/ good.
- Baya tira = leftwards.
- Daya tira = rightwards.
- Bhaato = ‘path’ or ‘way’.
- Mitho = tasty/delicious.
- Deraye = very (e.g. Deraye mitho = very tasty).
- Pheri bhetaula = see you again.
- Kukhura ko maasu = chicken meat.
- Bhaisi ko maasu = buffalo meat.
- Pani = water.
- Tarkari = vegetable curry.
- Shauchalaya = toilet.
- Kati tadha = how far?
- Tapaaiko nam ke ho? = what is your name?
- Mero nam —– ho. = my name is ——.
- Bhetera khoosi laygo = nice to meet you.
Final Thoughts on Trekking the Annapurna Circuit
Stuck in a rainy city, fantasizing about booking that travel extravaganza, your mind might conjure up images of pristine beaches and pina coladas. ‘Landlocked’ may not seem conducive to your dreams of a blithe, hostel-hopping existence…
But trust me: central Nepal is as laid back and inviting as anywhere on the planet, offering a simply unrivaled combination of its superb lakeside hostel scene and the best mountainous scenery around. The fact this guide is full of “Xth biggest/longest/tallest in the world” says enough in itself.
Memories forged on the trails over endless portions of dal bhat and games of cards are bound to be precious, as are any moments spent in the company of the ever-hospitable Nepalese people. The routes featured in the guide have been found on backpackers’ bucket-lists for generations, for very good reason.
Backpacking has changed greatly in many places in recent years, as mobile data and online bus booking systems abound. Traveling on foot through the mountains, with an actual, physical, paper map is a uniquely gratifying experience that no technological advancement can replace.
Trekking in the Annapurna Region -whether you choose the classic Annapurna Circuit or one of the other majestic options – is guaranteed to be an epic adventure that you should not think twice about booking!
Just don’t forget to wear in your boots first…

Photo: Ciaran Nye


A truly helpful inspiration, it felt like I was in the mountain….but yet being stalked y a yeti…so the experience of your experience is just plainly…amazing and has by far been the most best reading and advice I have ever found on Annapurna…not the yeti, just you and the guide of the Himalayas.
I am though a bit nervous about the thorong pass, altitude sickness, have you heard about garlic helping with altitude sickness?
Well best to you and hope to oneday our paths cross, I’ve been a backpacker for 27 years , but hardly left New Zealand, I have met travelers from all around the world in backpackers, now its my turn to head for nepal.
Thankyou kindly for your travel advice. Arohanui from NZ
Hi Luke,
Great to hear you are getting over to Nepal. Although there are many a remedy for altitude sickness some of the best things you can do is take the necessary time to acclimatise, not push on at an unmanageable pace, and have layered clothing to deal with any temperature changes.
Have a great!!!