Buddhist prayer flags, pagoda-marked villages, and the highest mountain on the planet make one helluva a combination, one that I soaked up to the fullest when I completed the Everest Base Camp (EBC) trek on January 1st, 2025. Yes, I did it in winter and that was truly one of the BEST decisions ever!
But more on that later, let’s get into why you’re here: a lowdown on what EBC really has in store. My husband and I did the trek completely independently: no guides or porters, and we even went by road instead of taking the flight to Lukla. So you can rest assured that I have a few notes after arranging it all!
Whether you want to go on a tour or backpack the route like we did, here’s everything you need to know about Nepal’s epic Everest Base Camp trek to the highest peak on the planet.
Can You Hike Everest Base Camp Independently?
Yes!
There’s some conflicting info out there as the country made a regulation that technically banned independent trekking in the country in 2024.
But after my Nepal trip I can confirm that the local Sherpa communities rejected this and the rule is NOT enforced for the EBC trek (same with The Three Passes and treks in the Annapurna Region).
So yes, you absolutely can go without a guide, porter or company (which saves money and adds a ton of flexibility).
How hard is EBC?
This HEAVILY depends on not just your fitness level, but how you react to altitude. And even then, altitude issues can hit at any time. EBC is HIGH at 17,589 ft (5,364 meters) and this trip was the highest I’d ever been.
I live in a high altitude region and have done many treks above 14,000 ft (4,267 m) and still I utilized some Diamox at around 5,000 meters.
The Broke Backpacker is supported by you. Clicking through our links may earn us a small affiliate commission, and that's what allows us to keep producing free content 🙂 Learn more.
As for the actual terrain, I personally found the route pretty easy (aside from Kongma La) as someone used to wild camping. It’s also virtually impossible to get lost on the main trail, and there are MANY amenities along the route.
If you’re fit/trained properly and are prepared for the altitude, you’ll do fine. If you’ve never done a high altitude trek, you may struggle regardless, but it’s much easier to struggle here than on camping trails!
Getting to the Start: Flying vs Driving
Most trekkers choose to fly to Luka from either Kathmandu or Ramechap depending upon the season. Besides it being one of the most dangerous airports in the world, it’s not exactly cheap with tickets cost up to $450/roundtrip per person.
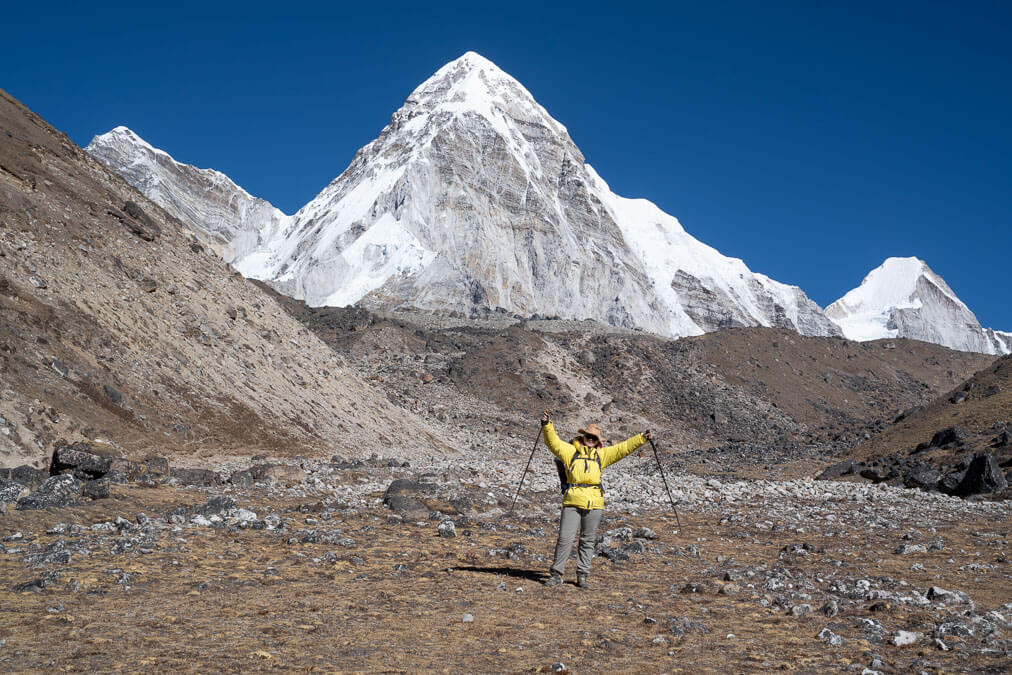
Photo: Samantha Shea
Because of all this, we chose to take the road route which consisted of two different jeeps: a comfortable one from Kathmandu to Phaplu for about $15/person and another VERY bumpy, long off-road ride to Surke for another $25/person. It’s also possible to start the trek from Phaplu if you have time, which gives you insight into less-touristy Nepali mountain villages and extra time to acclimatize.
If you want to take the adventure even further, you can opt to start in Jiri, where the original trail to EBC began before the roads were extended. This will tack at least 4-5 days on to your trip, but is filled with some stunning scenery and villages that feel a lot more untouched than what you’ll find along the main route.
Best Time to Trek to Everest Base Camp
So you may find this controversial, one of my top Nepal travel tips is that I’m 100% sure that the best time to do EBC is in the month of December. While the rest of the internet will tell you March-April or October-November I can assure you that those will be ZOO LIKE experiences with insane numbers of trekkers, guides, and donkeys.
As one of the most popular hikes on the planet, even in December EBC had more people than I’ve ever seen in the Karakoram, where I usually trek. But it was VERY manageable. Like we had the entire Base Camp to ourselves, and Kala Patthar at sunset only had three other people.
Compare this to crowds and dozens of people during the peak seasons and it’s like talking about two different hikes.
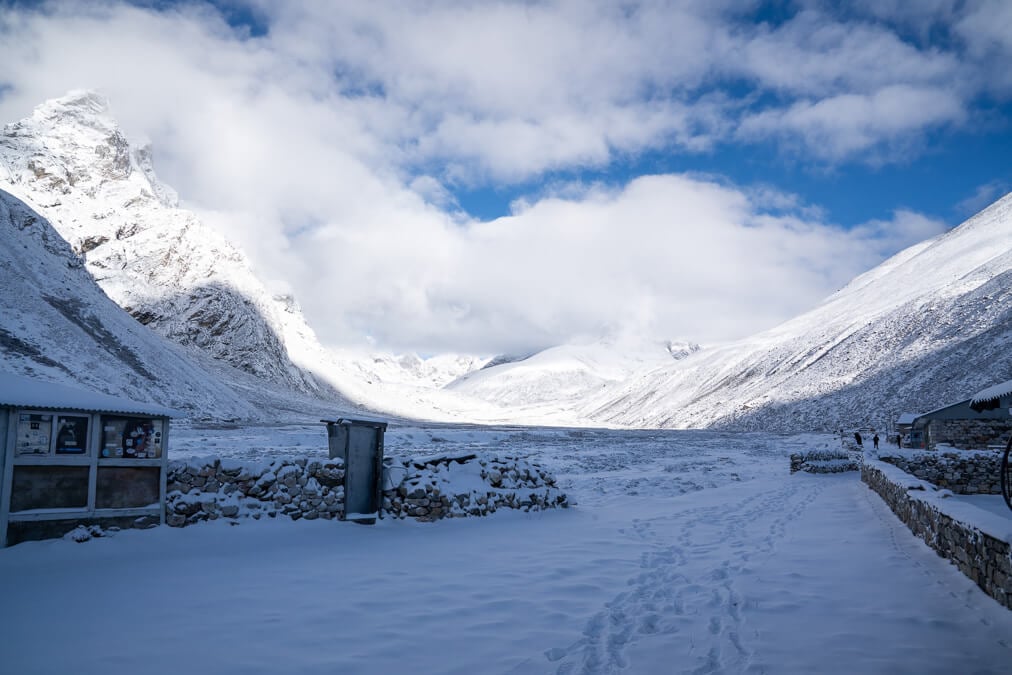
Photo: Samantha Shea
YES, it is a bit colder but it’s really not THAT extreme, plus since lodges aren’t packed full, you should be able to grab extra blankets for free when you need them. We didn’t even bring sleeping bags, though if we did I’d bring light ones. Massive winter ones are NOT necessary.
December is also statistically the driest month of the year in Nepal’s Himalayas. Every day except ONE of 19 spent on trail was sunny with blue skies. We even did the Kongma La Pass during this timeframe, and the other two (Cho La and Renjo La were open too).
If December doesn’t work, I’d recommend either LATE November, early January, or February, though the latter has started to become more popular as it’s technically warmer.
Keep in mind that summer May-August is rife with monsoon rains and landslide and is the true off season for EBC. This happens to be the most beautiful time of the year in Gilgit Baltistan though, so consider trekking in Pakistan then if you end up liking Nepal!
Permits Needed for EBC
You’ll have to pay for two permits to enter Samargatha National Park in the village of Monjo along the trail. For most trekkers, this will happen on day two of your route.
These include:
- Khumbu Municipality Entrance Fee: $18/person
- National Park Entrance Fee: $16.5/person
Note that drones are BANNED without a (very expensive) permit that can only be obtained by a local trekking company. I know this one of the most beautiful places in Nepal, but don’t think you can sneak one in either. They specifically check at the permit office!
Cost of EBC
This varies wildly depending on where you stay, what you eat and if you choose to go with a company. We ended up spending around $800/person for a 19 day trek eating well and opting for private bathrooms when possible.
Many Nepali companies will offer around $1,200-$1,500/person for a 12-14 day trek though this will often include a stay in Kathmandu too. Group trips or foreign companies will typically be even more.
It is possible to hire JUST a porter for the trek too, which will come out to around $30/day.
Everest Base Camp Day by Day Itinerary
Since most people will start trekking from Lukla, I’ve written out the itinerary with that in mind. If you plan to drive in like we did, plan to add at least one more day depending upon where you stop.
In practice, you start your trek at Jiri, Phaplu, Paiya, Cheplung (where we started) or Surke.
Day 1: Lukla to Phakding
- Trekking time: 3 hours
- Difficulty: Easy, some ups and downs
- Max Elevation: 8563 ft (2610 m)
- Elevation Gain:
- Distance: 4.6 miles / 7.5 kilometers
- Where to Stay: Green Village Guest House
After arriving into Lukla (hopefully you’ll make it!) it’s time to start trekking right away. Though you could always spend a day chilling at one of the many Lukla guesthouses though.
Don’t be surprised if your flight gets delayed or canclled though – the runway here is extremely short and risky, so weather conditions have to be perfect. I HIGHLY recommend baking in buffer days into your overall itinerary because of this.
If you’re hiking in peak season, you’ll likely have to fly from Ramechap which means today is a LONG day, but the hiking itself is pretty easy at least.
Your flight should (hopefully) arrive in the morning, and then you can make your way to Phakding pretty leisurely. There are several ups and downs, but the terrain is primarily cobblestones today.
Be prepared for a temperature drop once you reach the village as it’s almost entirely in the shade. I loved staying at Green Village Guest House, where they even had rooms with en-suite bathrooms and electrical outlets.
Day 2: Phakding to Namche Bazaar
- Trekking time: 4 hours
- Difficulty: Hard. Starts out easy, but then there’s a huge uphill (and a ton of meters) right before you reach Namche
- Max Elevation: 11,286 ft (3,440 m)
- Elevation Gain: 2723 ft (829 m)
- Distance: 4.6 miles / 7.5 kilometers
- Where to Stay: Khumbu Lodge
Today is hard but rewarding as Namche is where the valley really begins. It’s also the last place you can find a ton of amenities. Namche has EVERYTHING, from trekking gear to medical supplies and even Irish pubs and high quality pizza with mozzarella cheese!
You’ll start out on some standard paths through villages until you reach Monjo, where you’ll grab your national park and local permits.
Next up, you’ll see your first iconic Nepali suspension bridge before the uphills begin. This section is where you essentially gain 2,000 ft of altitude at once, so you 100000% want to have trekking poles. As someone who has done dozens of treks above 14,000 ft I cannot recommend them enough.
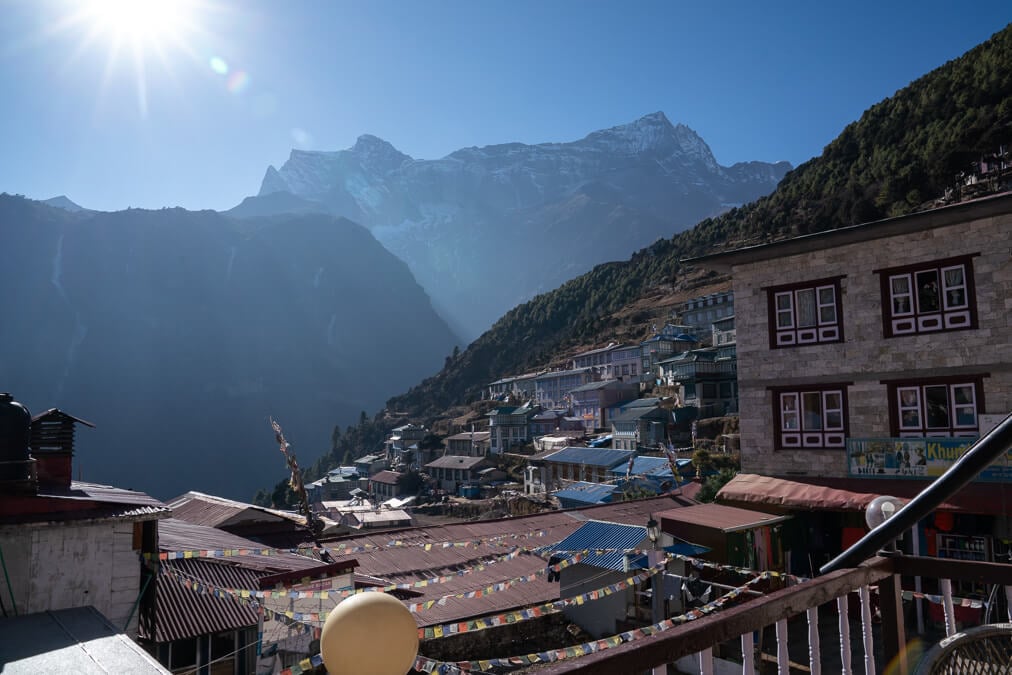
Photo: Samantha Shea
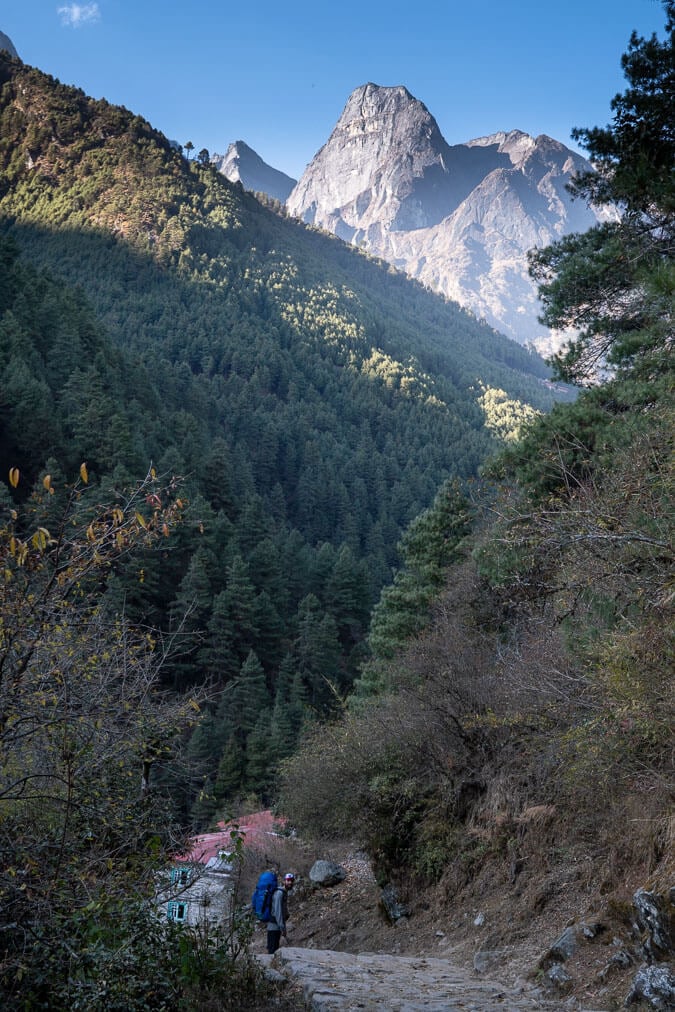
After crossing the famous Hillary Suspension Bridge, you’ll come across the “forest up hill” where you’re just gaining altitude among lots of firs. Donkey traffic can be a problem here, even in off season. ALWAYS give them the right of way and stay back.
I recommend starting early so you can get into Namche before dark – it’s a super cute town with an unmatched level of creature comforts. I stayed at the Khumbu Lodge both on my way up and down and not only is it Sherpa owned and operated for decades, but they also have large rooms with hot, private showers and an extensive menu.
Day 3: Acclimatization Day
It may feel early on, but trust me you’ll appreciate this rest day. Make sure you have everything you’ll need from here as you’ll realsiitcally only find a few smaller shops in Dingboche going forward.
You can also choose to do a hike to help you out with altitude to the famous Everest Viewpoint Hotel.
If you’re looking for places to eat or chill I can recommend:
- Irish Pub
- HighCamp Cafe
- Namche Bakery Cafe
- Namche Organics
Day 4: Namche Bazaar to Pangboche (or Tengboche)
- Trekking time: 7-8 hours
- Difficulty: Starts out really nice until you have to tackle another Namche-style hill through a forest right before Tengboche
- Max Elevation: 13,110 ft (3996 m)
- Elevation Gain: 1,824 ft (555 m)
- Distance: 11 miles (18 km)
- Where to Stay: Sonam Friendship Lodge
Warning that today is ROUGH, but the views that made you visit Nepal do become noticeably more magical and that makes it all worth it. Stop for an iconic photo with a pagoda and Ama Dablam (you can’t miss it!) and trek down a forest hill and right up to another one.
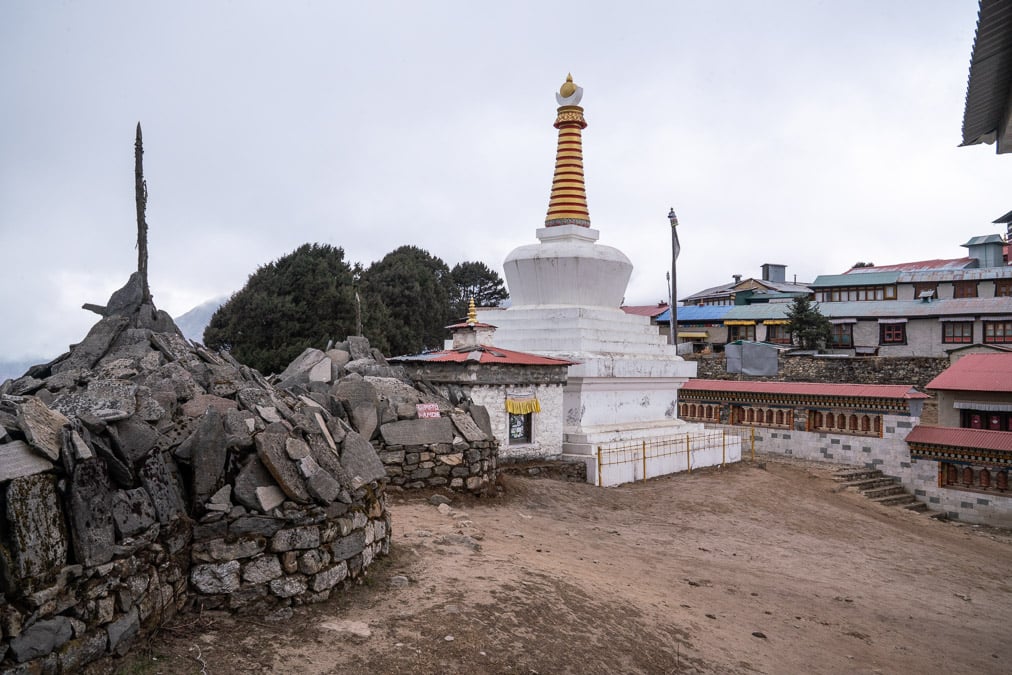
Photo: Samantha Shea
You’ll eventually arrive at Tengboche, home to a Buddhist monastery that’s worth a visit.
While you can stop here, I recommend keeping it moving to Pangboche if you can. It makes tomorrow *a lot* easier. The route onwards is fairly downhill and straight with a bit of elevation gain at the end. Pangboche is also the jumping off point for the Ama Dablam Base Camp trek which is a full-day side quest.
Day 5: Pangboche to Dingboche
- Trekking time: 4 hours
- Difficulty: Easy terrain and epic views, but the altitude really sets in today
- Max Elevation: 14,470 ft (4410 m)
- Elevation Gain: 1,360 ft (414 m)
- Distance: 4.9 miles (7.8 km)
- Where to Stay: Tashi Delek Lodge
I LOVED this day of the trek, and it’s also one of the easiest, especially if you stayed in Pangboche. The valley really bgeins to open up and you’ll start to really feel like you’re truly surrounded by mountains.
You’ll also finally pass the tree line today, which means it’s also common to feel the altitude. While Dingboche has far more amenities than I expected (a super cute cafe, small gear shops where I got the comfiest socks), it’s also where things get pricey!
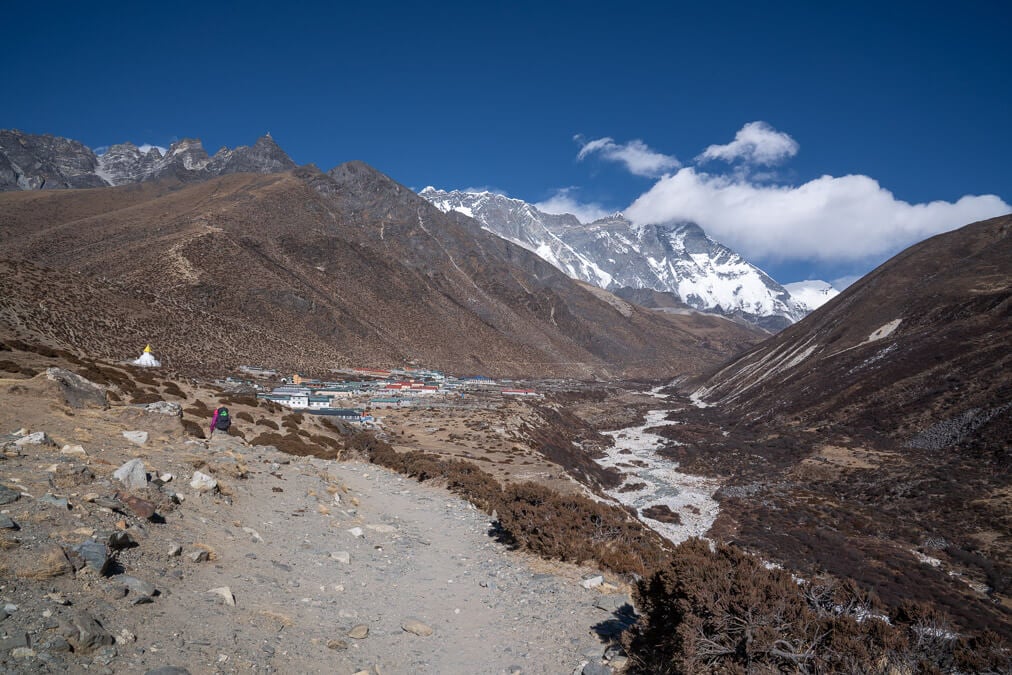
Photo: Samantha Shea
The most annoying expenses on the EBC trek are paying to charge electronics (10000% bring a powerbank) Wifi and boiled water. Here you’ll start to see prices of everything hike up, as it’s harder to get supplies here.
Dingboche is also the last place where we found our NTC SIM cards work, so if you’d like to stay connected, be prepared to pay around $8/Wifi card (it works for 24 hours) going forward.
Day 6: Dingboche to Lobuche
- Trekking time: 4 hours
- Difficulty: Moderate to hard, today’s uphills are killers with notable elevation gain
- Max Elevation: 16,142 ft (4920 m)
- Elevation Gain: 1,672 ft (510 m)
- Distance: 4.9 miles (7.8 km)
- Where to Stay: Eco Lodge Lobuche
As we did the Kongma La Pass, we actually didn’t go this way on the way to EBC, but did come back and stay in Pheriche on the way back.
If you too plan to tack on Kongma / The Three Passes, today will be the day you’ll break from the classic trail and head to Chukhung. And be sure to be prepared with some high-calorie hiking snacks as you won’t come across any semblance of civilization until Lobuche.
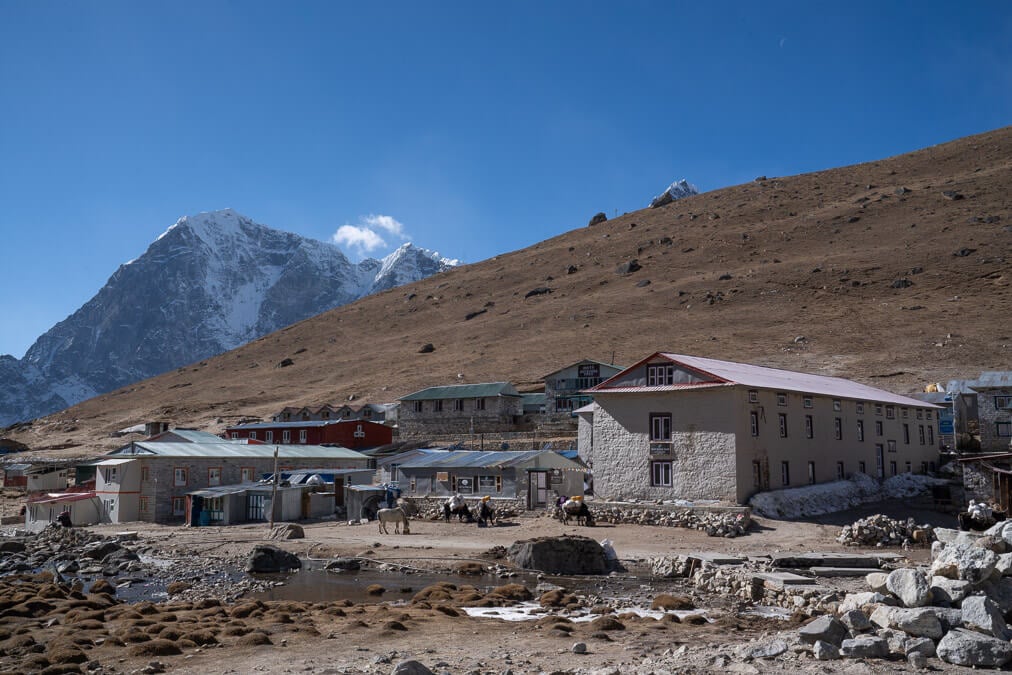
The route to Lobuche isn’t particularly long, but whew is it STEEP so be prepared for that! You’ll have quite a few uphills to tackle, and trail traffic can get a bit congested today.
After tackling one of the steepest sections of the day, you’ll come across Memorial Park, a sobering shrine of sorts dedicated to all those who’ve lost their lives climbing in the Khumbu region.
Day 7: Rest Day
Lobuche is over 16,000 ft high, and it’s a great place to take a rest day (essential when you’re planning a hike!) before heading onwards to Everest. You can aim for an acclimatization hike to a nearby glacier, or just pop around the village.
Lobuche was the last place I braved a hot shower, and it’s also the final village where you can find running water. In Gorakshep (tomorrow’s abode), all water has to be carried in by yaks meaning it’s hella expensive. Bring extra from Lobuche if you can!
Day 8: Lobuche to Gorakshep (and Kala Patthar)
- Trekking time: 6 hours (3 to Gorakshep, 2 up to Kala Patthar and 1 down)
- Difficulty: Hard, the route to Kala Patthar is the highest you’ll get on the entire trek
- Max Elevation: 18,443 ft (5621 m) at KP, Sleep at 16,900 ft (5151 m)
- Elevation Gain: 2,301 ft (701 m)
- Distance: 7.3 miles / 11.7 km
- Where to Stay: Himalaya Lodge
Today is a bit of a challenge for sure, so be prepared.
Not only is the route to Gorakshep filled with a lot of boulders, rocky glacier crossings (no ice, this section of glacier is pretty dead), and a helluva a uphill, but then you have Kala Patthar.
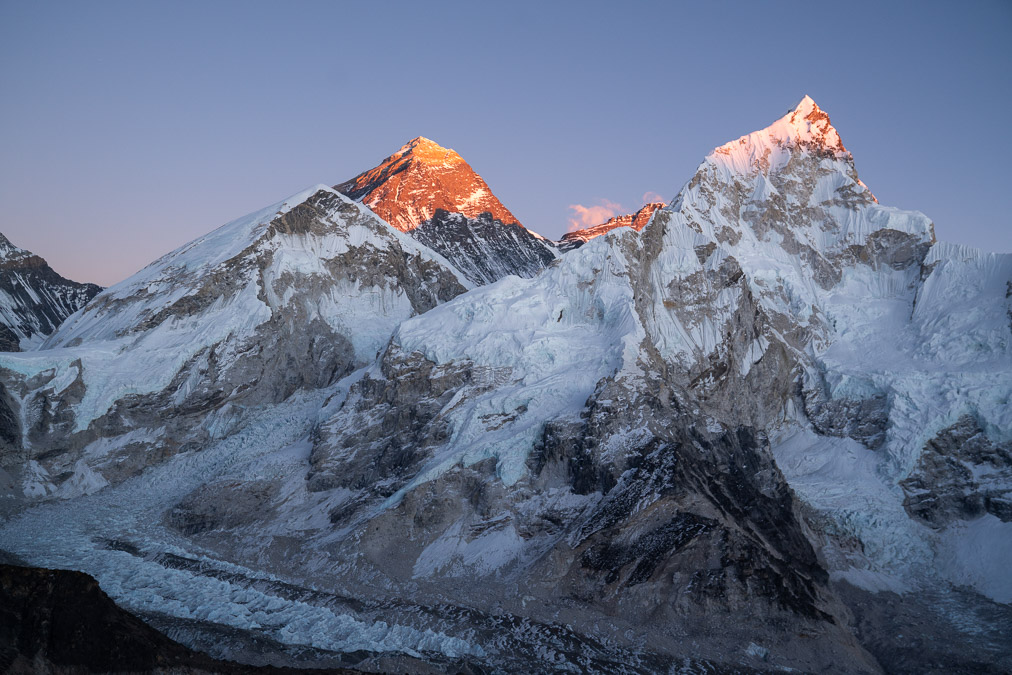
Photo: Samantha Shea
But trust me – it’s so incredibly worth it to see it at sunset. The views of Everest and other 8000ers is unmatched and infinitely better than what you’ll see at Basecamp. It’s legit one of the best hikes in the world.
Once you reach Gorakshep, settle in and drop your things before heading up to the summit. I highly recommend starting no later than 2PM to ensure you get there before dark. It looks easy but the elevation is no joke!
Day 9: Gorakshep to EBC and back to Lobuche
- Trekking time: 6 hours (3 round trip to EBC, 3 to Lobuche)
- Difficulty: Moderate, after making it to EBC you’ll be losing elevation for the first time
- Max Elevation: 17,598 ft (5364 m) at EBC, sleep at 16,142 ft (4920 m)
- Elevation Gain: 698 ft (212 m)
- Distance: 7.3 miles / 11.7 km
- Where to Stay: Eco Lodge Lobuche
Finally, after more than a week of trekking you’ll make it to Everest Base Camp today! The route from Gorakshep is pretty easy – some ups and downs on what’s a dead/sandy glacier but nothing compared to the ascent to Kala Patthar. This is the deepest into the glacier you’ll go on the standard route, and you’ll be able to see the infamous Khumbu Ice Fall too!
It should take no more than 1.5 hours and the best part is you can leave your big backpack at the guesthouse.
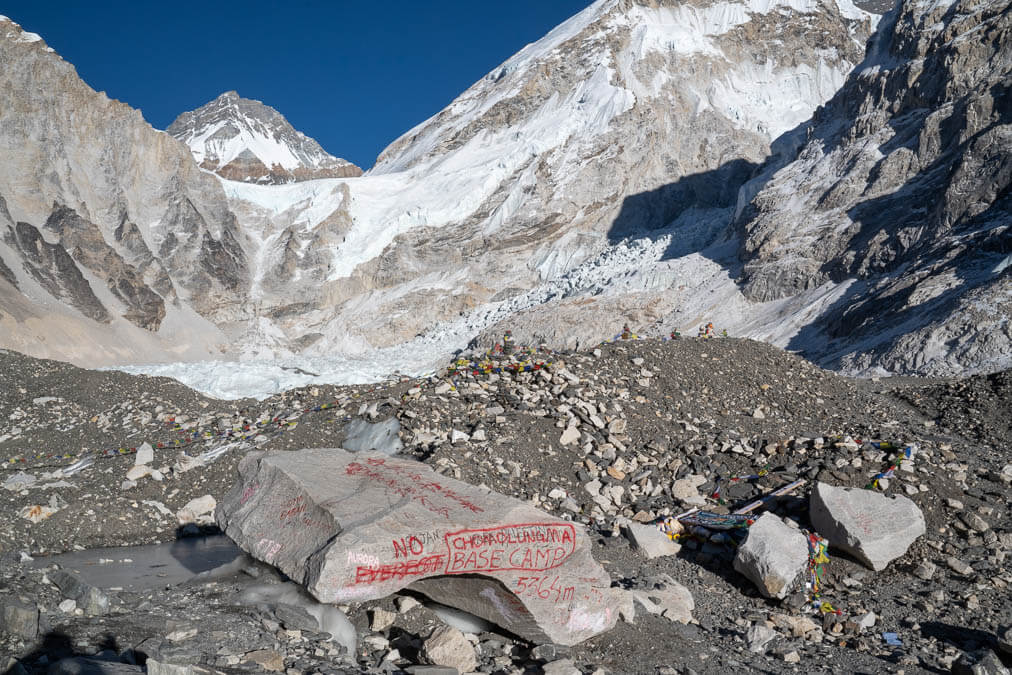
Photo: Samantha Shea
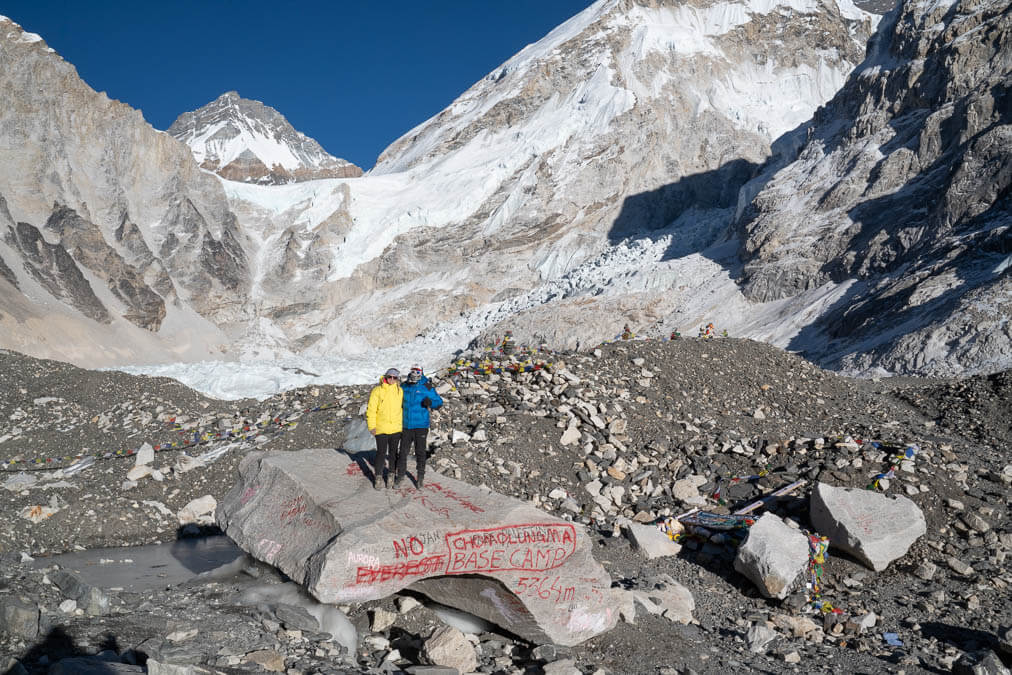
Take some time to soak in the ice-world vibes you’ll get and take a picture with the iconic EBC rock, where you’ll see it’s Indigenous Tibetan name inscribed: Chomolungma.
Keep in mind that while many trail reports say to go early, if you want to be alone you’ll have to go extremely early as morning is when helicopters fly in. We made our way in late afternoon and it was the BEST decision. Granted, we did spend another night at Gorekshep instead of heading all the way back to Lobuche, but getting such a special spot to ourselves was beyond words.
Day 10: Lobuche to Pheriche
- Trekking time: 4 hours
- Difficulty: Easy – it’s just about all downhill today
- Max Elevation: Sleep at 14,340 ft (4371 m)
- Elevation Loss: 1,802 ft (549 m)
- Distance: 4.9 miles (7.8 km)
- Where to Stay: Panorama Lodge
I read some reports that try to push beyond Pheriche today, but honestly it’s a cute town and you’ll have to walk several more hours for the next villages if you keep going.
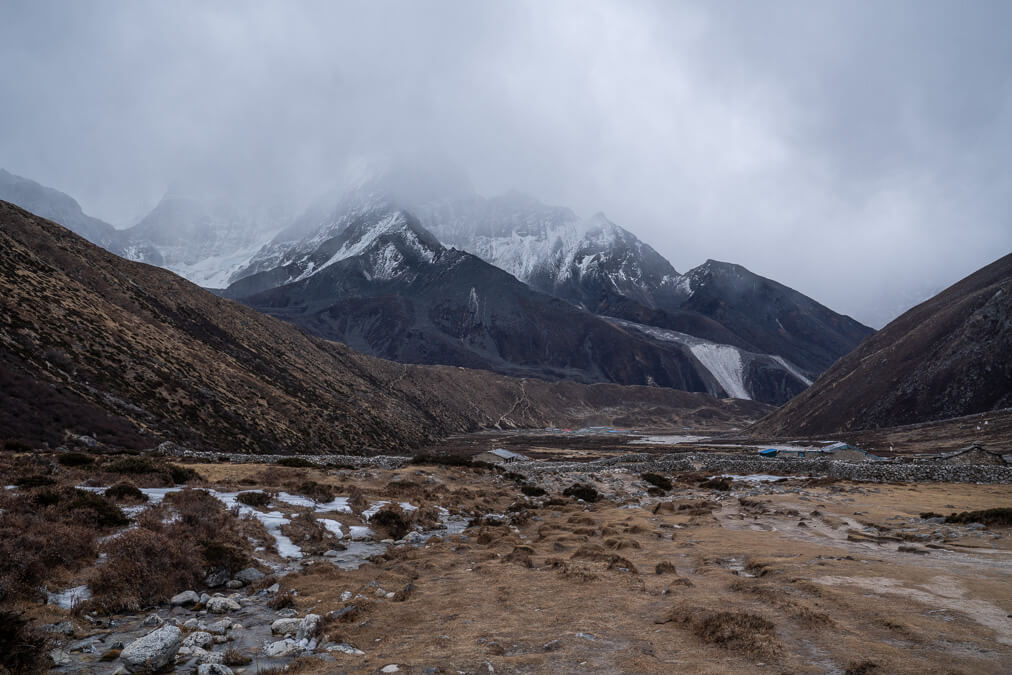
Photo: Samantha Shea
After passing by the memorial site again and several downhills, you’ll enter a wide valley and arrive at the little village of Pheriche. There’s numerous places to stay here, and even some cafes open in peak season.
I LOVED staying at Panorama Lodge, the owners were super friendly and I had an INCREDIBLE burger and fries here!
Day 11: Pheriche to Tengboche
- Trekking time: 6-7 hours
- Difficulty: Easy except for a steep bit at the end
- Max Elevation: 12,660 ft (3860 m)
- Elevation Loss: 1,680 ft (512 m)
- Distance: 6.8 miles (10.9 km)
- Where to Stay: Himalayan Hotel Lodge
Today’s mostly downhill, but expect a bit of an uphill slog through the forest to reach Tengboche. If you’re a super strong/fast hiker, you can continue onwards toward Namche but otherwise I DO NOT recommend that as it’s a long day already.
There aren’t alot of lodges in Tengboche, and the Himalayan Hotel is the best option. They had apple pie which was heavenly!
Day 12: Tengboche to Namche Bazaar
- Trekking time: 6-7 hours
- Difficulty: Moderate to Hard – you have a very steep and long downhill followed by another steep uphill and then quite a bit more (relatively) flat terrain
- Max Elevation: 11,286 ft (3,440 m)
- Elevation Loss: 1,374 ft (418 m)
- Distance: 6.7 miles (10.7 km)
- Where to Stay: Khumbu Lodge
Again, you could go further but the push from Namche to Monjo isn’t a fun one so I’d stop and rest there. You’ll be going back the same way you came in, so prepare for those steep forest climbs.
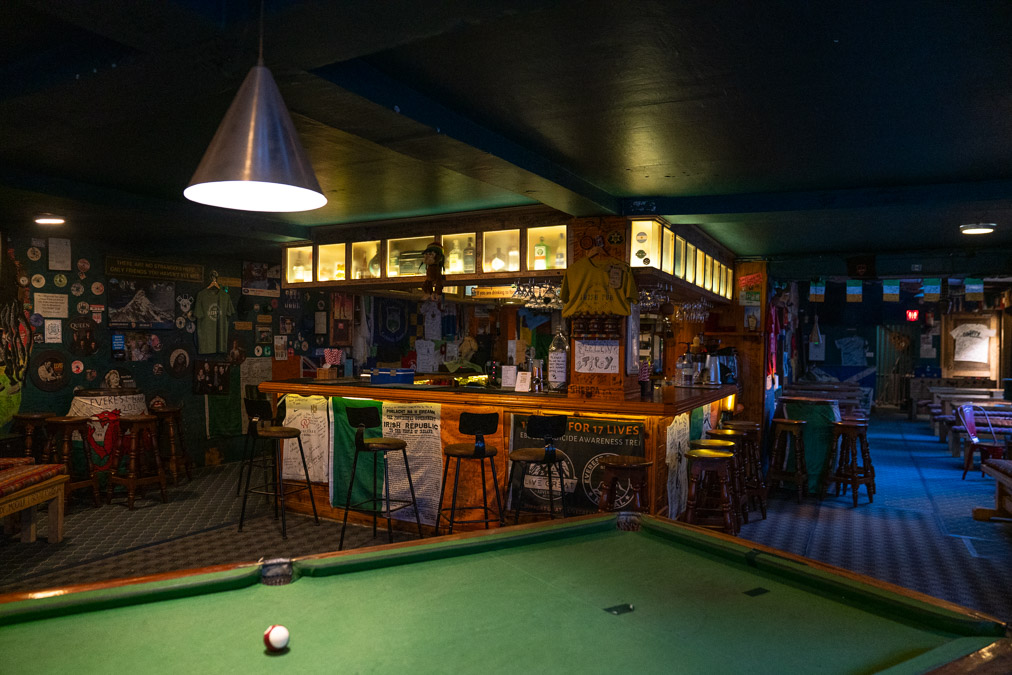
I felt really good on this day but it was still long! In Namche you’ll be able to enjoy a hot shower again and a number of surprisingly delicious comfort foods. HighCamp has some legitimately incredible wood fired pizza and is a sound place to celebrate your success!
Day 13: Namche to Phakding
- Trekking time: 4 hours
- Difficulty: Moderate – I actually found this day challenging with so many steep ups and downs
- Max Elevation: 8,563 ft (2610 m)
- Elevation Loss: 2,723 ft (829 m)
- Distance: 7.6 miles (12.2 km)
- Where to Stay: Green Village Guest House
It is technically possible to reach Lukla from Namche, but I don’t think this is a good choice for beginner hikers.
Going to Phakding is definitely the move, especially if you plan on taking the road route back. Otherwise, prepare to spend around 3.5 hours getting to Phakding.
Day 14: Phakding to Lukla
- Trekking time: 3-4 hours
- Difficulty: Moderate. Get ready for one more uphill at the end!
- Max Elevation: 9,383 ft (2860 m)
- Elevation Gain: 820 ft (249 m)
- Distance: 4.6 miles (7.5 km)
- Where to Stay: Himalayan Lodge Lukla
While you can try to trek the morning of a flight, I don’t recommend taking any risks. You should absolutely spend tonight in Lukla! Elevation is much lower now and the sun will feel crazy strong if it’s out, even in the winter.
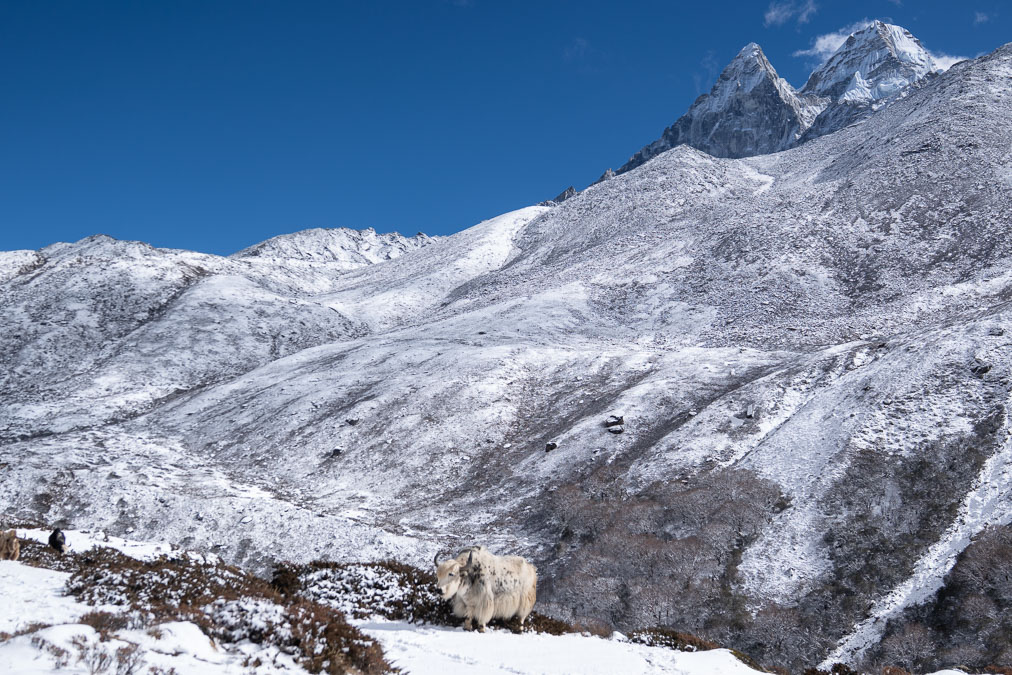
Flights can be super unpredictable, so be preapred to post up in Lukla or take the road route if needed.
Instead up heading uphill to fly, we continued along trail to eventually reach Surke where we grabbed one of two jeeps that took up back to your stay in Kathmandu. This took 26 hours total, but was worth the savings!
EBC Add-ons
The Khumbu region is HUGE and there are quite a few ways to add some extra days and difficulty to your adventure.
Kala Patthar
Spoiler alert: the best view of Everest is NOT from EBC, but rather from the top of Kala Patthar. Nepali for “black rock,” it sits right at Gorakshep, the last village before EBC and while many online guides say to go for sunrise, I can assure you sunset is the move.
You’ll get to see Everest bathed in the most magical golden light, and you won’t have to trek up to 18,373 ft / 5,600 m in the dark. While the trail is insanely steep, it’s nice to not have to do it with your backpack and there’s actually many benches along the way made out of recycled plastic.
I personally found this to be the highlight of our entire trip views-wise and really think you should stay at Gorakshep to make access easiest! It’s totally worth an extra day tacked on to your itinerary.
The Three Passes
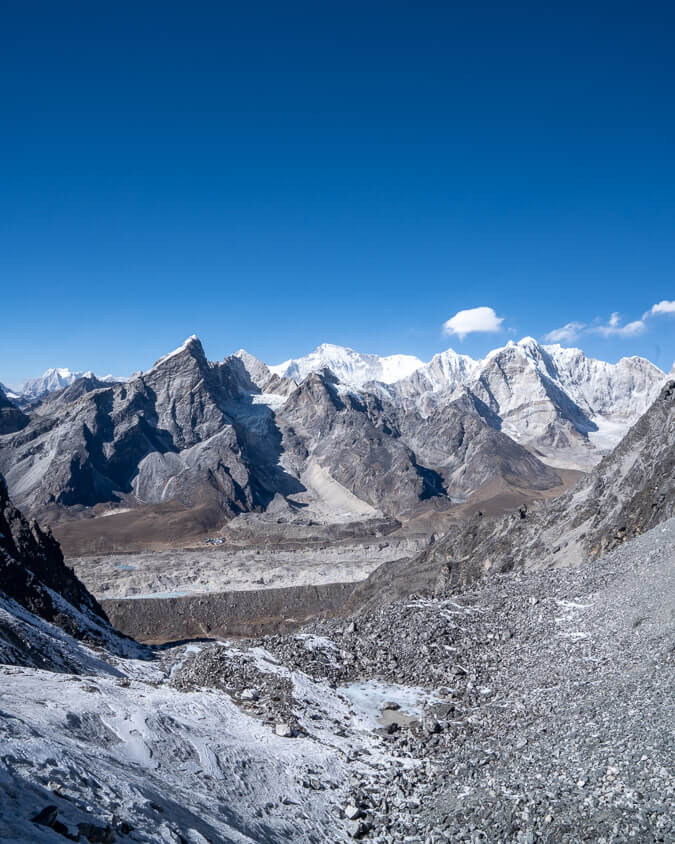
Photo: Samantha Shea
Three high-altitude passes between valleys that include glacier crossings significantly up the anti of EBC from relatively basic terrain to a route that even experienced hikers will find challenging. These really aren’t ideal for beginners, but especially fit folks can give them a go.
While there are markers to keep you from losing the route (even across the glaciers) I recommend at least a porter to help you out. These elevations are no joke.
And while the passes can be done in either direction, counterclockwise tends to be easiest as you get the hardest and higher pass (Kongma La) out of the way early.
- Kongma La (18,159 ft / 5,535 meters): Taking you from Chukhung to Lobuche, this is the highest and arguably steepest pass that requires you to cross a fairy short glacier route after descending. It’s still safe if you have experience with glaciers in less-touristy areas.
- Cho La (17,782 ft / 5,420 m): The most popular pass, Cho La is typically done after EBC and connects Lobuche to Dzongla. While it’s not as steep or high as Kongma La, the glacier crossing here is tricky as there’s frequently ice fall.
- Renjo La (17,585 ft / 5,360 m): Technically the least demanding, Renjo La typically comes last is what really makes it a challenge. This also the least populated part of the loop, so you may have to walk a far way to the nearest village after crossing it.
Gokyo Lakes/ Gokyo Ri
Ranging in altitude from 15,420 to 16,404 ft (4,700 to 5,000 m), the Gokyo Lakes are the highest freshwater system in the world and consist of 19 total bodies of water, though only 6 are trekked to. Gokyo Village sits on the bank of the third one, which is also the most famous.
From the village, you can also climb a peak (Gokyo Ri) which has not just epic views of Everest, but also Lhotse, Makalu and Cho Oyu.
You can reach the area either via the Cho La Pass after going to EBC or from an easier deviation you’ll encounter after leaving Namche.
Questions People Usually Ask Me…
Getting Insured BEFORE Trekking
You definitely want some solid hiking insurance before heading up this high!
Sort out your insurance before you go. There are several good options, but our overall pick is SafetyWing. Most of the Broke Backpacker team has used it at one point or another, and we’ve filed claims for rabies jabs in Bali, a hospital stay in Mexico, and a clinic visit for a stomach bug that wouldn’t quit. All paid out.
It’s month-to-month, no lock-in, no itinerary required, and you can buy it after you’ve already left. A little over $2 a day if you’re under 40.
New SafetyWing customers: use code BROKEBACKPACKER for 8 free weeks of electronics theft coverage. You have to scroll down and click the pink camera on their landing page to enter it, and you have to do it before creating your account.
Ready for Everest Base Camp?
Trekking to the base camp of the highest mountain on the planet was bit every bit of pain and type 2 fun that went along with it. Planning everything independently can deff be daunting at first; I vividly remember myself hung up on research before we decided to do it.
But it was also one of the best travel experiences of my life, a Himalayan journey just as magical as the hype makes it out to be.
Overall, I found it cheaper and so much more flexible to trek to EBC without a guide. But my ultimate tip (regardless of how you decide to do it) is to go in December or January! You’ll have much more intimate and peaceful experiences, both on trail and in tea houses.




What a fantastic guide Samantha! I really enjoyed reading this. I completed a very similar trek in 2004 but your photo from Kala Pathar beats mine hands down. It was lovely to reminisce about my own trip by reading about your and F’s adventure 20 years on.
I am a big fan of The Broke Backpacker and Samantha is not only a fantastic travel writer but she is also an amazing travel guide – check out her trips to Gilgit Baltistan. To all the writers on this team – thank you for forging the path for the rest of us.
Thanks Karen. We agree Samantha is just awesome!