It’s no secret that New Zealand is home to some of the most INCREDIBLE landscapes in the world. If you get the chance to witness them, you’ll want to nestle right in and never leave.
Hiking is absolutely the best way to do this. You can truly submerge yourself into New Zealand mind-blowing beautiful nature just by stepping off the beaten track a little. You can really get yourself into the remote depths of the country’s wilderness (even within just a day!)
The hiking in New Zealand is world-class and if you have ample time, mate, get amongst those overnight hikes. Trek for days if you can! But for many travellers, their time on this magical land at the bottom of the planet is limited.
So for those of you looking for the best hikes in New Zealand that you can smash out in a day, I’ve got you covered.
As the Broke Backpacker’s resident Kiwi and hiking goddess, I am here to share with you everything I know. I’ve hiked high and low, all across my backyard of New Zealand and I come to you with my absolute favourites. There’s a good mix of tough treks and easier ones to suit all levels of hikers in here.
Let me take you through the best New Zealand day hikes, what to expect from each and the best places to stay before/ after each.
Grab a pen and paper, you’ll want to note these down and see where they fit into your itinerary.
Let’s get into it.
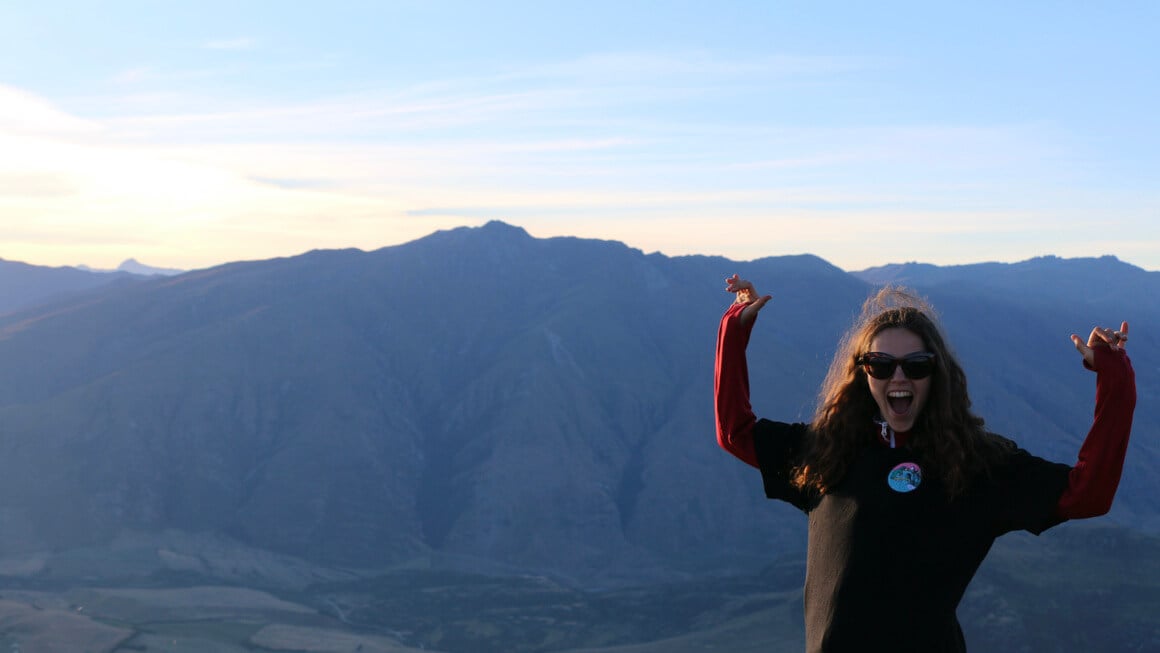
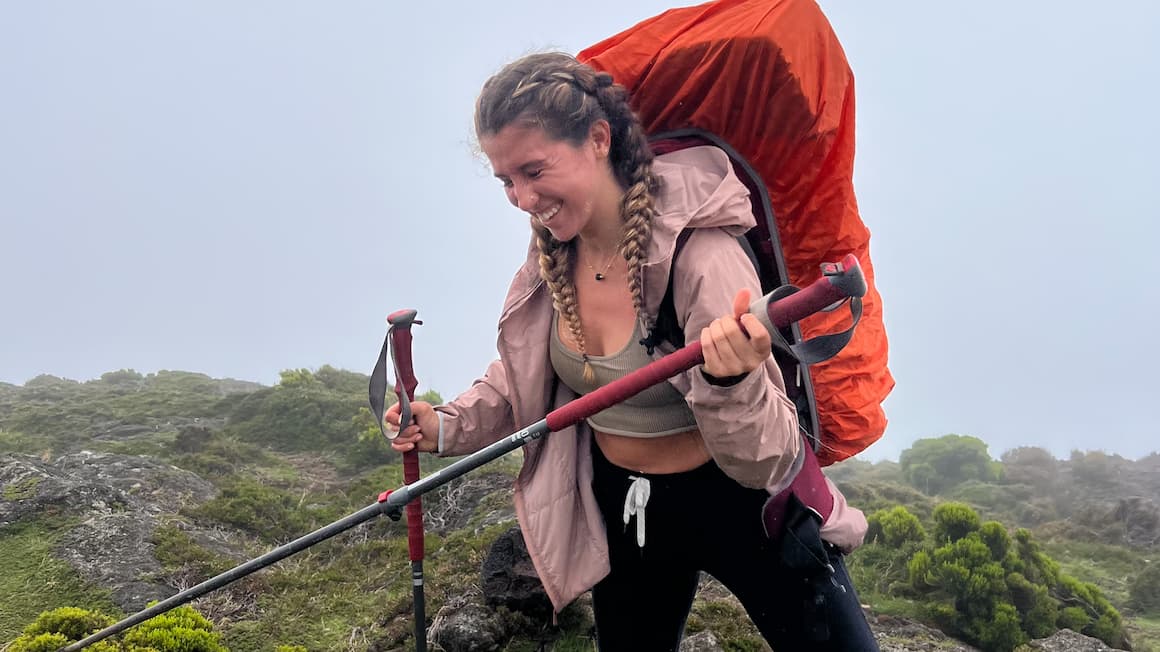
Photo: @danielle_wyatt
The Broke Backpacker is supported by you. Clicking through our links may earn us a small affiliate commission, and that's what allows us to keep producing free content 🙂 Learn more.
Travelling to New Zealand and hiking its majestic landscapes is a bucket list shit for many of us, backpackers. Getting ourselves burrowed into the lush green, icey white and dazzlingly blue natural landscapes of New Zealand’s islands.
New Zealand is spread across two vastly different landscapes. In the north, you’ll find a mix of coastal hikes on the outskirts of the island and inland you’ll find some pretty mighty volcanic treks. In the south, you’ll be spoilt with the heights of the Alps; marvelling at glaciers, lakes and awe-inspiring mountains.
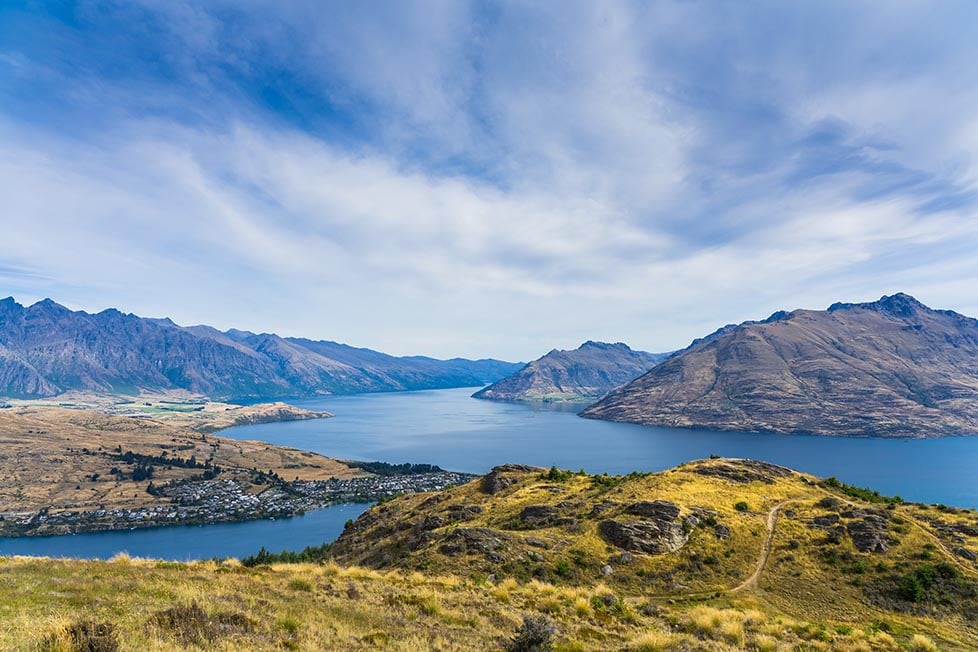
Image: Nic Hilditch-Short
Don’t forget that the seasons in New Zealand are opposite to the UK and the USA. With summer being between December and March and winter between June and September.
Many of the hikes I’ve listed can be attempted in winter (with a good load of thermals) but are optimal in the summertime. Others are very risky and only for the pros as soon as the snow and ice roll in; so plan accordingly, peeps.
When hiking in New Zealand, you’ll notice how many local Kiwis will be on these hikes with you. Being so far away from anywhere else in the world, Kiwis are exceptionally good at exploring their own backyard. You’ll notice that we use slightly different terminology for things:
- Tramping – Hiking
- Scroggin (scrog for short) – Nut mix
- DOC – Department of Conservation
- Dunny/ Long Drop – Toilet (no flush)
- Bush – Forest
- Tussock – Type of long native grass
The Department of Conservation (DOC) does an AMAZING job in New Zealand at looking after the trails and keeping them as safe as possible for us trampers. We love DOC.
New Zealand Trail Safety
Oh, the stories we’ve heard of the adventures embarked upon in New Zealand; the soaring peaks, the crystal blue waters and the fiery volcanic landscapes.
Diving into New Zealand’s wilderness doesn’t come without its risks and being prepared is a HUGE part of being a hiker. It’s important to understand your own fitness and the difficulty of the hike you’re about to take on.
Photo: @danielle_wyatt
I’ve noted some of the most important tips for keeping yourself safe when hiking in New Zealand:
- Let someone know you’re going – Hiking 101, always let someone know where you’re going and how long you expect to be.
- Pack the right gear – What you need to take will depend on the season, the distance, etc. You’ll find more information on what to pack throughout and at the end of this article.
- Don’t leave home without a plan – Research the track you’re about to tackle so you know what to expect and how to prepare.
- Check the weather forecast – This step is crucial. You’ll want to know if it’s expected to piss down, snow or maybe even just be exceptionally hot so that you can prepare.
- Respect the wildlife – We are pretty blessed in New Zealand with mostly safe wildlife, so you shouldn’t come across anything too scary on your tramps. But respect that you’re in their home and keep your distance.
- Leave plenty of time – This is especially important in winter when the days are shorter. Leave as early as possible and always take a good head torch, just in case.
- Take enough food and water – I can’t drill this one home enough. Take enough food (scroggin included) and a shit load of water. I’ve hiked without enough water before, and in summer, it’s seriously dangerous.
- Get good travel insurance – a no-brainer. Even when we are super prepared, shit can still go wrong.
North Island:
- Tongariro Alpine Crossing
- The Pinnacle
- Mount Taranaki
- Mount Maunganui
- Cape Brett
South Island:
- Roys Peak
- Ben Lomond
- Isthmus peak
- Abel Tasman
- Hooker Valley
1. Tongariro Alpine Crossing – Ruapehu, Near Taupō
Let’s kick things off with easily one of the best, toughest and most popular New Zealand day hikes on the north island: the Tongariro Alpine Crossing Ruapehu.
Taking on this beast of a day hike will be tough but good Lord almighty, Mother Nature rewards you with some INSANE views along the way. The most iconic view is the Insta-worthy pic spot by the bright, blue crater. But on a clear day, you can seriously see for miles and miles across New Zealand’s beautiful landscape.
The climb can be steep and in parts can be skiddy on the volcanic scree and doing this hike without a good pair of hiking boots is bloody tough. The friend hiked with was in her normal running shoes and she struggled in these parts. I love the Lowa Women’s Renegade GTX Mid – they’ve seen me through some wild terrains and always pull through <3
Photo: Nic Hilditch-Short
The terrain can be steep and you are entering some pretty unpredictable alpine conditions. I wouldn’t recommend attempting the hike in winter unless you are MEGA PRO and have good hiking gear (crampons, an ice axe, etc).
The weather can be windy, icy, and snowy and you need to be avalanche-aware. I back my hiking skills but I would stick to doing this track in the warmer months and enjoy the snow on the ski fields at this time of year instead. Either way, this hike is so epic, that it’s a reason to visit New Zealand in itself.
You’ll have the most consistent weather in February, March, and April but this is also the busiest time. If you’ve got more flexibility to wait it out until you get a good weather day, it’s also beautiful to do in Dec or May to beat the crowds.
- Length: 19.4km
- Duration: 7-8 hours
- Difficulty: Average
It’s strongly recommended to book a shuttle to drop you off at the start of the track and pick you up at the end (which is in a different place). Parking is VERY limited and has time restrictions.
Where to stay when hiking the Tongariro Alpine Crossing?
You can either stay in Taumarunui, Turangi, Ohakune or the National Park Village to be close to the start of the hike. Shuttles can take you to the start of the hike and back from each area.
However, I like to stay at the National Park Village as it is the closest to the start of the hike which means I don’t have to get up as early! The Tongariro Crossing Lodge, as you can tell by the name, is one of the best places to stay in the National Park Village before/ after hiking the Tongariro Alpine Crossing.
2. The Pinnacles/ Kauaeranga Kauri Trail – Coromandel
The Pinnacles/ Kauaeranga Kauri Trail is one of the most popular tracks around the Coromandel region. Locals and travellers alike flock to this track to witness its incredible views from the top.
Unfortunately, I’m yet to witness the mind-blowing views everyone raves about as we decided to attempt the track on a cloudy ass day. But you know what? It was still God damn, awe-inspiring, to say the least.
The track-up is a moderate difficulty level. For most of the climb, you’ll be submerged in New Zealand’s lush native bush which is very handy if you decide to tackle it when the sun is beaming down.
It’s 7km to reach the very top and takes around 3.5 hours (depending on how speedy you are). So, double that (ish) for your round trip time.
From swinging bridges to clambering up rigid boulders to reach the lookout point; this track serves up a few challenges and a whole load of fun. Close to Auckland, Hamilton and Tauranga; it’s one to add to your New Zealand hit list.
You can also choose to book the Pinnacles Hut near the top of the hike if you want to stick around for sunset or get up for sunrise the next day. If you choose to turn this into an overnight hike, get in early – this hut tends to book up fast.
- Length: 14km
- Duration: 6-8 hours
- Difficulty: Moderate
Where is the best place to stay when hiking the Pinnacles?
The best area to stay to be close to the base of the track is in Thames; a small(ish) New Zealand town just a 30-minute drive away. It’s a very Kiwi town in the Coromandel, known for its fishing and gold mining history. It’s not an overly popular holiday spot but it’s an ideal place to stay in New Zealand before your hike.
A great place to crash after a day on your feet (or, to rest up the night before) is Grafton Cottage & Chalets. With a plunge pool, a hot tub and incredible sunset views – they do not disappoint.
3. Mount Egmont Summit – Taranaki
Mount Egmont is one of my favourite National Parks in New Zealand and home to multiple hikes. The most popular are Mount Egmont Summit and the Pouakai Crossing but there are also plenty more such as Fanthams Peak or the Lake Dive Loop. But Mount Egmont Summit is the one I’ve decided to include in my top 12 (not going to lie, it was tight!)
The Mount Egmont Summit hike is no walk in the park. It’s a mix of stairs, scree, scrambles and concrete and it’s a challenge. You’ll want to have pretty good fitness built up before you tackle this beast (oh and LOTS of snacks, scroggin’ and water).
You may end up like my mate multiple times on the way up but I guarantee you, the views from the top are out the gate and totally worth it.

Photo: @danielle_wyatt
The best time to hike Mount Egmont is between January and April when the weather is the most predictable. Make sure you check the conditions before you head off, take lots of water and of course, hiking 101; be a safe hiker.
When you get to the bottom, if you have ANY energy left; you can take a stroll down from the car park and have a refreshing, reward swim in Dawson Falls.
I’m not going to hide away from the fact this is one of the most dangerous hikes in the country. Most of that danger occurs between the colder months of May to December.
The risks on the track are 10-fold from snow, ice, avalanche terrain, bad weather and sub-zero temperatures. This is a hike to steer clear of during these months unless you have a shit ton of mountaineering skills and all the equipment. Otherwise, it’s just not worth the risk.
- Length: 14 km
- Duration: 8-10 hours
- Difficulty: Difficult
Where is the best place to when hiking Mount Egmont?
If you want to stay in a town close to the start of the hike, you’ll be staying in either New Plymouth, Inglewood or Stratford. Each town is between 20-35 minutes’ drive away from the start of the hike.
New Plymouth is the most built up of the bunch and is close to the sea. It has a lot to offer other than just being close to the hike. The best place to stay is this Little Church Bay holiday home – with a hot tub and panoramic sea views; it’s the perfect place to unwind after or prepare for your big trek up Mount Egmont.
4. Mount Maunganui (Mauao) – Tauranga
This one I’m slightly biased about as it’s in my hometown. I have walked this puppy more times than I can even begin to count and the views still blow me away every single time.
In terms of effort expended for the views received, I don’t know if you can beat Mount Maunganui or “the mount” as we locals call it.
There are a load of different tracks that you can take to get to the summit of Mount Maunganui. You can either start from Pilot Bay, or most commonly, people start from the surf club. If you start from the surf club, you’ll get about 10-15 minutes into the hike before you get to a fork in the road.

Photo: @danielle_wyatt
The big decision… to go left? or to go right? In terms of views, I’d say go right. It’s like taking the scenic route; it’s a bit longer but you get incredible views across the sea and over to Matakana Island. Or, you can go left for a harder and faster challenge with views similar to the summit (still insanely beautiful).
Either way, this hike is by far the best thing to do in Mount Maunganui for sure.
You can walk this track any time of year but if you choose to do it in the peak of summer – take a shit load of water and wear appropriate exercise gear. I’ve seen many people attempt to climb the mount in jeans and it doesn’t look too fun.
If you get up there for sunrise, you will not be disappointed. However, you will need a good head torch to get you up there. My go-to travel head torch is the Petzl Actik Core Headlamp – it’s gotten me through many early morning treks.
- Length: 3.8km
- Duration: 1 hour
- Difficulty: Easy
Where is the best place to stay when hiking Mount Maunganui?
Well, this one is easy – Mount Maunganui, of course! The town just below the climb will set you up perfectly for hitting the track. Booking somewhere within walking distance is ideal, especially over summer as the parking can be a NIGHTMARE.
Quest Mt Maunganui is located in Downtown “the Mount” and is just a 20-minute walk along the beach to the base of the track. They offer beautiful, modern studios in the middle of Mount Maunganui’s cool main street.
5. Cape Brett – Bay of Islands
Ahh the Bay of Islands. If you’re lucky enough to head up to this magical place – you’ll know what I’m talking about. There is just something about the Bay of Islands that never fails to captivate its visitors. It’s deffo worth including on your North Island road trip.
One of the reasons it lures travellers in is its incredible hiking trails; my favourite being Cape Brett. I’m not going to lie – it’s a toughy, especially if you choose to tackle it on a hot day (like I did) with nowhere near enough water (again, like I did…)
The track starts at Oke Bay in Rāwhiti, where you will begin your big ol’ 16km journey to the Cape Brett lighthouse! The track goes through Māori land for the first 10km until you get to Deep Water Cove. From here you’ll be back on public land for the last 6km.
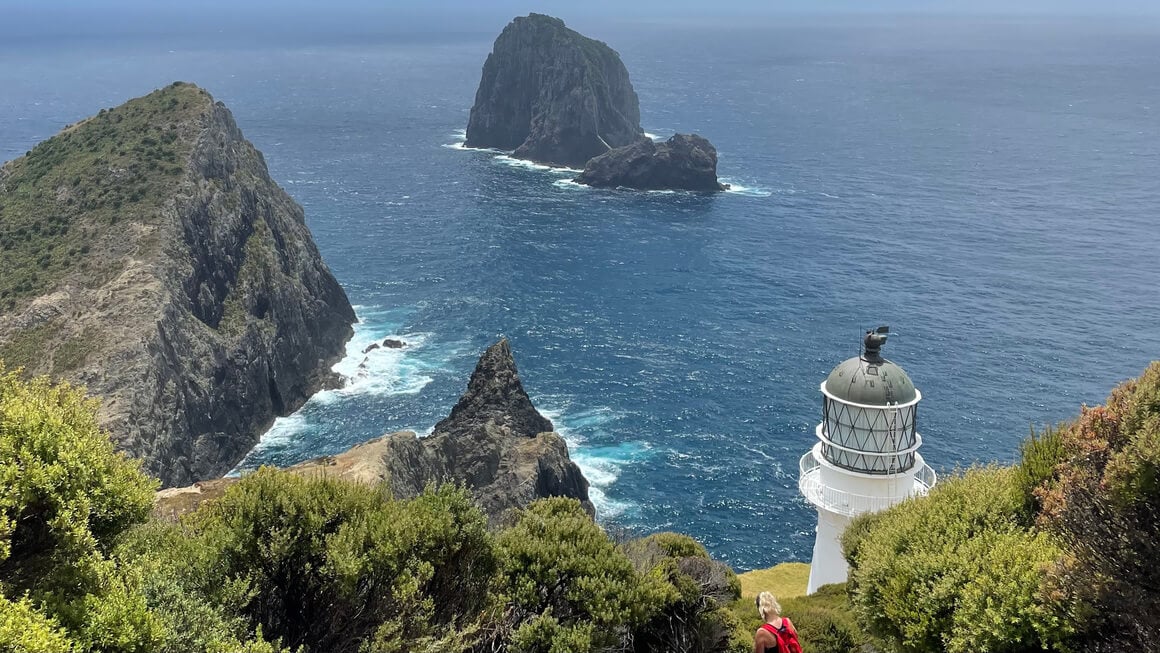
The first 10km might fool you into a false sense of security – don’t fall into that trap. The last 6km is the most challenging (but also the most rewarding!)
When you get to the lighthouse, there is a hut that you can book if you decide to stay the night and do the hike back the next day. But to make this into a day hike, you’ve got two options:
- Option 1: You can do what I did – rather than hiking the whole 16km back after getting to the lighthouse, you can just go back to Deep Water Cove and catch the water ferry back to Rāwhiti. However, that is still a solid day of hiking and potentially too much for some. It’s 22km in total (16km to the lighthouse and 6km back to Deep Water Cove). I loved it, but it fuuuuuuckin tough.
- Option 2: Take the ferry to Deep Water Cove where you can start and finish the track. The ferry leaves from Russell, Paihia and Rāwhiti. This will mean you no longer have to walk across Māori land, and thus, don’t have to pay the DOC fees for the use of this part of the track. Plus, you’ll still be in for a bloody solid 13km round trip from here doing what I believe to be the toughest part of the track.
Whichever option you choose, you’ll be able to push your limits and see some bloody incredible views. Once you’ve finished, you can head to one of the Bay of Islands beautiful wineries for a well-deserved tipple or two!
- Length: 22km/13km
- Duration: 10 hours/6 hours
- Difficulty: Difficult
My biggest tip for this hike is to take enough water with you. You could also do yourself a MASSIVE favour a buy a filtered water bottle, like the Grayl Geopress – then you can fill up from the streams along the way.
Where is the best place to stay when hiking Cape Brett?
There are a few places to stay before/ after hiking Cape Brett. Firstly, you’re in the Bay of Islands – which is absolutely beautiful. To make the most of it, I’d recommend staying in Russell; a gorgeous town by the sea just a 40-minute drive from the start of the track at Oke Bay.
You could also opt to stay in Manawaora, Parekura Bay or of course, Rawiti. This is great for ease of getting to the track but there are VERY limited places to stay in these areas.
The Duke Of Marlborough in Russell is an iconic place to stay in Russell, right on the water and right next to its quaint town. It’s the ideal place to rest up before and after your hike. Plus, the restaurant downstairs serves up some of the best food in town.
6. Roys Peak Track – Wānaka
First tip: don’t be like me. I hiked Roys Peak on the 1st of January, in the peak of summer, after 3 days of partying at the RnV music festival. It’s a moderate track but honestly, it felt like one of the toughest hikes I’ve ever done. I know, I know… it’s my own fault, but guys, c’mon, a little bit of sympathy would be nice.
So, if you decide to do it not severely hungover, you’re one step ahead of me already!
But honestly, I have absolutely no regrets. I witnessed some of the most incredible views I’ve EVER seen in my life that day. Spanning across Lake Wānaka and the Southern Alps. We stayed around for sunset and hiked down with a good head touch, which was totally doable.
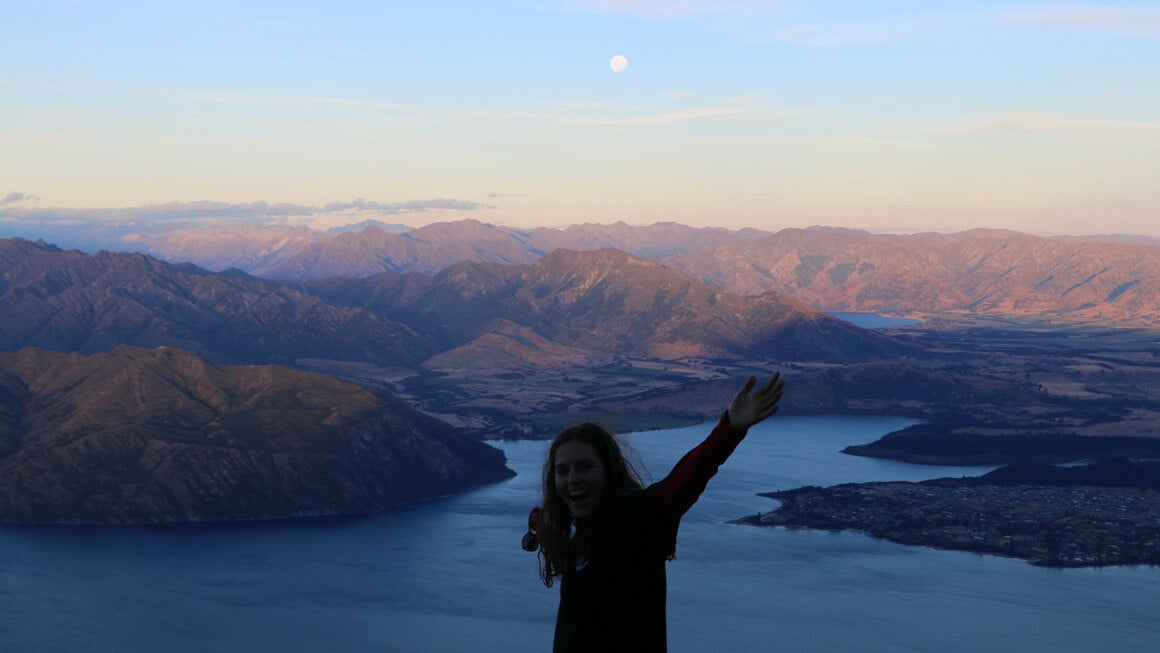
Photo: @danielle_wyatt
The track can be very different in summer vs winter time and you’ll want to be prepared for either:
Winter (June – September):
- You’ll need to bring some warm clothes with ya, it can get pretty damn chilly at the top.
- Good hiking boots are crucial – when the snow starts to melt the surface can get pretty slippery.
- Check the snow forecast before you go and if it’s had a heavy dump, either leave it for the pros or pack your crampons and ice ake to tackle your way up.
- Take note of the shorter winter daylight hours and be sure to make tracks early.
Summer (December – March):
- It is often pretty warm on the track for most of the way but you do get pretty high at the peak, so taking a good jacket to keep you warm is important.
- Take plenty of water, you’re gonna sweat a lot.
Roys Peak is one of those tracks that on a clear day, you can see the teeny tiny car park from the top and it slowly starts to get close over the hours of walking on the way down. But don’t focus on that, keep your eyes up on the INCREDIBLE views in front of you because honestly it really is one of the best things to do in Wānaka.
- Length: 16 km
- Duration: 6-8 hours
- Difficulty: Moderate/Difficult
Where is the best place to stay before hiking Roys Peak?
Mate, staying in Wānaka will be no hardship. The views from Roys Peak are amazing but even the views from the town across the lake and the mountains will blow you away.
The Lakeside Apartments will look after you before or after your hike. With a swimming pool, hot tub and insane views across the lake; it’ll be just what the doctor ordered after a long ol’ trek.
7. Ben Lomond Track – Queenstown
This sneaky little track is hidden just behind the action of the busy town of Queenstown. Take a turn out of the tourist-filled streets and into New Zealand’s wonderland. Starting from the Skyline Gondola base on Brecon Street, you’ll take a turn out of the tourist-filled streets and dive into New Zealand’s natural wonderland.
If you’re looking for a little shortcut, you can jump on the Skyline Gonala and start the hike from there. The track up until then is immersed in the trees – you may come across a mountain biker or two on your way.
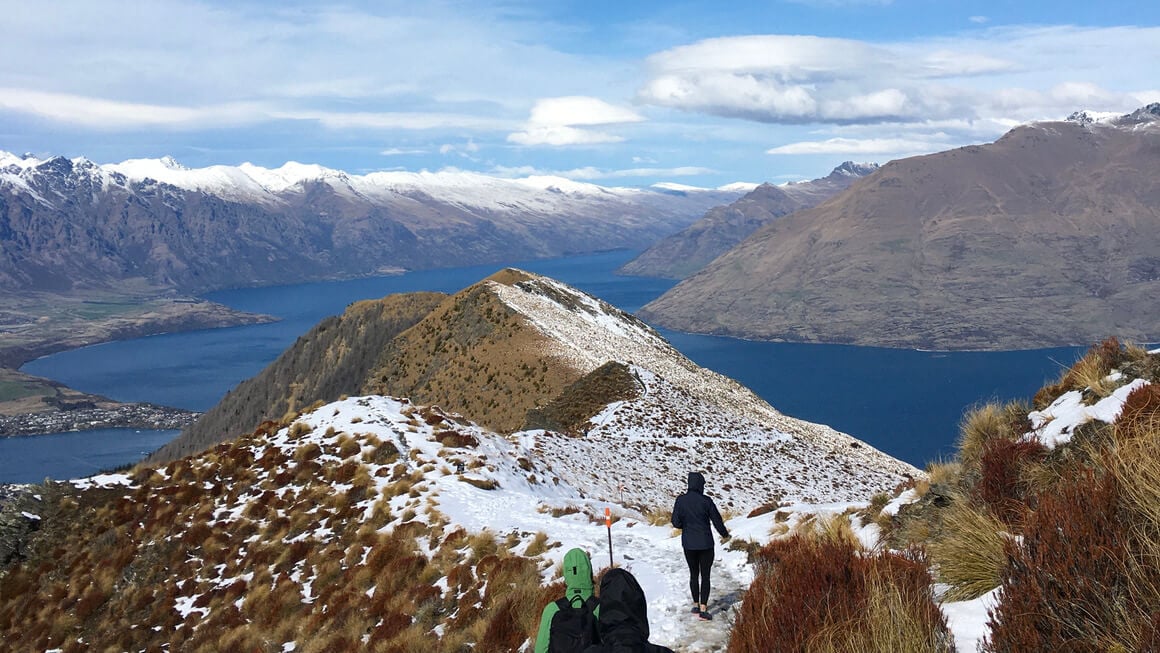
Photo: @danielle_wyatt
You’ve got two options when it comes to hiking up big ol’ Ben Lomond:
- To the summit: This one takes guts and is not for the faint-hearted (or those without crampons or an ice axe on ice and snow days). The toughest and most treacherous part of the track is the 1.748 metres from the saddle to the summit. You’ll find the track is pretty rugged and has some steep drop-offs. But if you’re up for it, the views are out-of-this-world.
- To the saddle: Hiking to the saddle (which I did as I did not have the gear or the experience for the summit), follows the same track as the summit. You just turn around before hitting the final stretch. This is slightly shorter but as you can see in the photo below, you don’t miss out on the views.
What’s even better about this track? When you’ve finished you’ll be back in Queenstown! Grab yourself a Ferg Burger and relish in the satisfaction of a day well spent. Just make sure you visit Queenstown during the right time of year if you don’t plan on a winter trek.
- Length: 14 km/ 10km
- Duration: 6-8 hours/ 5 hours
- Difficulty: Difficult
Where is the best place to stay when hiking Ben Lomond?
Although you feel a million miles away once you’re on the track, you start from the bustling tourist town of Queenstown. Therefore, the best place to stay will be as close as you can to the Skyline Gondola to start the track.
Treat yourself after your treacherous trek to some well-deserved luxury at the Queenstown Park Boutique Hotel. You’ll be a five-minute walk from the start of the track and you’ll be coming back to a SUPER comfy room in the middle of one of New Zealand’s most famously beautiful towns. Not bloody bad if you ask me.
8. Isthmus Peak – Near Wānaka
A little out of Wānaka, you’ll find the heights of Isthmus Peak towering above Lake Wānakaand Lake Hāwea. While it’s not as busy as the iconic Roys Peak, it’s just as rewarding. Compared to Roys Peak, I found there were a lot more Kiwis out on the track making the most of their own backyard.
Most of the trial is a 4WD track, so although it can get pretty steep, it’s a pretty maintained track to follow. Counting the zig-zags of the track will keep your mind busy for hours. The track gets pretty damn steep in some areas, you need to remind yourself to take a minute to look up and marvel at the views.
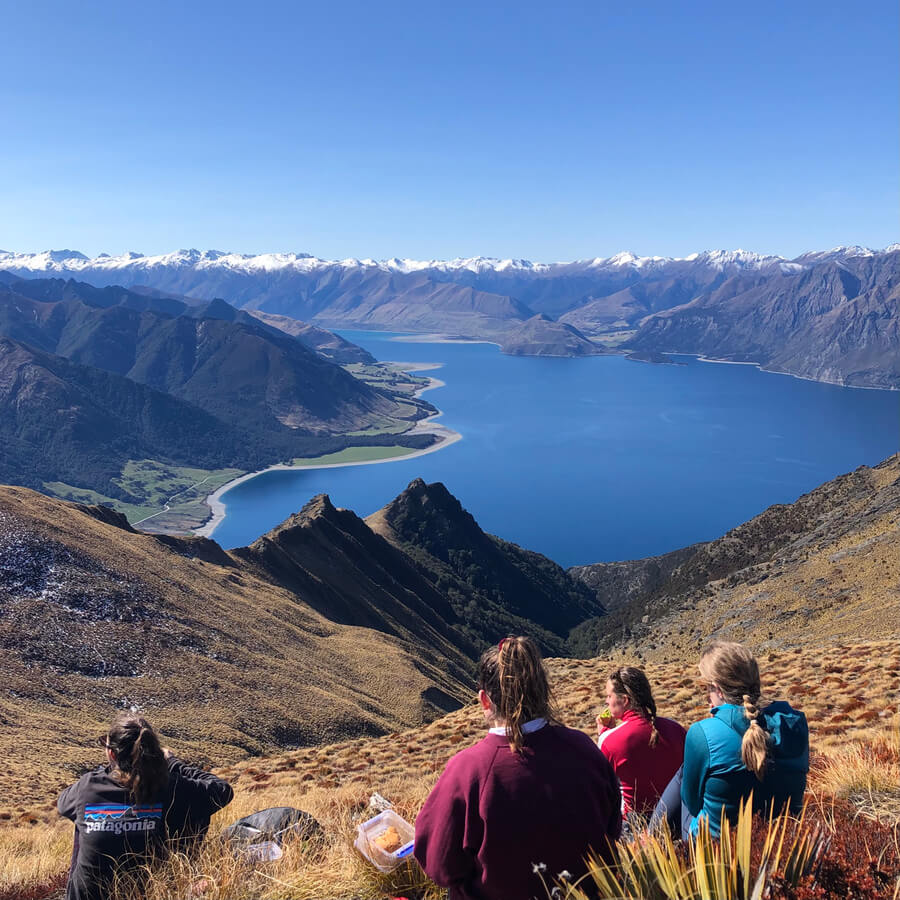
Photo: @danielle_wyatt
The basin track that you climb faces east, attempting to do this in the middle of summer in the midday heat would be killer. If you do this, pack a shit load of water – you’re gonna need it.
It’s important to know that every year between 20 November and 20 December, the track is closed for farming. There is also hunting at Glen Dene Station between March and May, so try to avoid the track then. If you do hike it during this time; stay alert, cautious and visible.
- Length: 16km
- Duration: 5-7 hours
- Difficulty: Moderate/ Difficult
Where to stay when hiking Isthmus Peak?
Isthmus Peak towers over both Lake Wānaka and Lake Hāwea; making both of these towns ideal places. Lake Hāwea town is slightly close to the start of the track; around a 20-minute drive. Whereas, Wanaka town is more like 30-minutes.
Wānaka has a lot more going on; you won’t be short on places to stay or eat here. Plus, you’ll get to marvel at some pretty incredible views across the lake.
Archway Motels & Chalets in Wānaka provide the perfect stay before/ after hiking Isthmus Peak. My favourite part is their outdoor hot tub with ridiculously beautiful views across the mountains.
9. Abel Tasman – Near Nelson
You may be thinking Dani, you know this is a 3 day day hike, don’t you? And yes, I know the full track is at least 3 days (and if you have the time, I’d 10/10 recommend doing the whole thing). But, you can also opt to do parts of the track as a day hike.
There are a few options when it comes to which part of the track you want to tackle. But in the spirit of the Broke Backpacker, I’ll take you through the cheapest (and one of the most beautiful) options.
Tōtaranui Campsite to Separation Point will give you some INCREDIBLE views and doesn’t require you to get any expensive water taxis. You can park your car at Tōtaranui which is 2.5 hours from Nelson – be sure to stop in at Tākaka (a super cool hippy town on the way!)
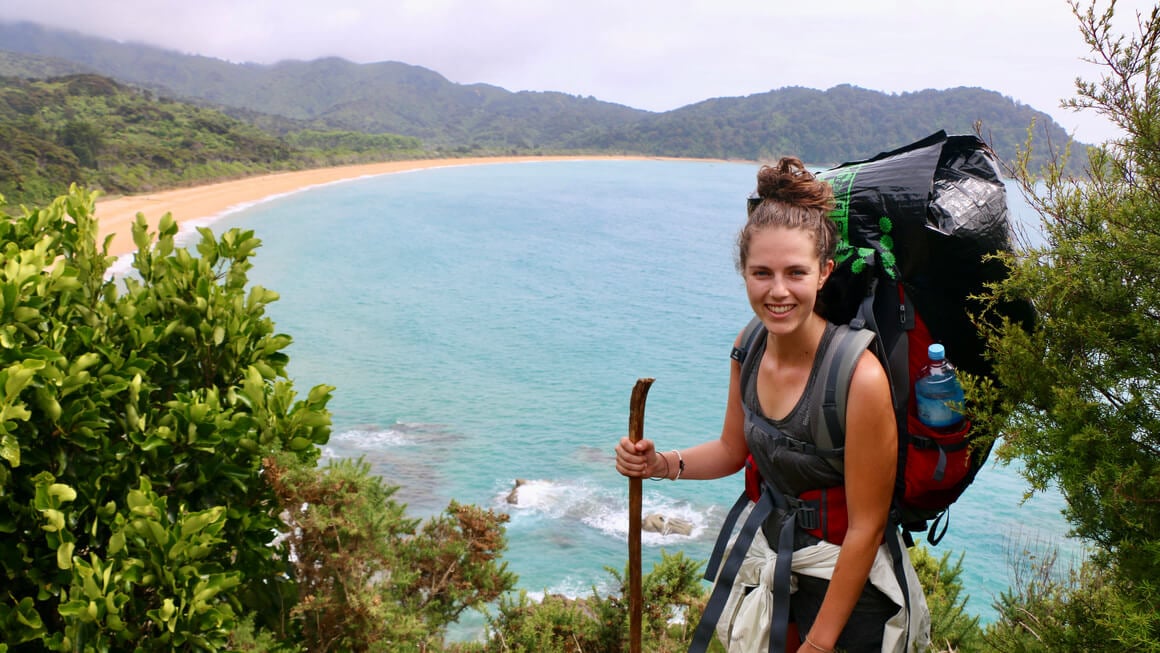
Photo: @danielle_wyatt
As with most of the Abel Tasman track, the terrain is pretty manageable. With steady inlines, declines and treks along seriously stunning golden beaches. And I mean STUNNING; they’d give Thailand a run for their money.
On this route, you’ll get to pass through Anapai Beach and Mutton Cove before hitting Separation Point. You can take all the time you need along the way to soak in the landscapes before heading back to Tōtaranui.
You get to see the track from a new perspective (literally) and I’d recommend jumping in for a well-deserved swim at Anapai Beach.
- Length: 14.6km
- Duration: 6-7 hours
- Difficulty: Moderate
However, if you are willing to splash some cash on this potentially once-in-a-lifetime experience, I would without a doubt splash it on a sailing and hiking experience. A catamaran will sail you around the beautiful coastline to Anchorage Bay, where you’ll have some lunch before you apart on your 3-4 hour hike to Marahau.
Where is the best place to stay when hiking the Abel Tasman?
If you choose to start from Tōtaranui, you’ll want to stay in Tākaka or one of the nearby beach towns such as Tarakohe. Tākaka is a super cool, hippy town full of quirky shops and funky coffee shops. It’ll make for a unique stay just 50 minutes from the start of the walk.
Waitapu Springs B&B is the perfect place to stay before or after your hike. Your hosts are wonderful and will feed you up with a delicious, hearty Kiwi breaky. Plus you can treat yourself in their spa area; with 2 spa pools, a sauna, and an icy cold spring water pool. All of this comes at a very affordable price too.
10. Hooker Valley – Mount Cook
You can’t visit New Zealand’s south island and miss out on witnessing the majestic beauty of the country’s tallest mountain, Mount Cook (Aoraki). Towering above its neighbours at 12,217 ft, it truly is a magical sight to witness. And the best way to see it? By hiking the Hooker Valley Track.
This track will have you constantly reaching for your travel camera – from epic swinging bridges to mind-blowingly beautiful glaciers and mountains. My camera roll was chocker after this hike.
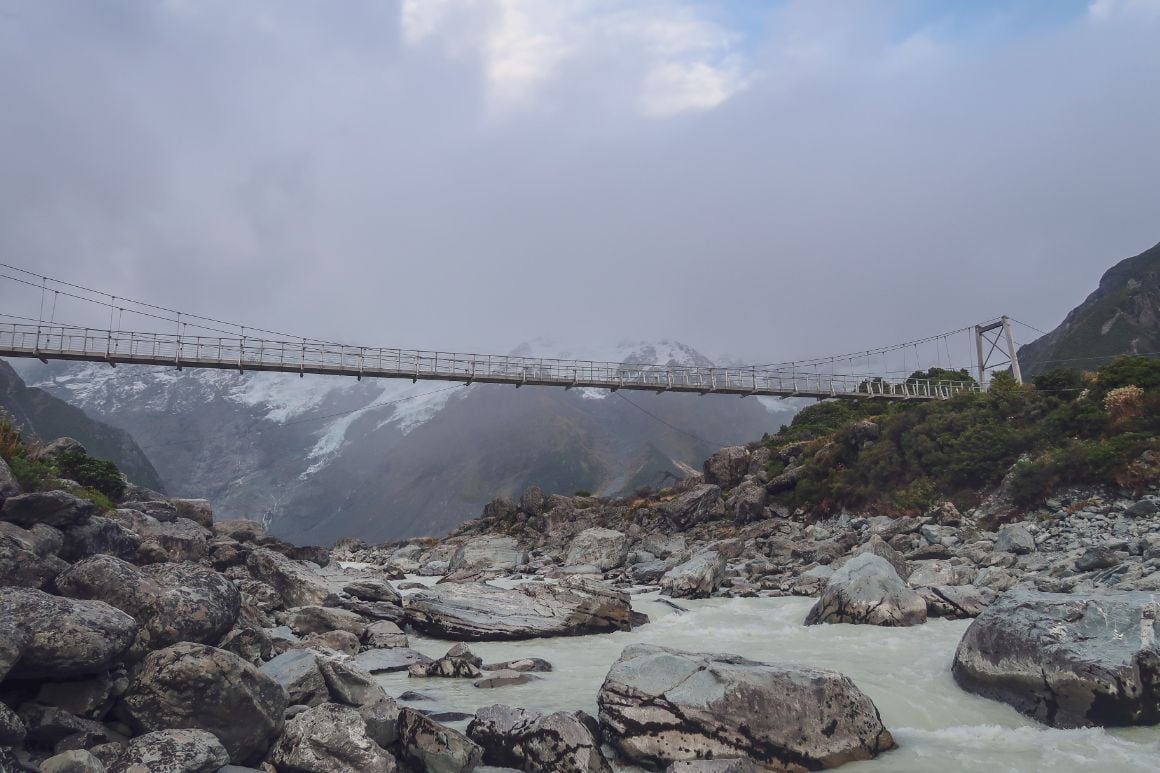
You may be happy to know that this is one of the easiest day hikes in New Zealand with little to no inclines. However, the reward is still HUGE. If you’re lucky enough to hike on a clear, calm day, you’ll get to marvel at the reflection of Mount Cook on Hooker Lake. It’s a bloody spectacle.
In the summer months, you will need to stock up on water and sunscreen as there isn’t a whole load of shade on the trial. You can hike this track in winter with little risk as it’s not near to avalanche-risk areas but you won’t be able to see the cool reflection on Hooker Lake as it’ll probably be frozen!
- Length: 10km
- Duration: 3 hours
- Difficulty: Easy
Where is the best place to stay when hiking Hooker Valley?
The small town of Aoraki/ Mount Cook Village is the closest place to stay near the start of the track. However, accommodation is VERY limited in Mount Cook Village and it books out pretty fast. So, get in early if you want to secure a bed.
My favourite (of the limited bunch) is the Aoraki Court Motel. With gorgeous rooms and insane views of the mountains, it’s the perfect place to stay before/ after trekking the Hooker Valley trail.
Day hikes in New Zealand will open your eyes to some of the most beautiful landscapes on the planet. If you get the opportunity to do any of these, you will be one of the lucky ones. But being prepared is really important to make sure you have the best time possible.
Some of these hikes will require you to take specialist equipment (crampons, an ice axe, etc), especially in the cooler months. But mostly, you’ll just need some reliable clothes and a good pair of hiking boots.
Photo: @danielle_wyatt
The reliable clothing that you need to prepare will depend on the season and weather when you embark on your hike. A good layer of thermals will be important for the colder months to keep you insulated. The Smartwool Classic Thermal Merino is my go-to, I have far more of these than I probably need!
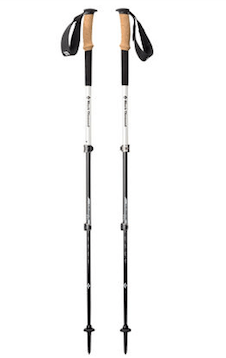
Black Diamond Alpine Carbon Cork
- Price > $$$
- Weight > 17 oz.
- Grip > Cork

Petzl Actik Core Headlamp
- Price > $$
- Weight > 1.9 oz
- Lumens > 160

Merrell Moab 2 WP Low
- Price > $$
- Weight > 2 lbs 1 oz
- Waterproof > Yes
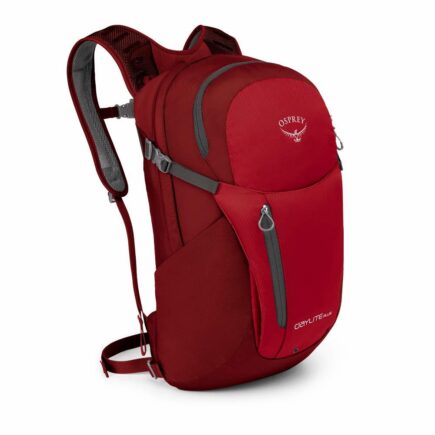
Osprey Daylite Plus
- Price > $$$
- Weight > 20 oz
- Capacity > 20L

GRAYL Geopress
- Price > $$$
- Weight > 16 oz
- Size > 24 oz
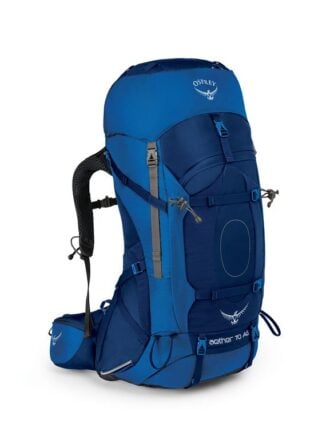
Osprey Aether AG70
- Price > $$$
- Weight > 5 lbs 3 oz
- Capacity > 70L

MSR Hubba Hubba NX 2P
- Price > $$$$
- Weight > 3.7 lbs
- Capacity > 2 person
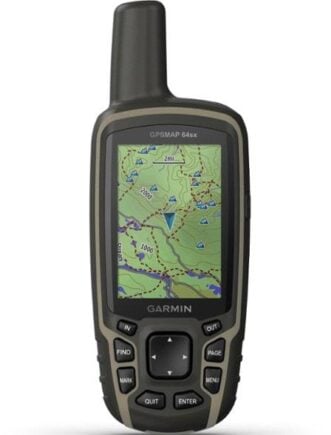
Garmin GPSMAP 64sx Handheld GPS
- Price > $$
- Weight > 8.1 oz
- Battery Life > 16 hours
Don’t Forget Your New Zealand Travel Insurance
Make sure you get some good travel insurance, aka one that covers the activities you’re going to be doing; a whole lotta hiking!
ALWAYS sort out your backpacker insurance before your trip. There’s plenty to choose from in that department, but a good place to start is Safety Wing.
They offer month-to-month payments, no lock-in contracts, and require absolutely no itineraries: that’s the exact kind of insurance long-term travellers and digital nomads need.

SafetyWing is cheap, easy, and admin-free: just sign up lickety-split so you can get back to it!
Click the button below to learn more about SafetyWing’s setup or read our insider review for the full tasty scoop.
Final Thoughts on the Best Day Hikes in New Zealand
After being away from New Zealand for nearly two years now, writing these articles makes me really appreciate how incredible New Zealand is.
If you’re lucky enough to make it to these magical islands at the bottom of the world, make the most of it. For many, it’s a once-in-a-lifetime experience. Do as many day hikes in New Zealand as you can and soak in every moment, marvel at every view.
From the top of the north to the bottom of the south; there are plenty of places for you to wander and get willingly lost in. But be prepared and be safe out there; I want you to come back in one piece and tell me all about your stories.
If you think I’ve missed any goodies, let me know in the comments!
Image: Nic Hilditch-Short
- Get off the couch and into the great outdoors with our hiking guide.
- Elevate your travel expertise and conquer the world’s most breathtaking hikes.
- Check out these travel bucket list ideas that will be sure to make this year the most memorable yet!
- Embrace your backpacker spirit and travel off the beaten path, because… why not?
- Or… dive in the deep blue in the best scuba sites in New Zealand.
- Our in-depth New Zealand packing list has all the info you’ll need for your trip.